
TUTORIAL: Thanksgiving Doodle Wreath Chalkboard
BEFORE YOU READ:
Throughout November, I will be sharing tutorials and tips design to help you celebrate the Thanksgiving holiday. But before we being, I want to acknowledge that the traditional narrative of the US version of Thanksgiving – that it was a peaceful feast between the Pilgrims and the people of the Wampanoag tribe – is grossly inaccurate and highly problematic. We cannot celebrate this day without acknowledging that the narrative we have been taught is whitewashing at its worst. We can, however, still find ways to celebrate without perpetuating the “Pilgrims and Indians” myth, but by instead focusing instead on values of unity and gratitude. I highly recommend reading this article in TIME by Sean Sherman, a chef, author and member of the Oglala Lakota Sioux Tribe, to learn more about the actual history of Thanksgiving and how to celebrate without glorifying a harmful myth.
I know it’s hard to believe, but Thanksgiving is in two weeks! Like, how? Wasn’t it just the 4th of July? Unfortunately, Thanksgiving is going to look different for Americans this year. Huge family gatherings with backyard football games will be replaced with small dinners and Zoom toasts. But that doesn’t mean we can’t make the day special. And the best way I know to build excitement for a big day is with special décor! So bust out your chalkboard, and let’s create a Thanksgiving doodle wreath that’s sure to impress your Thanksgiving guests… even if it’s just you and your dogs. Here’s what you’ll need:
Chalkboard
Regular chalk (Crayola Anti-Dust is my favorite!)
Pencil sharpener with large opening (like this)
Q-tips & cup of water
OPTIONAL: Pencil and scratch paper
OPTIONAL: Chalk pencil (like this)
OPTIONAL: Cheap-o aerosol hairspray
As you can see above, for this tutorial, we’re going to use regular, ol’ chalk. I know, I know – we are usually a chalk marker bunch. But Thanksgiving gives me all the rustic vibes – end of the harvest, apple picking, leaves falling, cider drinking vibes. And for that, regular chalk is just what we need.
Pro Tip: Sketching
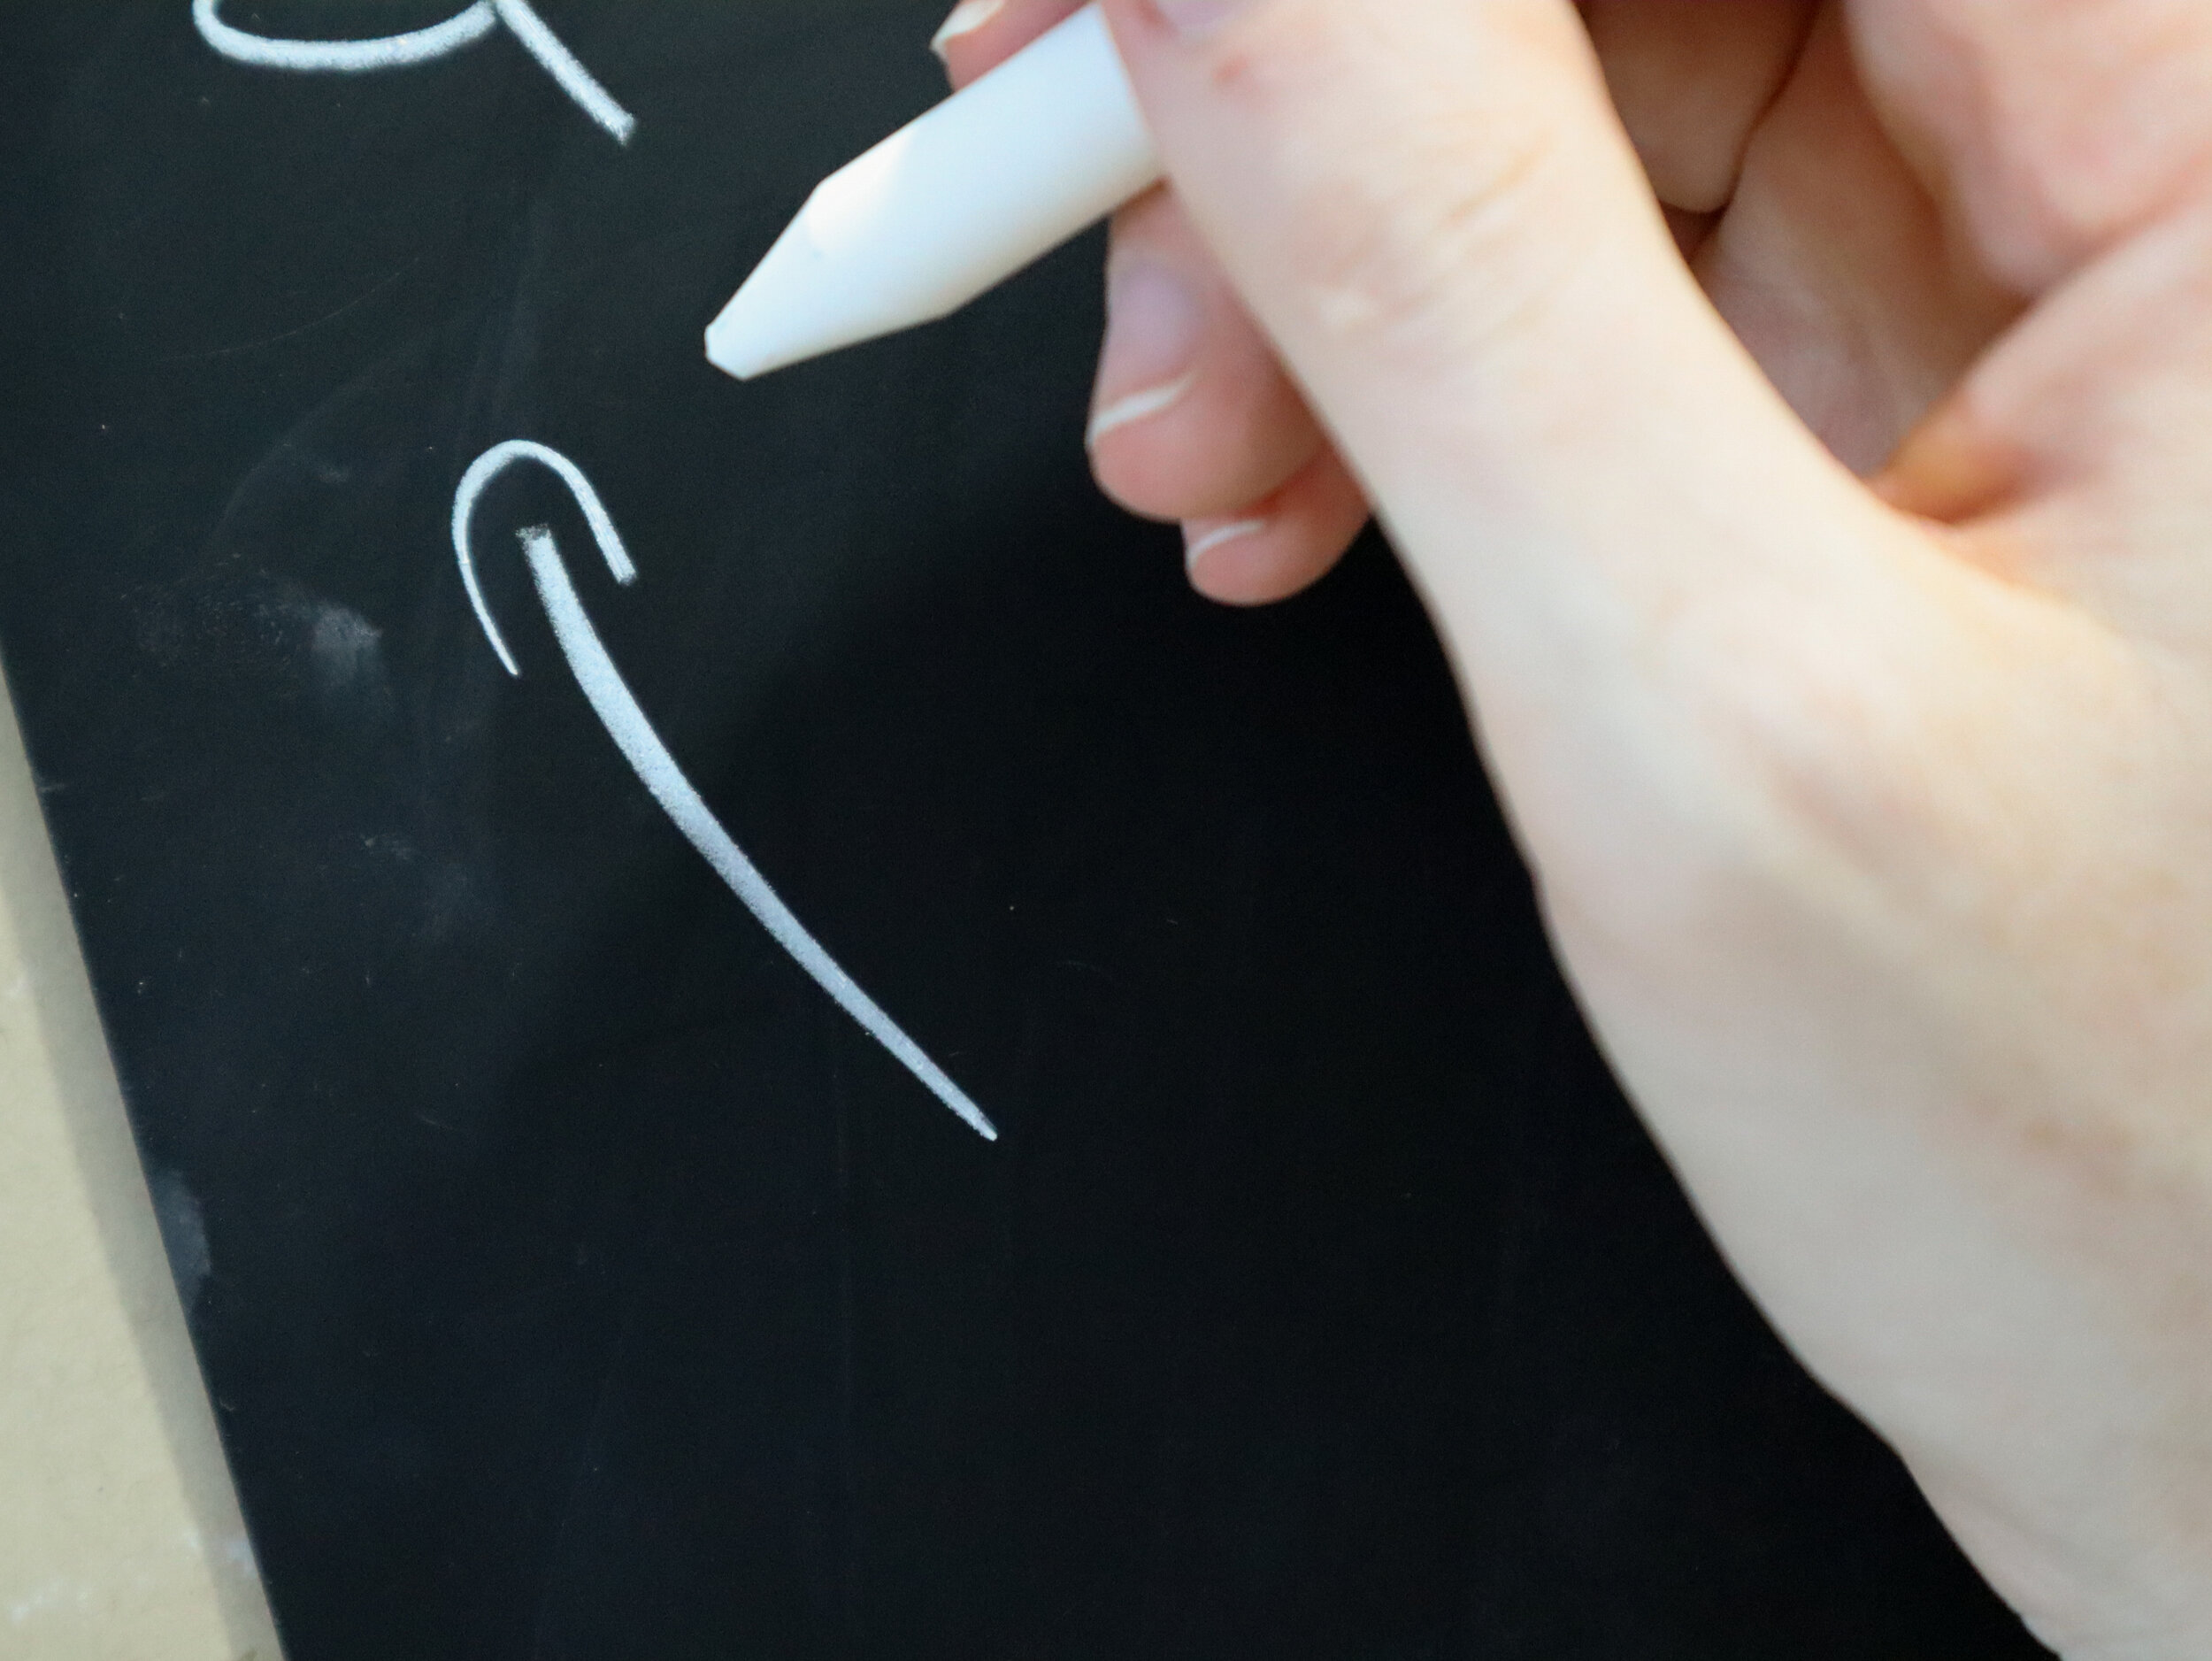
Before we start, a note on sketching. Because we are using regular chalk instead of chalk markers, it’s going to be a bit more difficult to get rid of errant marks at the end. You can make your life a whole lot easier by keeping your sketch marks as light as possible. This is where a chalk pencil can be very helpful, but again, you need a light touch – pushing too hard can leave indentations on your board. If you don’t have a chalk pencil, use your pencil sharpener to get your chalk to a very fine point, and, again, use a very light touch. That will make clean up at the end a breeze!
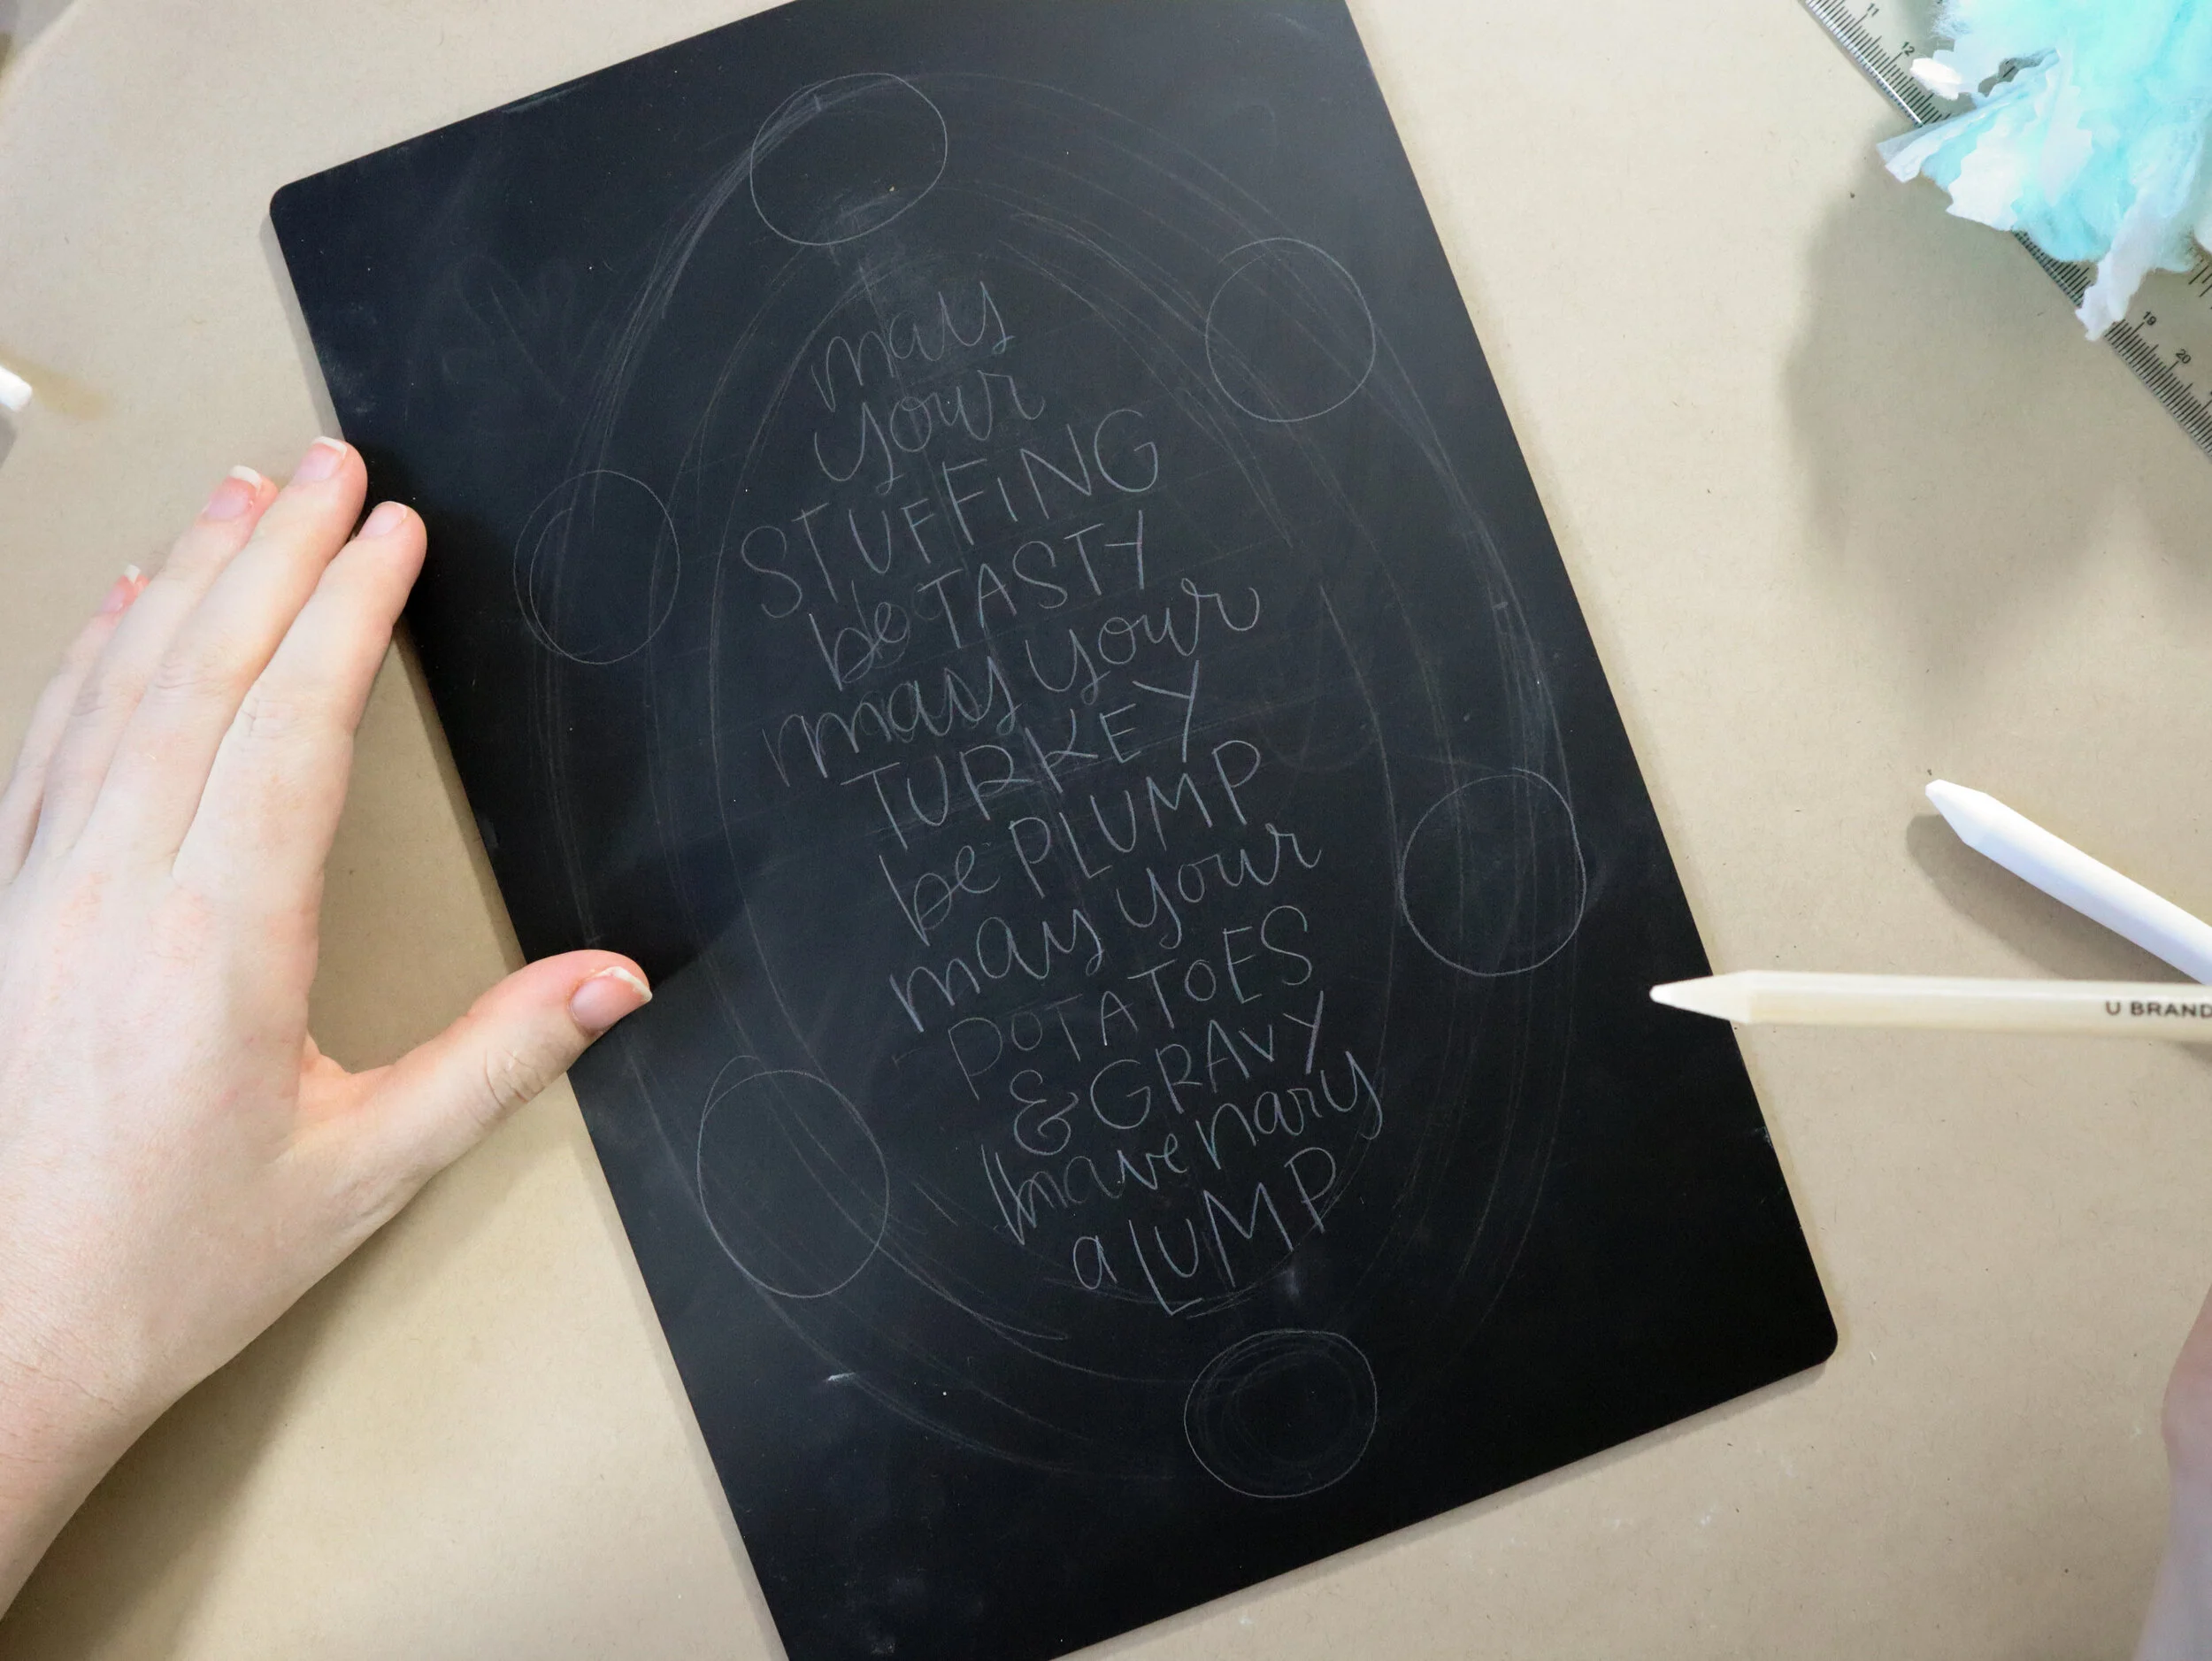
Step 1: Sketch an oval/circle on your board.
Find the center of each side of your chalkboard. I used an 8 x 12 inch board, so that’s 4 inches on the top and bottom, and 6 inches on the sides. At each of those center points, measure at least a half inch from the edge of the board and make a dot. Using a light touch, connect each dot with an arc to form an oval. Create another oval inside this oval. Do not worry about getting this perfect! We just want a rough guide for our wreath.

Step 2: Place your quote.
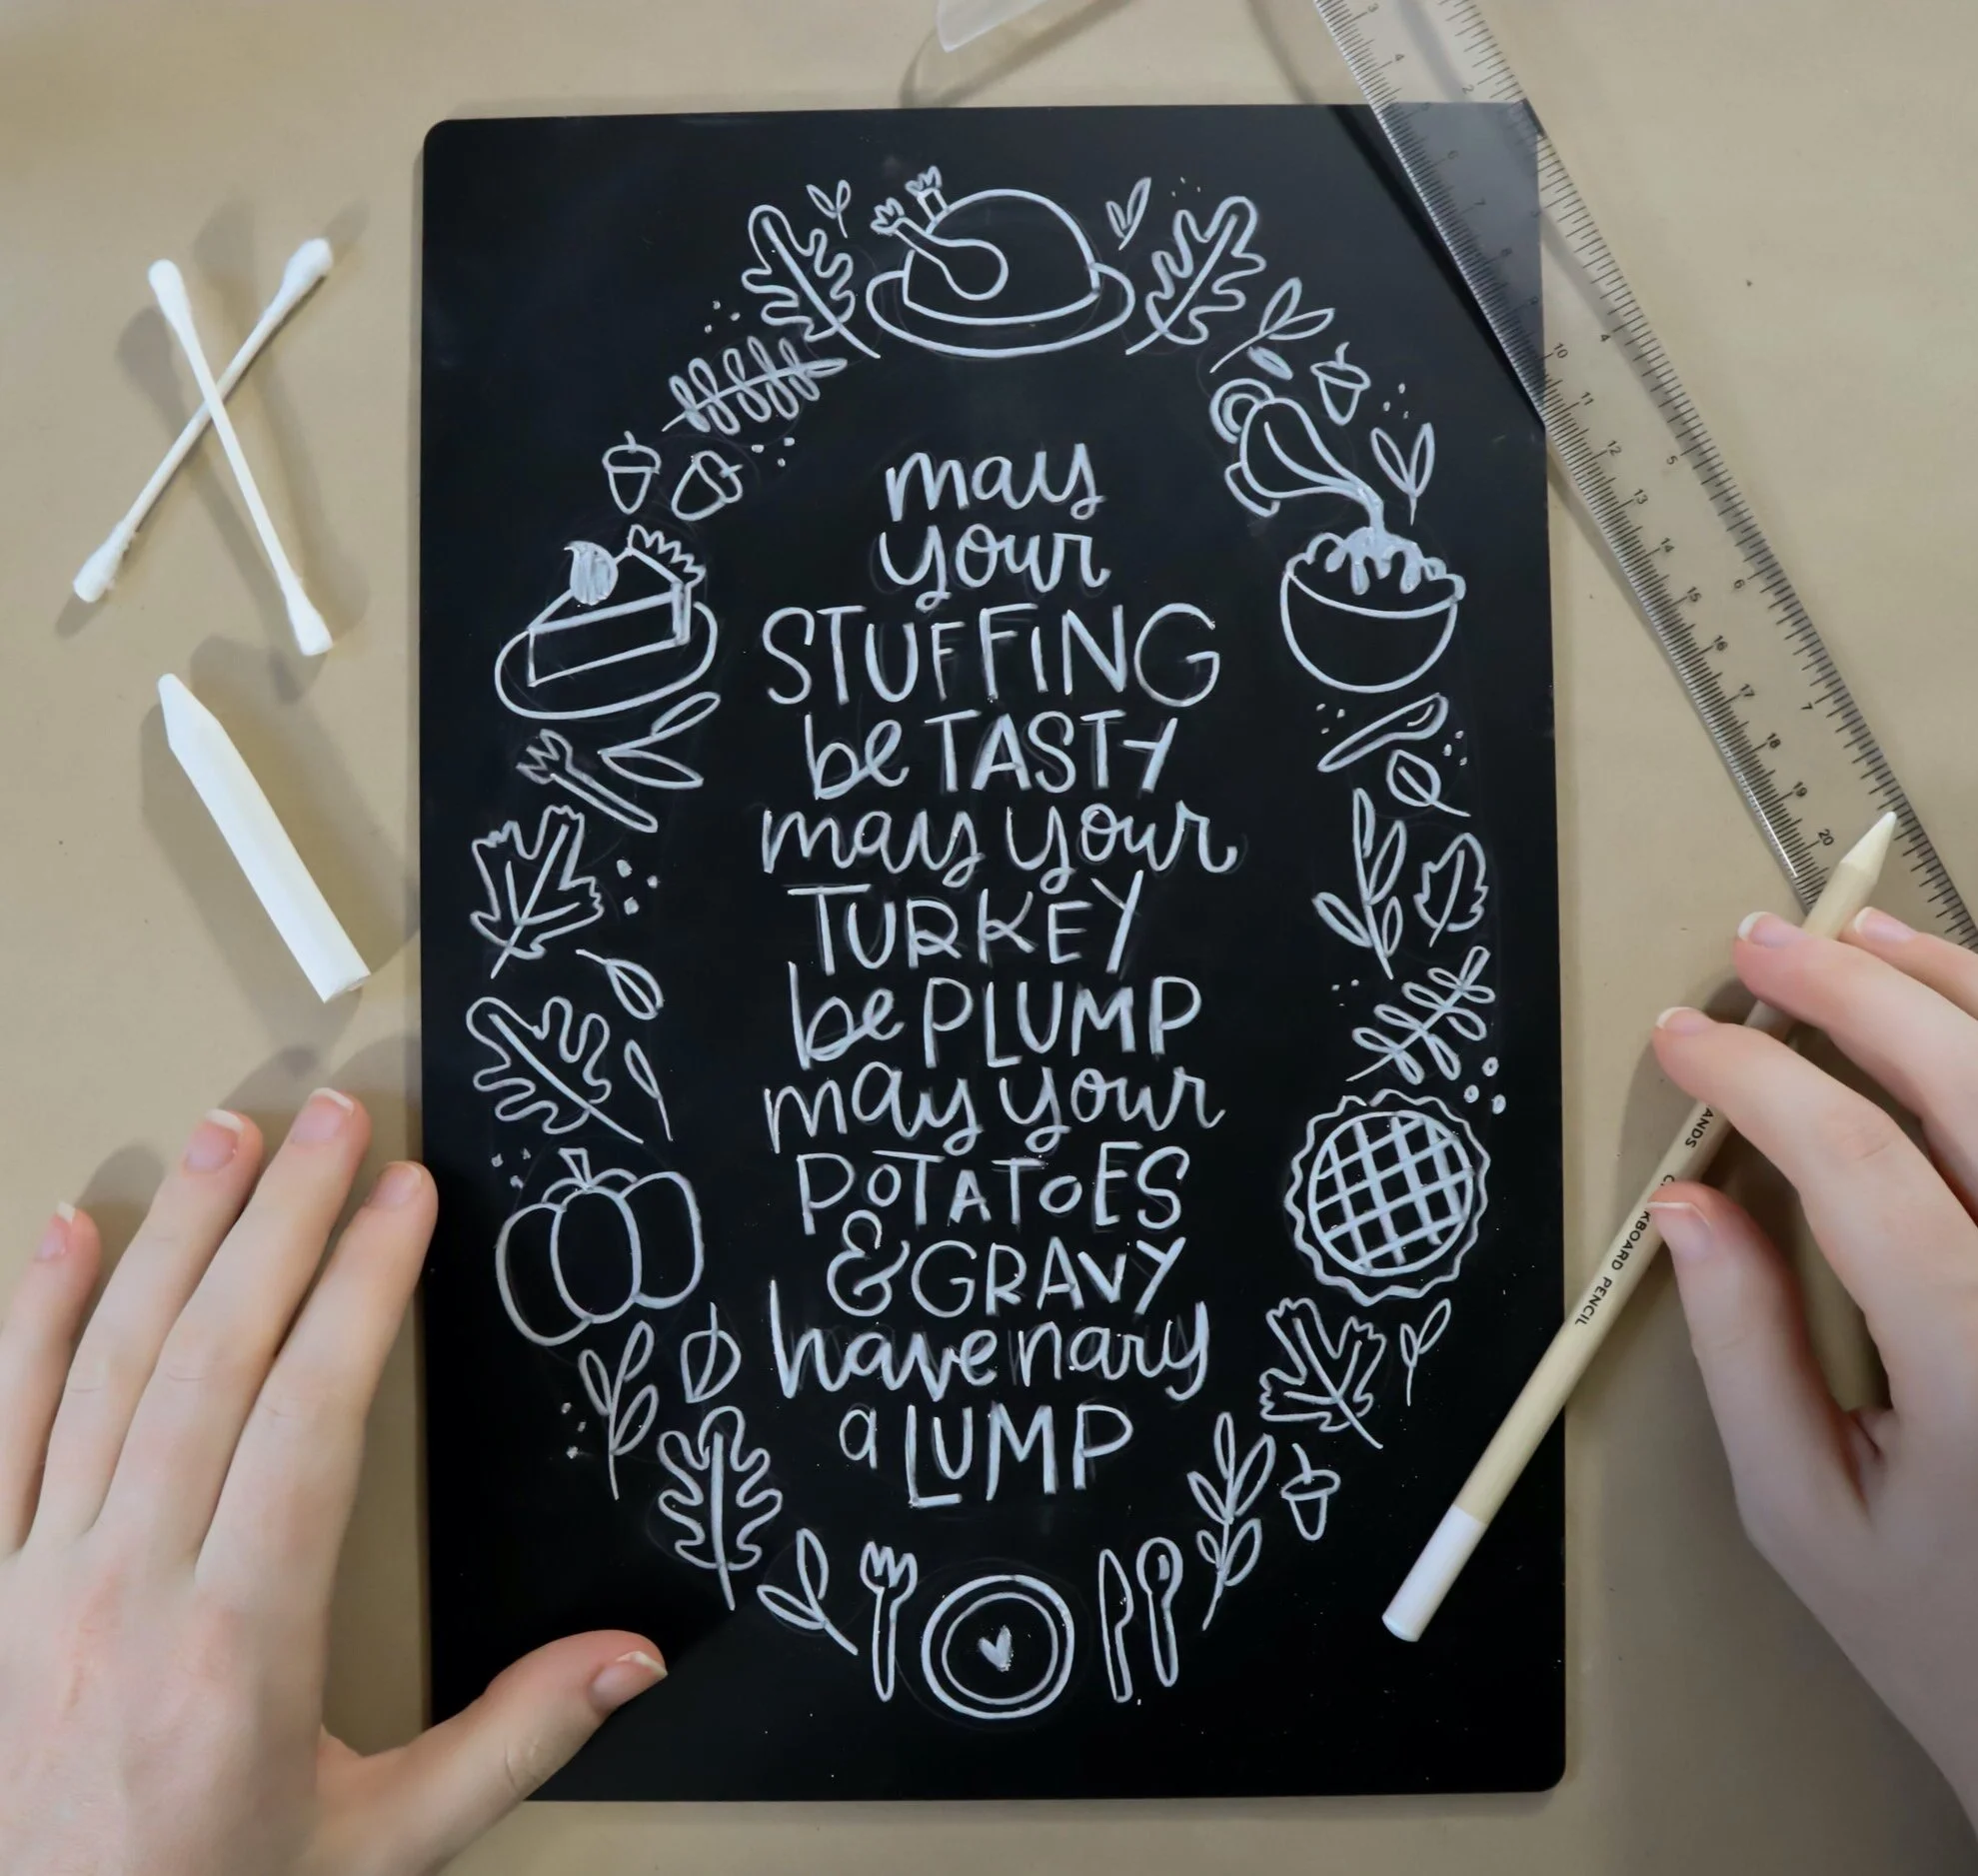
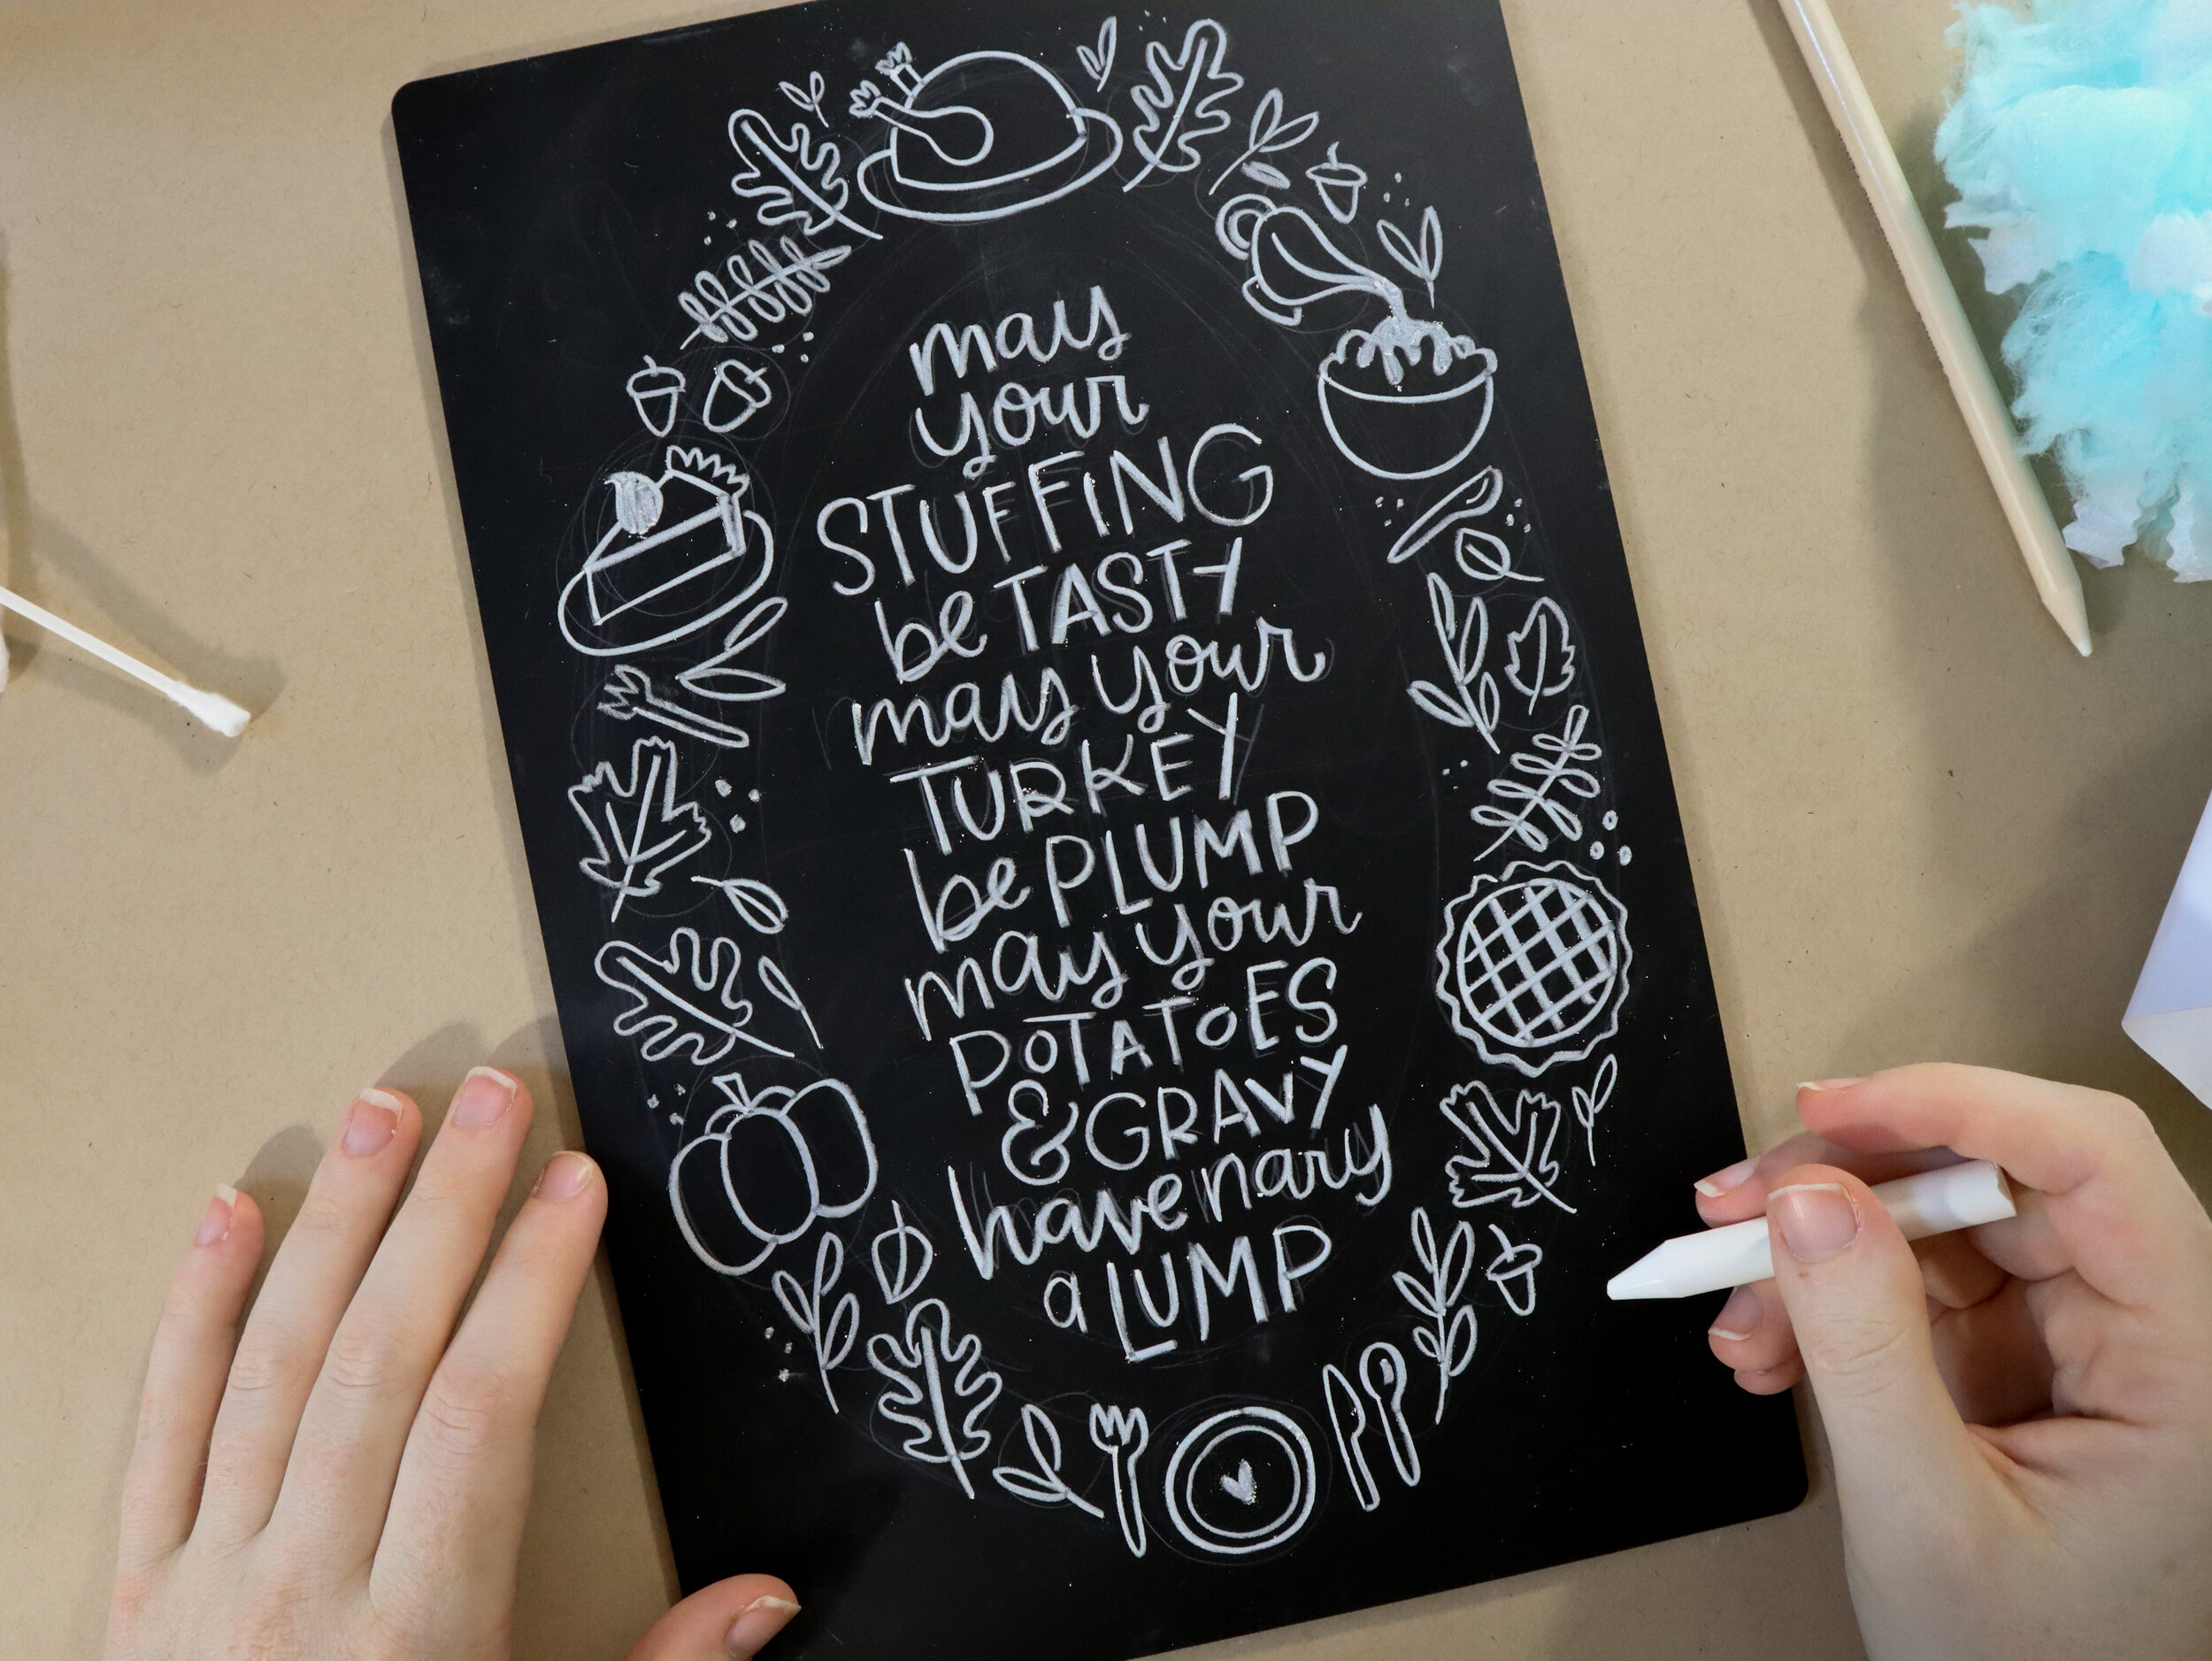
Once you have your oval drawn, lightly sketch out your quote. It is SUPER helpful to sketch this out on scratch paper beforehand, so you know exactly how you want to lay it out before the chalk ever hits the board. You can go with the quote I’m using here or choose your own!

Step 3: Lay out your wreath.
With your quote finished, it’s time to create your doodle wreath! But before we begin doodling, it’s helpful to make a plan. If you aren’t super confident in your doodling abilities yet, it’s totally fine to start on a scratch piece of paper and then move to your chalkboard. If you’re going straight to the chalkboard, remember to use a light touch!
First, we want to place anchoring elements at 6 equally spaced spots in the wreath. I’m going to mark those spots with large circles. Now we’ll add two smaller circles on either side of those large circles. You’ll now have 6 clusters of circles with a bit of space in between — add a circle here, too. Each of these circles will include a design element. See example below for a much less confusing explanation!

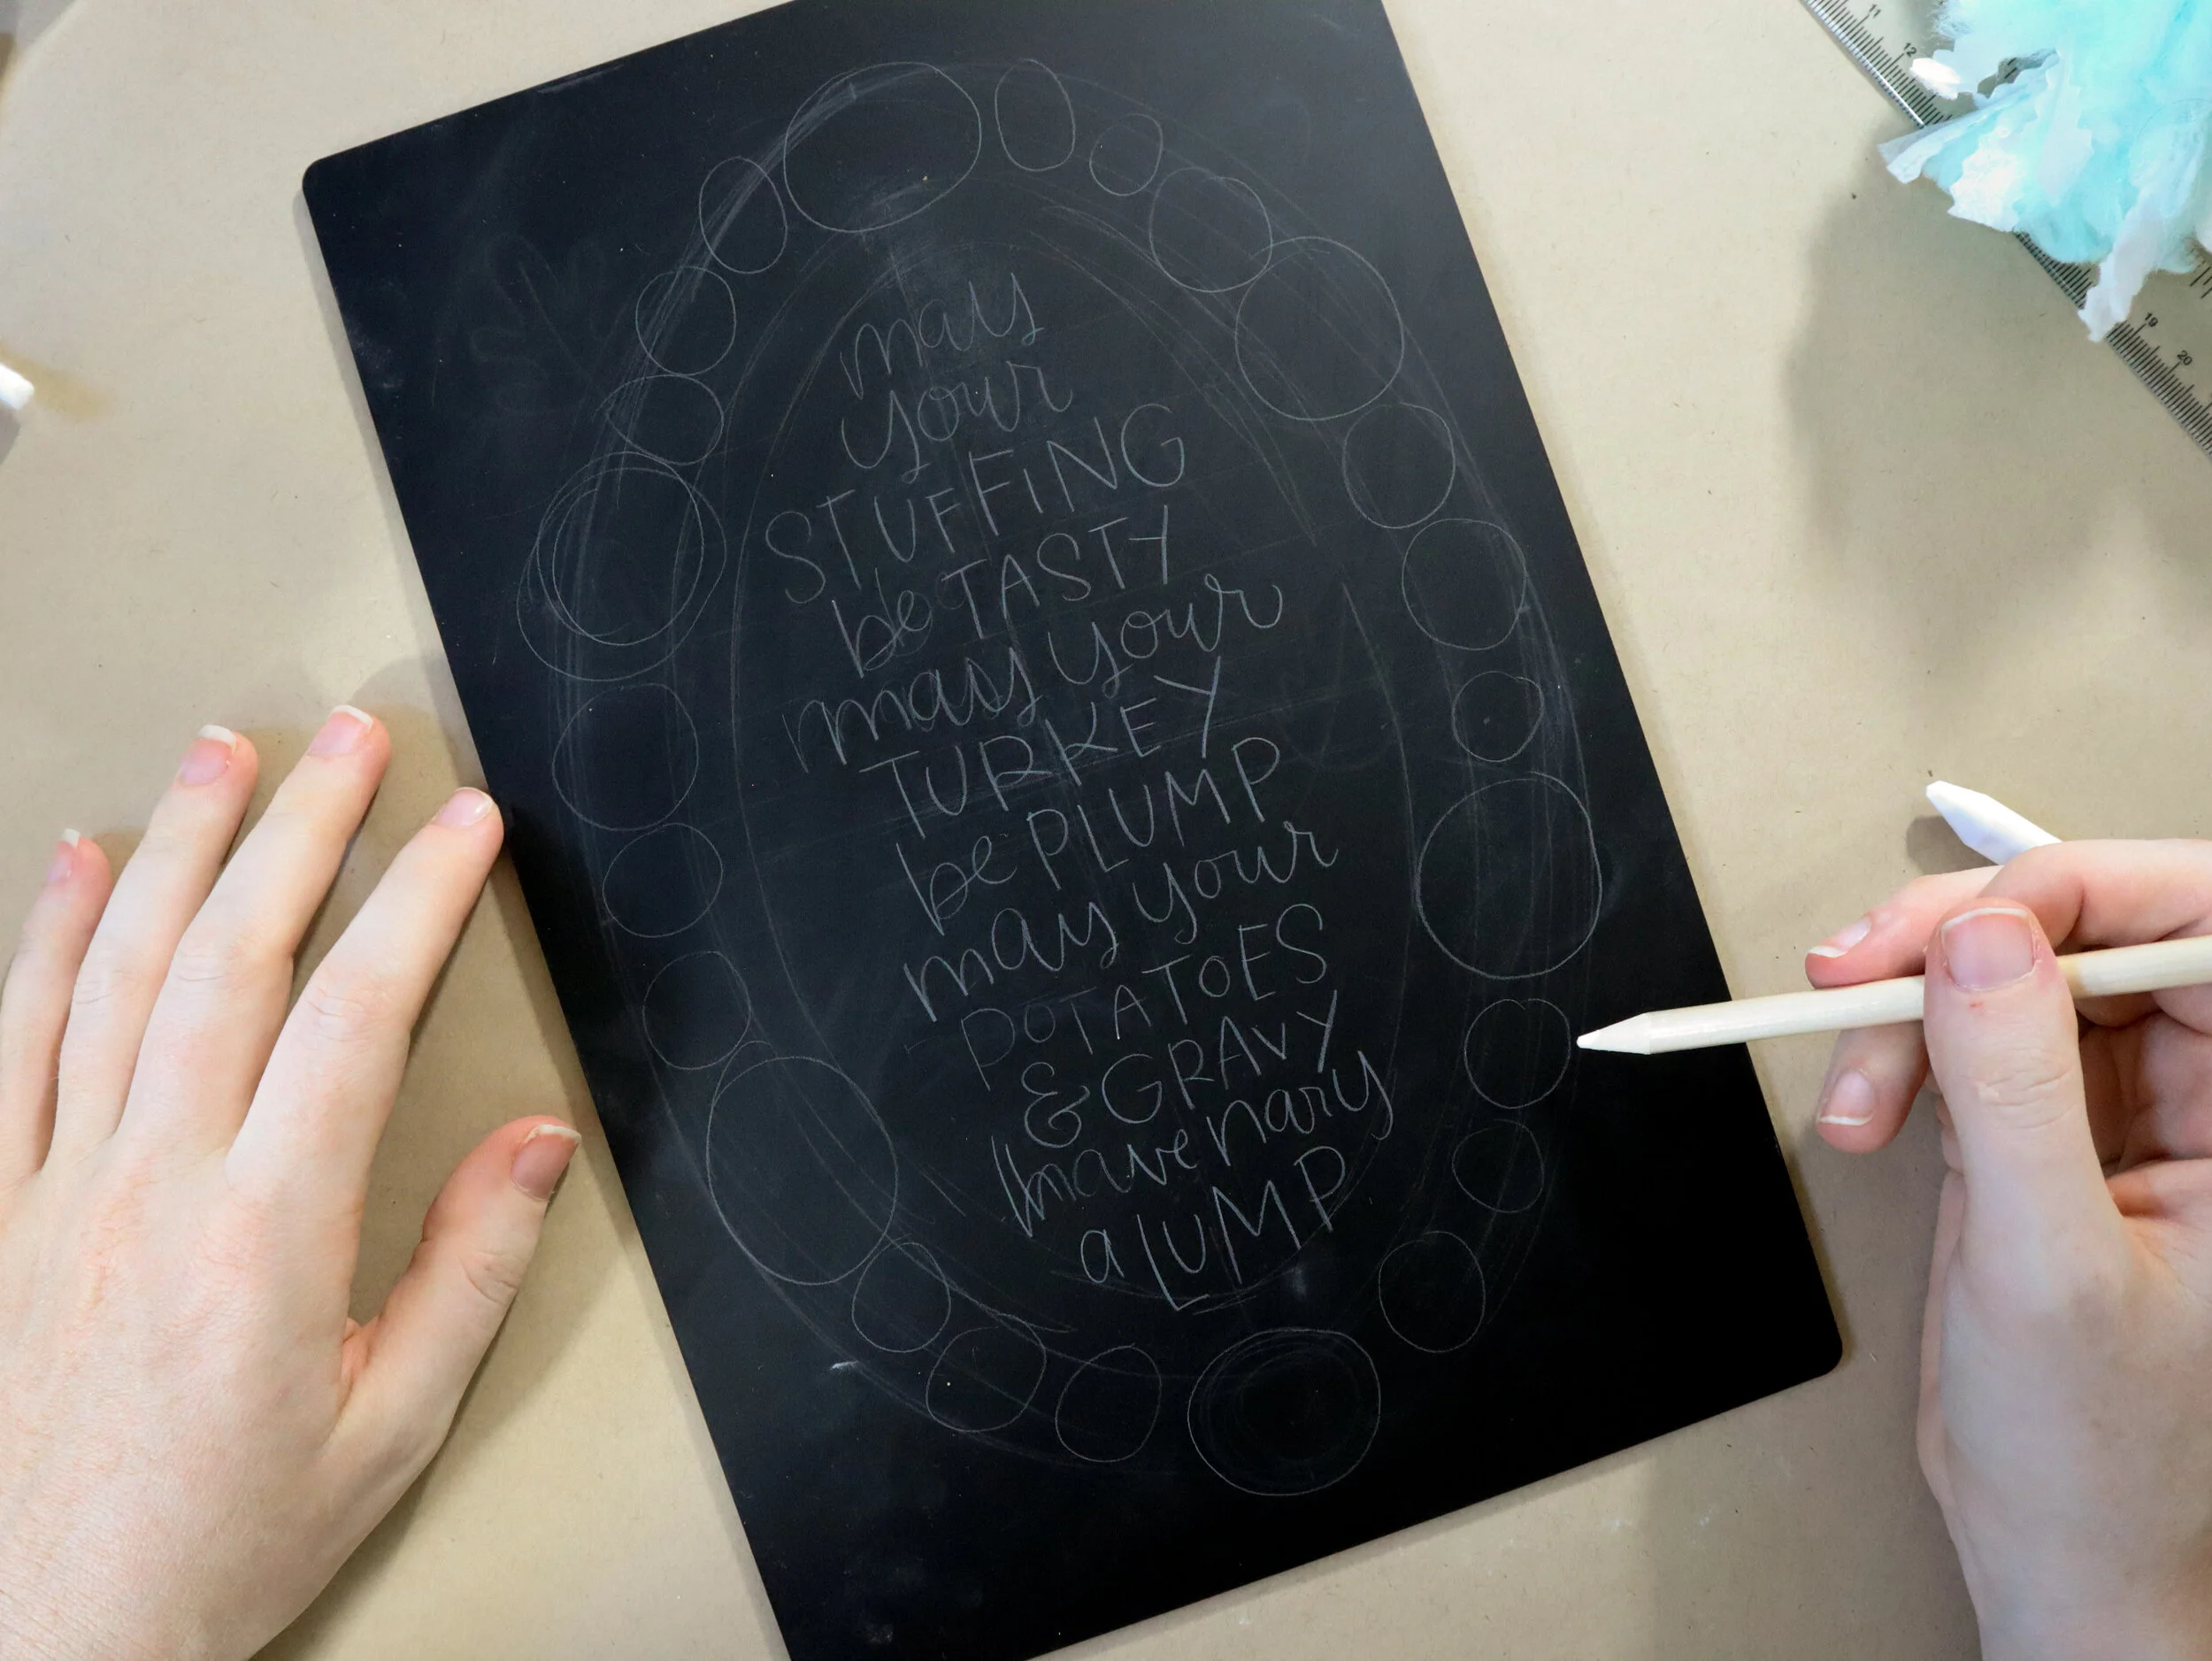
Now you have the framework for a nice, balanced wreath. Why does this matter? Because even if your doodles aren’t the prettiest close up (but they totally will be, just watch), your final piece will still look great as a whole.
Step 4: Trace & touch-up your quote.
Sharpen your regular chalk to a fine point and begin tracing the final quote. When you’re finished, make note of any sketch lines that are still visible. Using a Q-tip dipped in a bit of water, carefully remove these lines before moving onto the next step.
If you are concerned about smudging the quote while you work on the wreath, you can semi-set the quote with aerosol hairspray – the cheaper the better, so dig out that Aquanet! Hold the board at least a foot away from you, and give the quote a spritz. Do your best to avoid the area around it, but if some gets in the way of your wreath, it’s easily removable with a bit of water or rubbing alcohol, if it’s being difficult.

Step 5: Place your doodles.
Squeee, this is the fun part – let’s doodle! For my board, I decided to use a combination of botanicals, florals and fun fall foods. First, you’ll want to add your larger anchoring elements into the 6 large circles. I decided to do fall foods as my main anchor doodles to go along with the quote I chose.
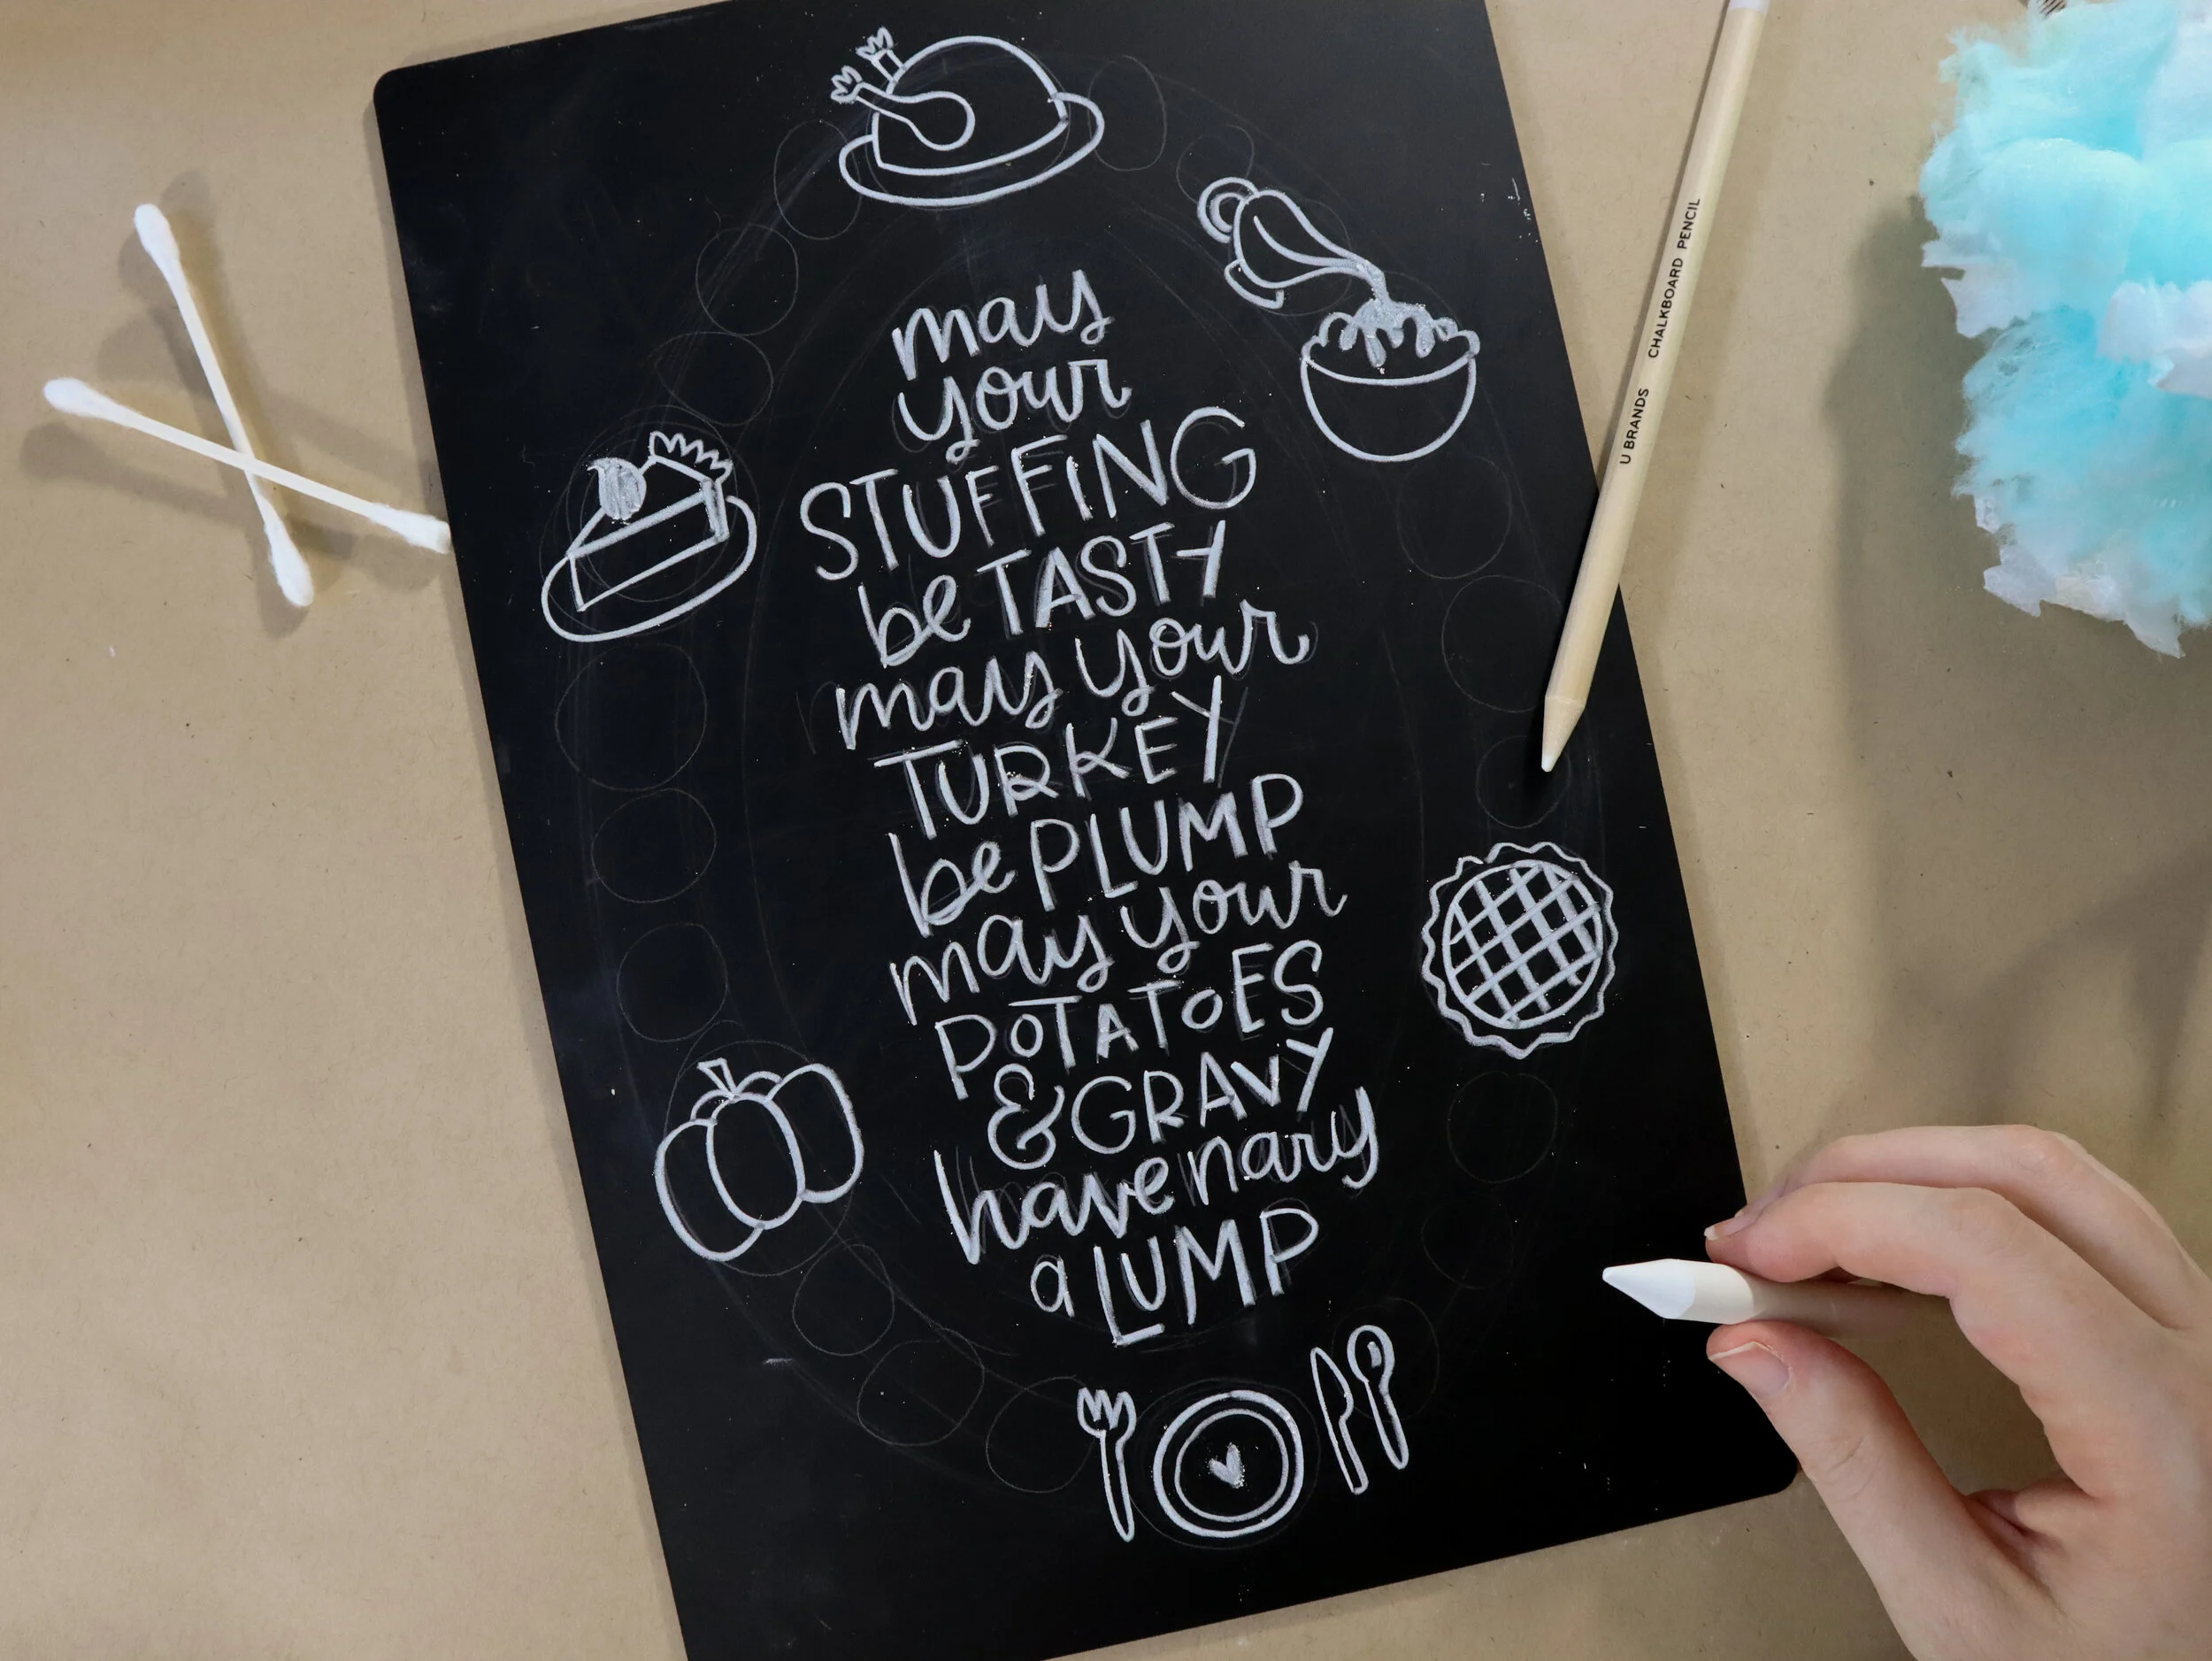
Next, you’re going to fill in the smaller circles on either side of the large anchors. You’ll see I already started that in the example above — the gravy boat and the knife and spoon. For the rest of these surrounding circles, I am adding in leaves and botanicals. Here are a few of my favorites.


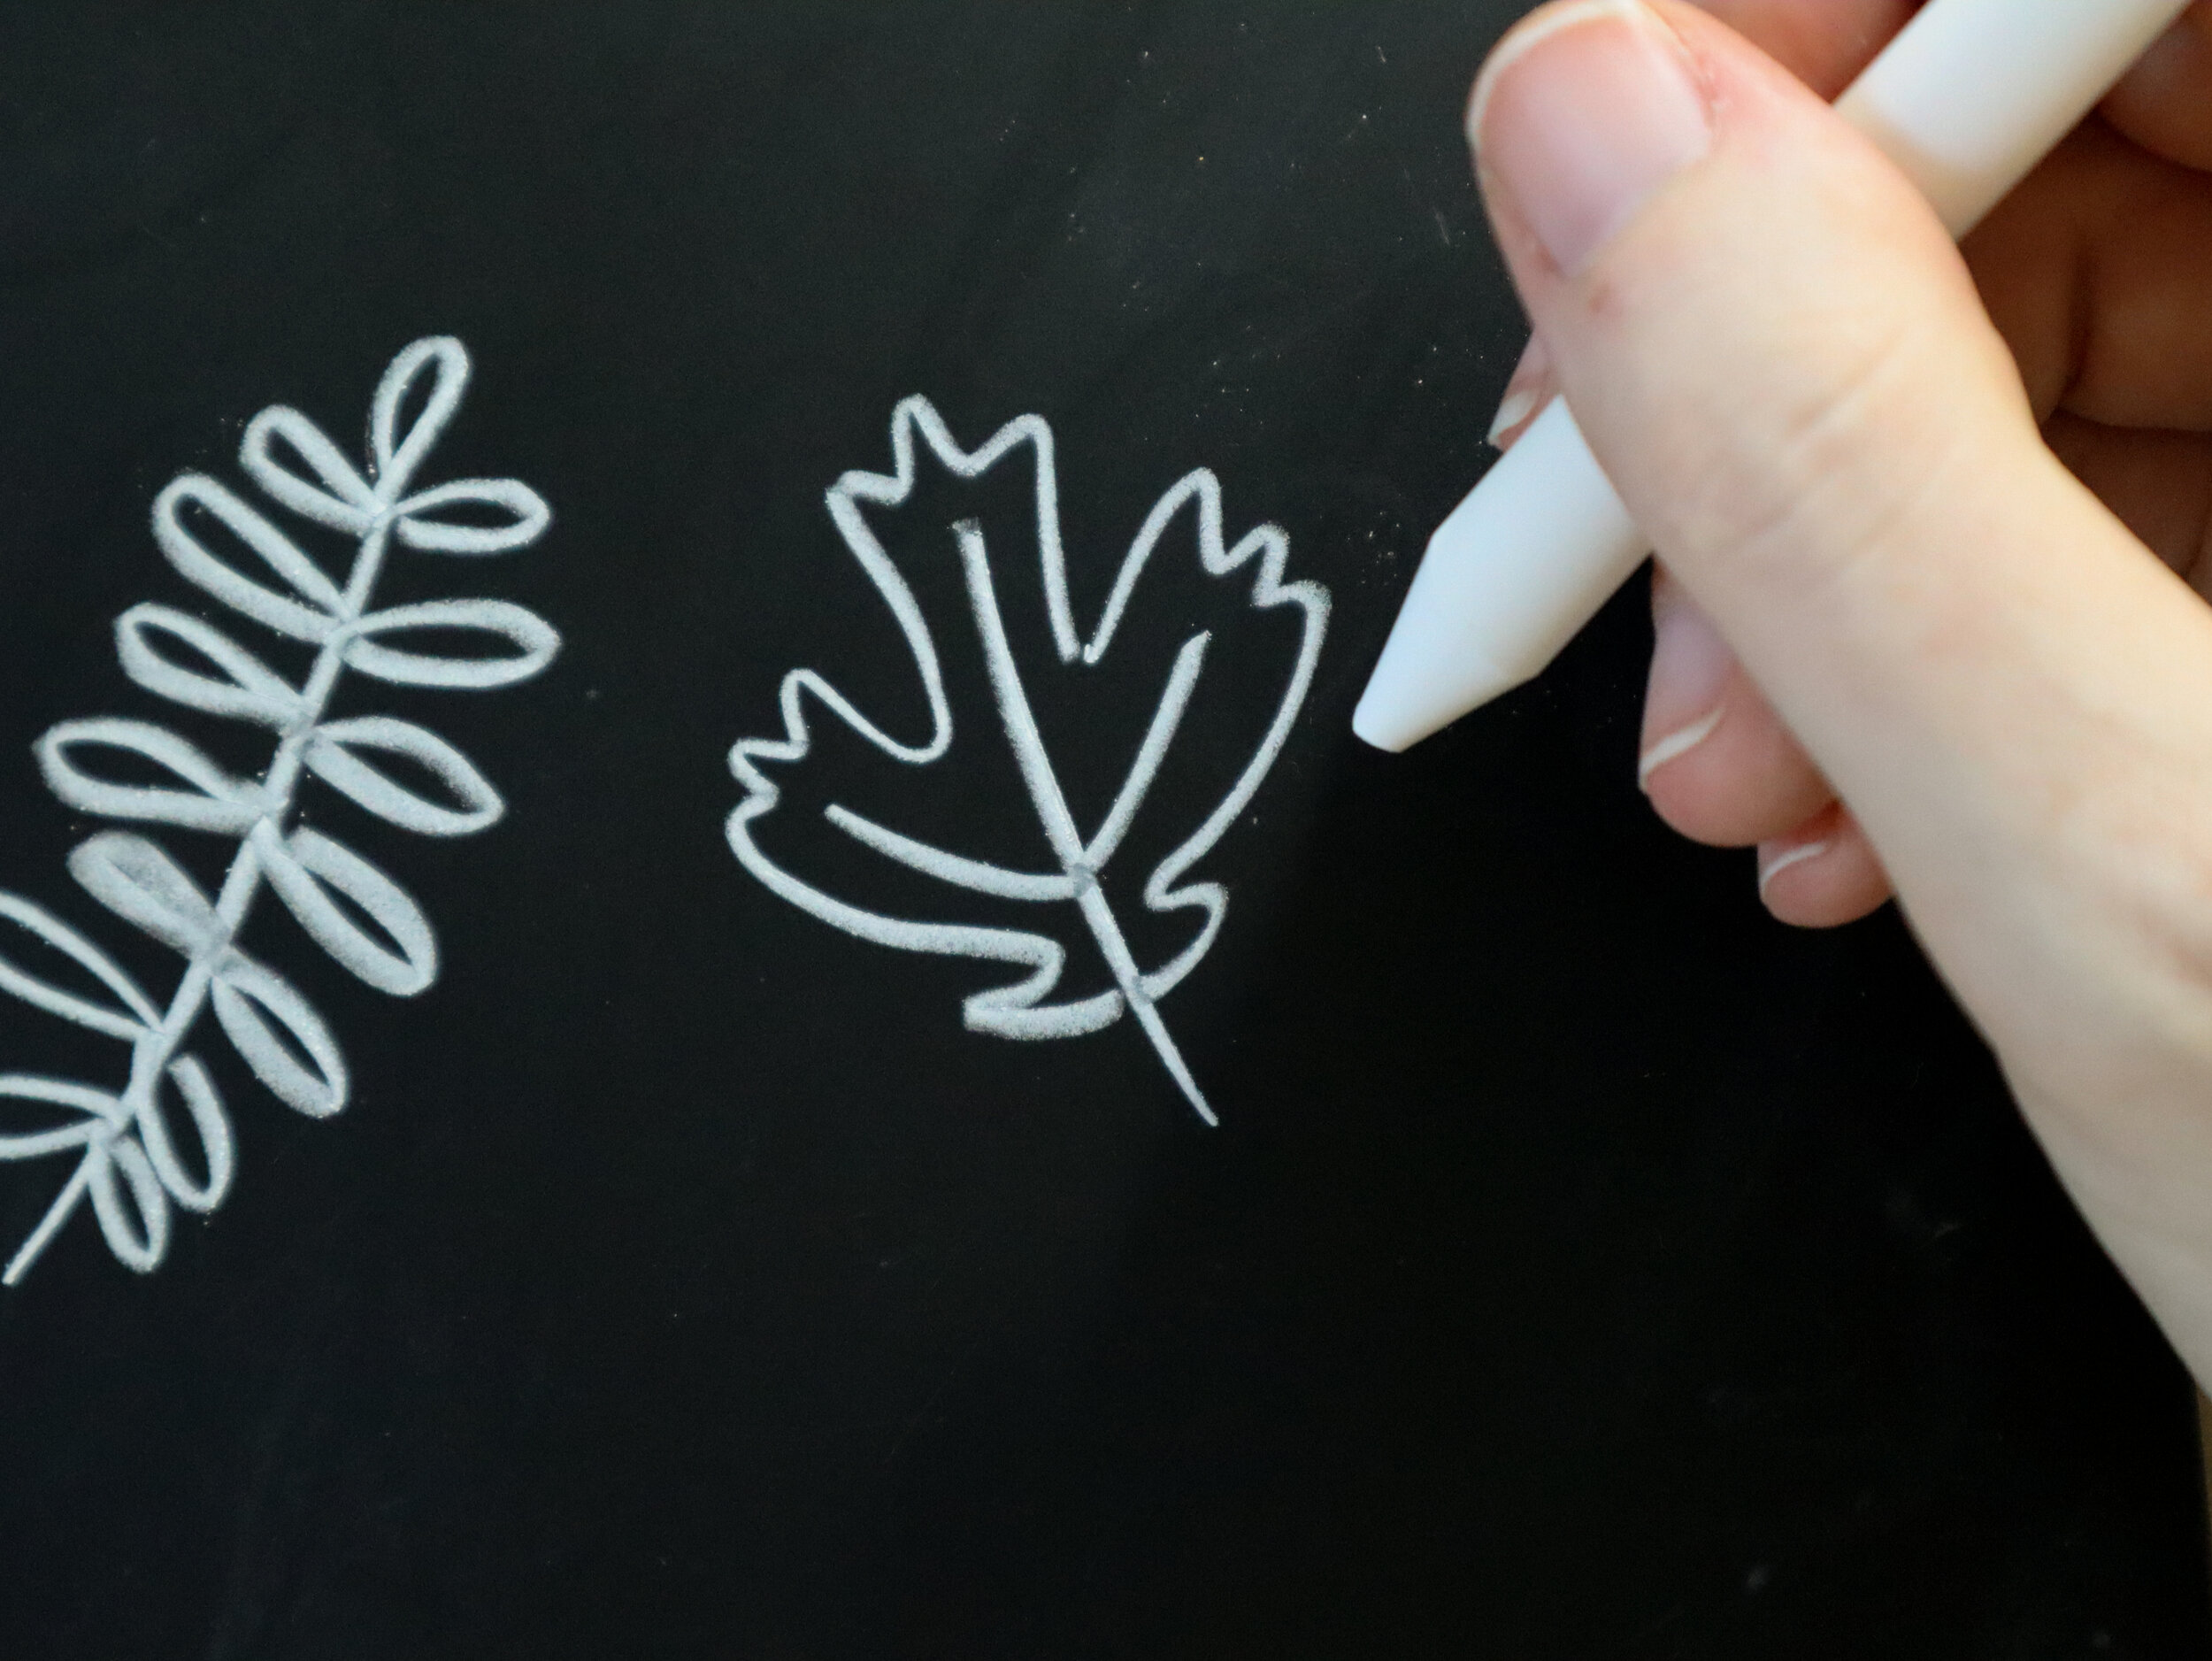


Now, just fill in your circles with these doodles, however you choose! Once you have all the circles filled in, stand back and squint. This will help you identify any areas that need filling. You can add in clusters of small dots or tiny leaves — both of those fill in space nicely and can help round out the wreath if you notice any odd angles.

Step 6: Touch up & finish.
Now let’s clean this up! Use a barely moist Q-tip (NOT wet) to erase any visible sketch lines. A note here: you don’t need to be extra precious about this. If this board is hanging up, no one is going to notice some light sketch marks, so don’t stress yourself out. Just clean up those lines that would be visible without looking too close.

Et voila! Look at that beautiful piece of autumn-y artwork you just created… and without a template! If you are worried about smudges, you can give the board a good spray with Aquanet or the cheap-o aerosol hair spray of your choice. This isn’t a permanent seal – just gives it a little extra protection.
If you enjoyed this tutorial and would like to see more like it, please let me know! And if you have any questions, feel free to leave them in the comments below. And finally, sharing is caring – be sure to share a pic of your final piece on the ‘gram and tag @hooplaletters so I can reshare. Happy chalking, everyone!
