DIY Christmas Countdown Calendar (Plus a Not-So-DIY Download)
Okay, LISTEN. I know it’s not Christmas yet. I am well aware we still have a couple weeks left of pumpkin spice and turkeys. And while I am ALL for letting Thanksgiving have its day (it’s one of my favorite holidays, after all!), it’s no secret that the holiday season can be, er… stressful. And sometimes in the midst of all that stress, we can forget to slow down and enjoy what makes the holidays special, like cuddling up on the couch to watch Christmas Vacation for the 10,000th time, watching your child sing Jingle Bells in a school program or the time-honored tradition of spiking the eggnog. With this in mind, I’ve got a tutorial that will not only give you an opportunity to flex your calligraphy muscles, but will also help you get organized for the holiday season AND serve as a reminder to slow down and enjoy. Yup, that’s right — we’re making a Christmas Countdown Calendar!
We’ll be making our calendar with some envelopes and cards — no cutting, gluing or a degree in engineering required. Now if just reading that made you exhausted, don’t fret! Unlike lots of other DIY Advent calendars out there, this one is designed to be low effort and high impact, both in the actual construction AND in what we put inside. AndiIf you’re feeling a little less than DIY, I’ve got something premade just for you.
BEFORE YOU START
If you’ve never heard of it, a Christmas Countdown — or Advent — calendar is a way to count down the days in December until Christmas. Traditionally, it’s filled with chocolate or little trinkets. We don’t do the chocolate calendars in our house mostly because I can’t be trusted with them — history has shown I usually finish them before we reach the end of the first week. So instead, we (I say “we” like my husband is involved, but ladies, you know the score here) replace the candy or trinket with a holiday activity. Now I know what you’re thinking… “oh great, more work.” But while some of these are structured activities like bake cookies or see Santa, most are little things that require no extra planning. Things like watch a Charlie Brown Christmas special or kiss under the mistletoe ( I know, I’m adorable). After I walk you through how we make our calendar, I’ll share some tips for activities.
Here’s what you need to create your Christmas Countdown Calendar:
Space. Before you purchase anything, find a space that will work for your calendar. We have a white brick wall in our dining room that worked perfectly for our calendar, but it would also look super fun hanging from a mantle if you’re lucky enough to have a fireplace. If you don’t have any spare wall space, a bulletin board or even a piece of foam core poster board will work just fine.
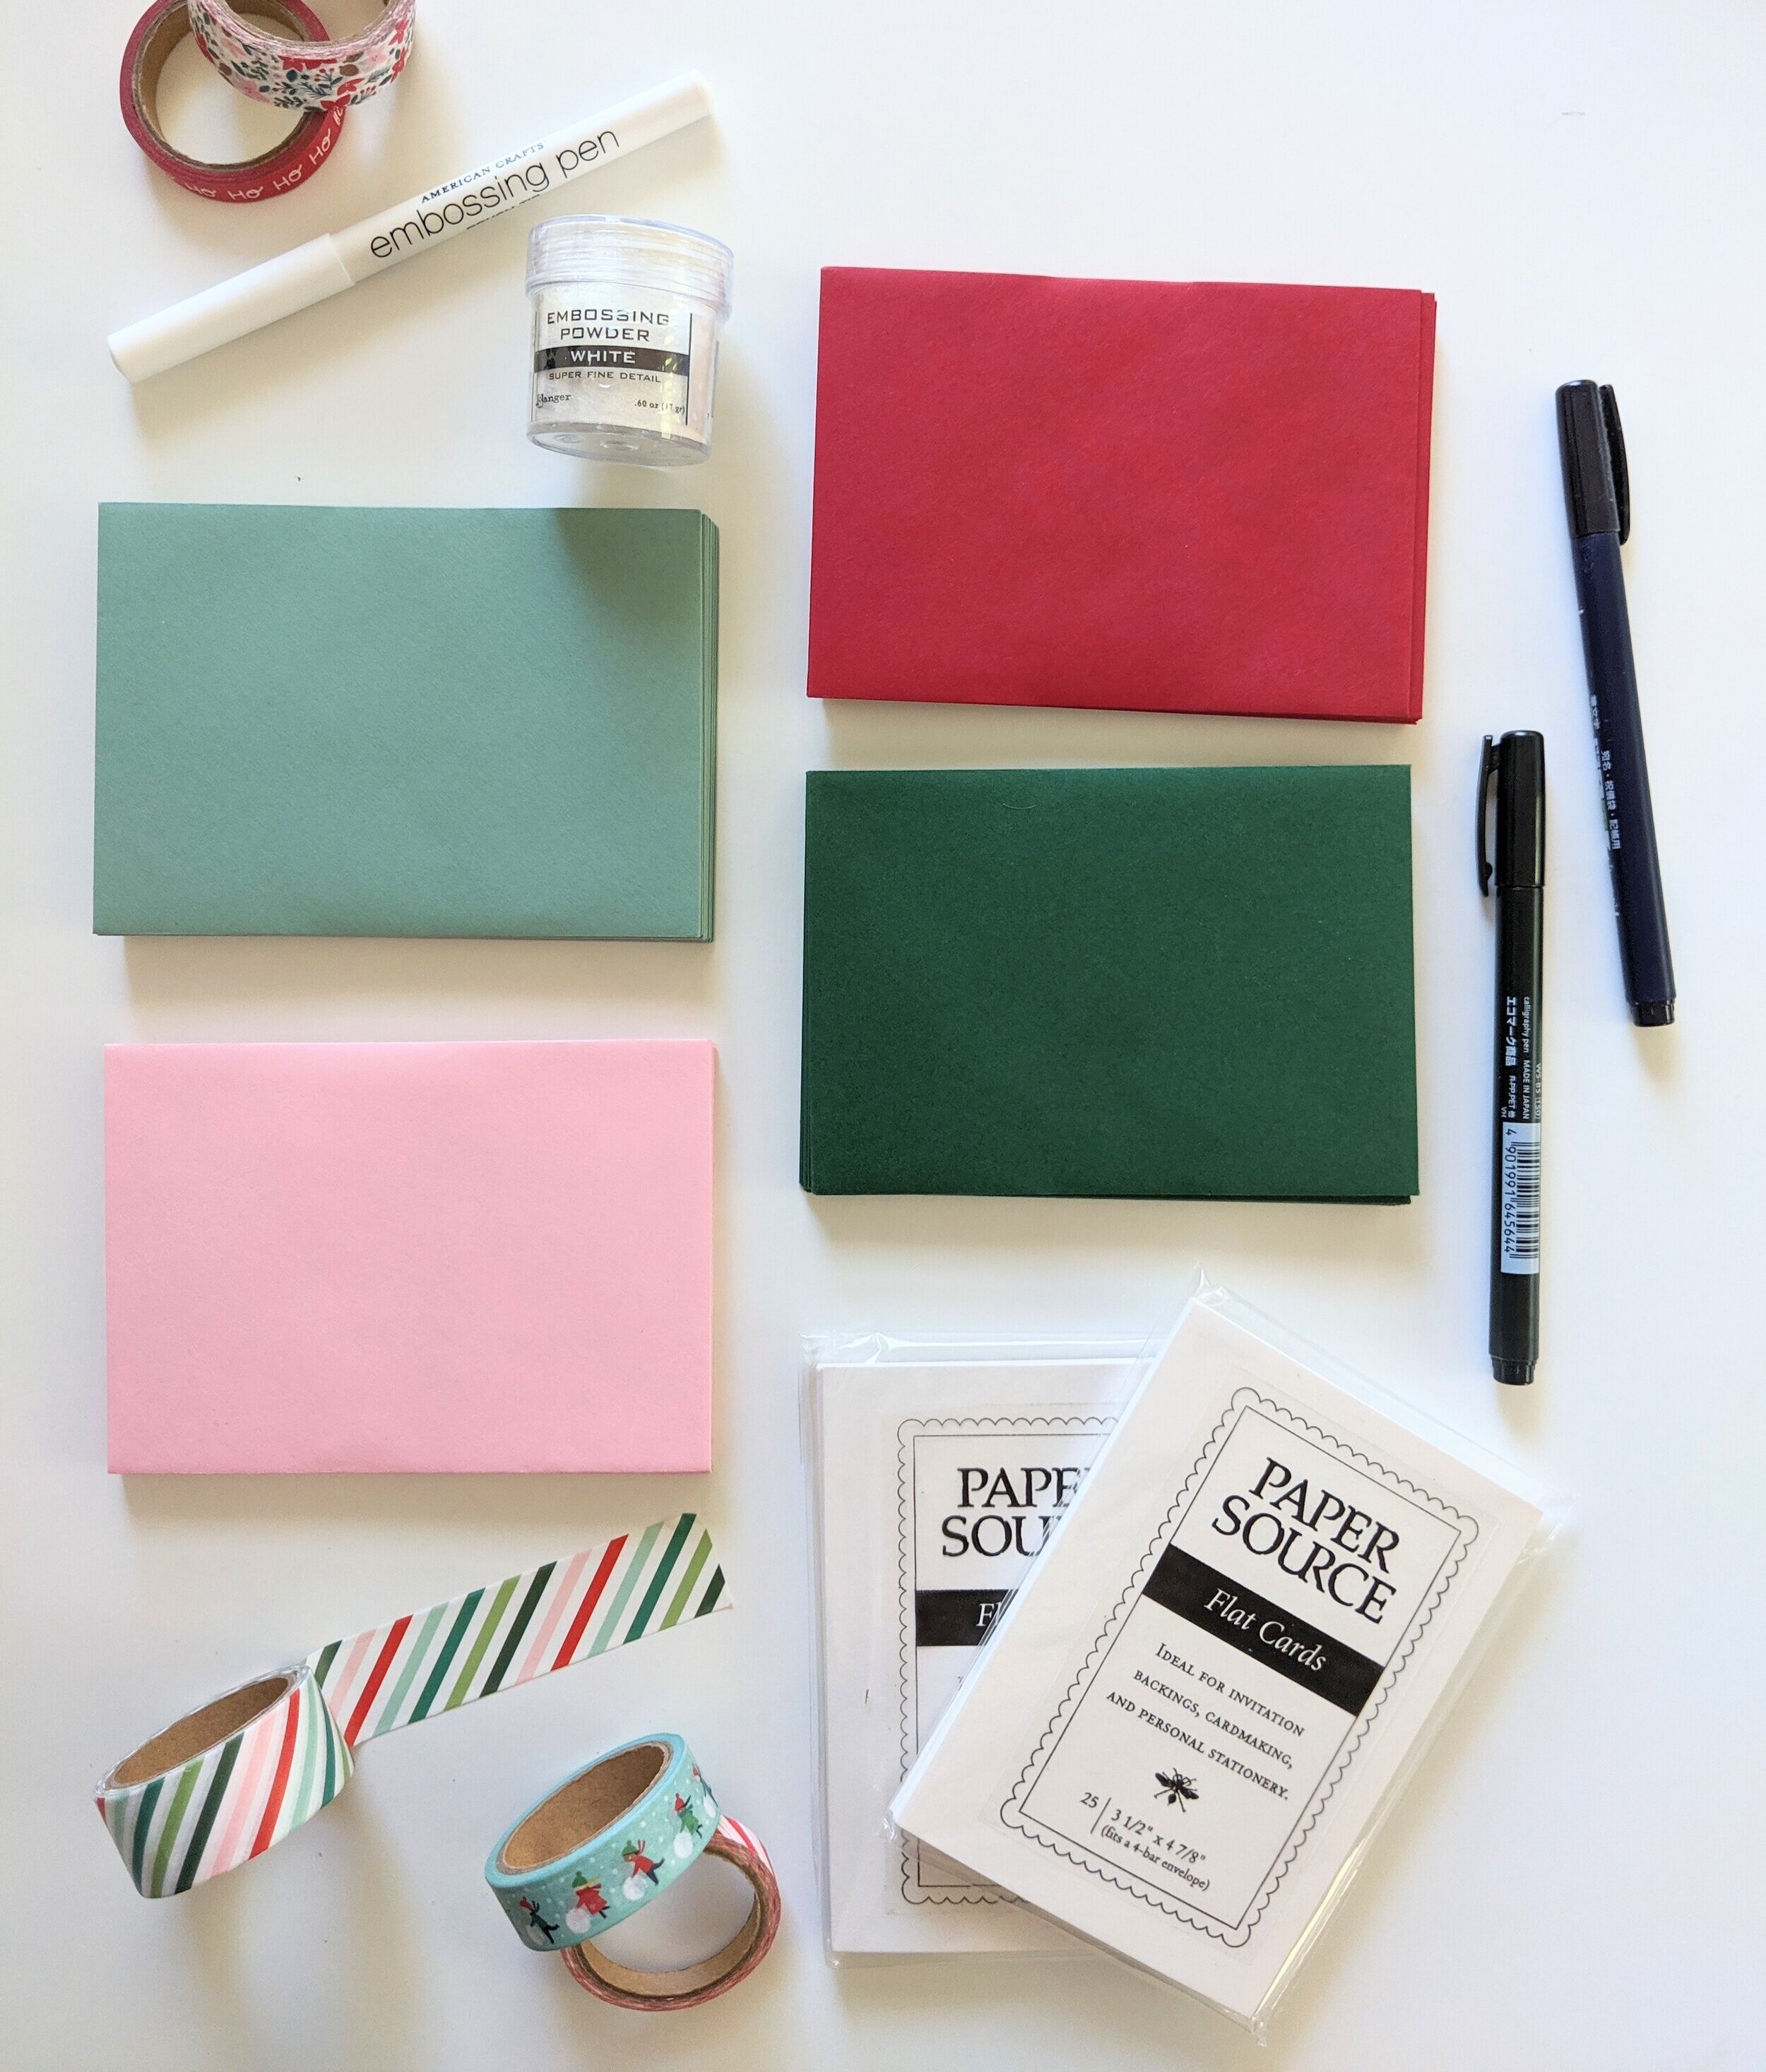
Envelopes & cards. The size of envelopes will depend on the size of your space. Paper Source — my go-to store for stationery products — has a great guide to the different sizes of envelopes and cards here. Our wall was fairly large, so I went with 4 bar envelopes and cards — that’s about as large as I’d recommend going. If your space is fairly small, consider using #1 baby size envelopes and cards — this would be perfect for a mantle. For color, choose something that works for you! I went with bright, poppy colors, but it would also be lovely in neutral and gold tones. If you want to recreate what I did, I used the Paper Source colors Spruce (dark green), Eucalyptus (light green), Poinsettia (red) and Blossom (pink). I also used the 4 bar flat cards in Eco White.
Ribbon/string. Got my pom pom ribbon at — you guessed it! — Paper Source. One recommendation: I got a wire string totally on accident, but I’m so glad I did — holds up GREAT for hanging. If you want something a little cheaper but still festive, red and white baker’s twine would be lovely!
Mini clothespins. I got mine in the Target Dollar Spot — unfortunately, they don’t sell online so I can’t link it, but there should be plenty in a variety of glittery colors at your local store!
Washi tape. This is totally optional, but man oh man, do I dig it. When I take the card out of the envelope for the day, I then clip it over the envelope. Shows that the day has passed and is a good reminder of all the fun stuff we have done over the course of the month. Because of this, I like to decorate these cards with some washi tape to give them a little color. And by this time, it should be no surprise where I got my set.
Brush pen OR embossing brush pen. To write on your envelopes, you’ll need a brush pen… or you can take it to the next level with some embossing. If you want to give this a try, you’ll need an embossing brush pen, embossing powder and a heat gun. Again, totally optional. But ‘tis the season to be extra.
One more thing before we make some holiday magic. The reason I’m posting this tutorial today and not after Thanksgiving is that I want to give you plenty of time to make it. This is one of those things that be completed in one sitting, of course, buuuut can also be stretched out over the course of a Netflix binge. Honestly, this is how I made mine. I did the organizing and embossing in one and a half episodes of Peaky Blinders, hanging on the wall during one episode of The Chilling Adventures of Sabrina and writing up the cards little by little during countless episodes of Word Party (my daughter’s current favorite/unbearable show). Point is, let this be a fun project that gets you excited for the holidays… not a tedious chore.
Got it? Good! Let’s do this.
STEP 1: ORGANIZE & ARRANGE YOUR ENVELOPES
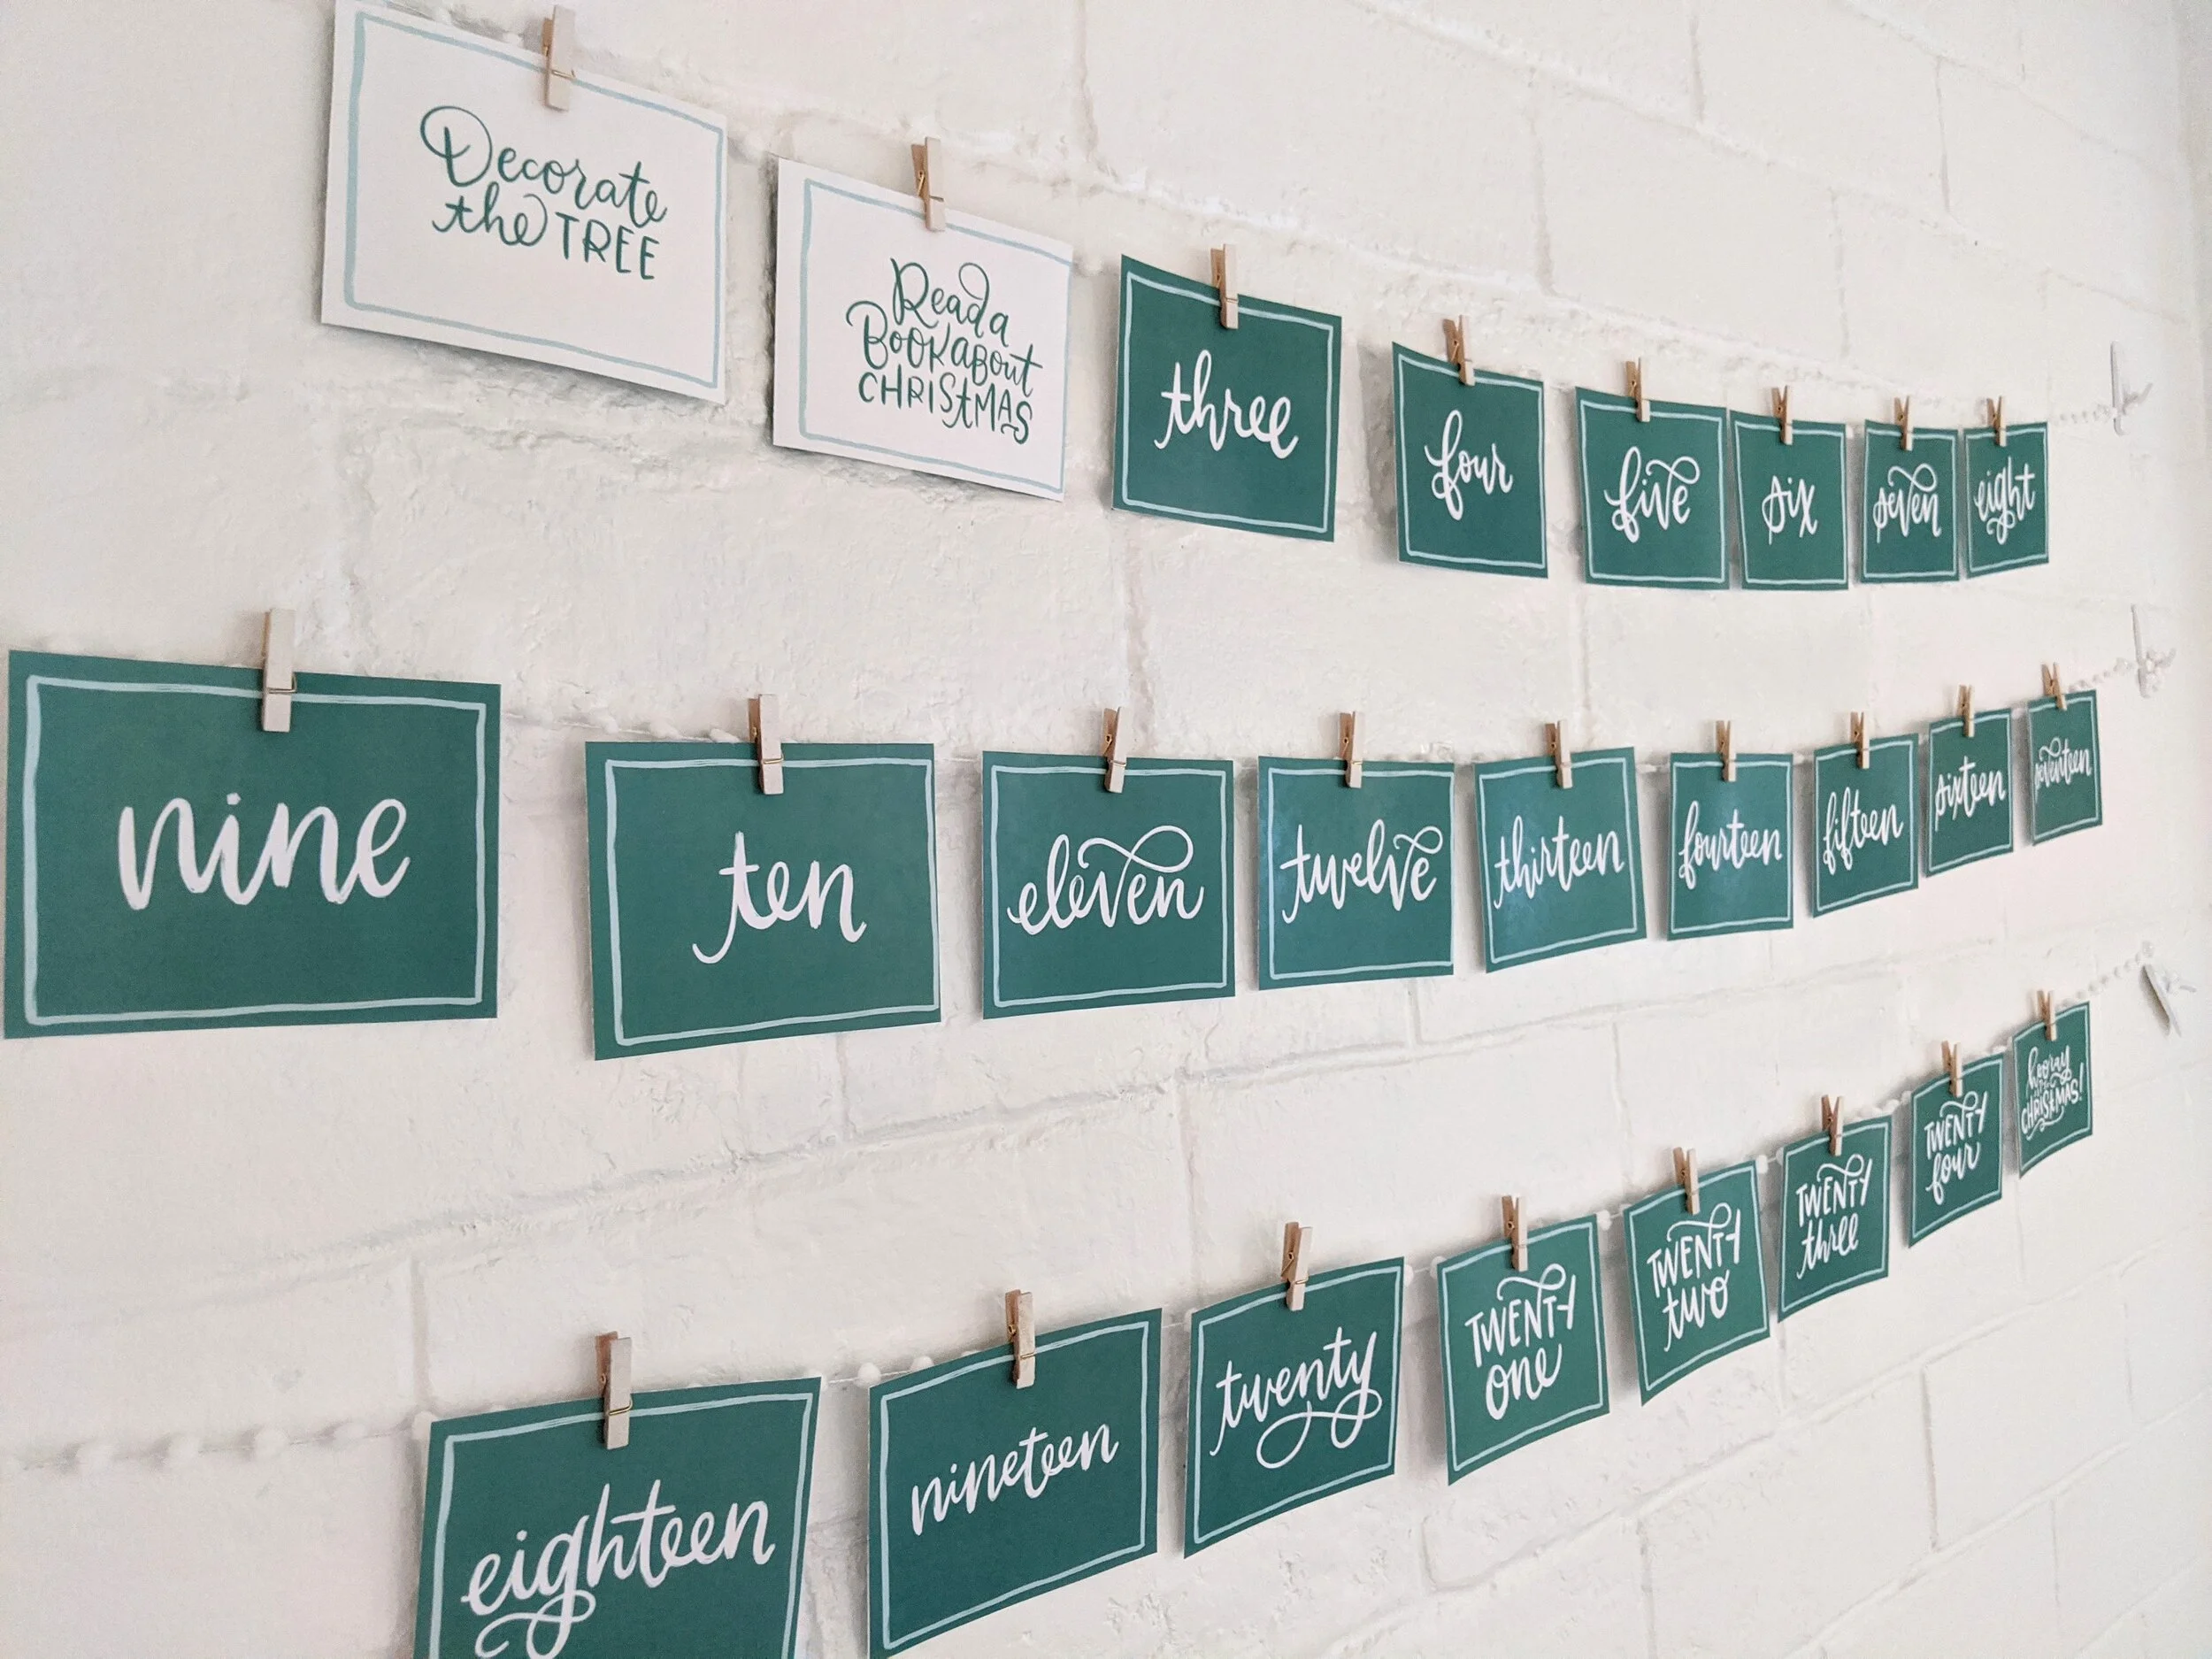
First thing you want to do is make a plan for how you’re going to arrange your envelopes on the wall/board you’re using. You can crunch some numbers here, calculating the square footage of your space and dividing that number by the area of your envelopes and… okay, I didn’t do any of that. My super precise way of doing it? I cut some string the length I wanted it on my wall and clipped envelopes on it to see how many I could fit. I could fit 9, so I decided to have 3 rows — 2 rows of 8 and 1 row of 9. If you want to calculate it and be super precise, be my guest… but this way works just as well.
If all your envelopes are the same color, you can skip ahead to Step 2. But if you are using different colored envelopes like I did, you’ll want to decide on a pattern. I laid everything out on the table in rows, rearranging colors until I felt I had a nice balance.

Then I took notes on which color went where — DR for dark green, P for pink and so on. I also made note on which days of the week each date fell on. This won’t be super important until you draft up your cards, but definitely worth noting as you create your legend.

STEP 2: SCRIPT & EMBOSS
Once you have an arrangement for your envelopes, you can start scripting the numbers. Now you can do this in a brush pen and it would be totally fine! If you choose this route, I recommend the Spectrum Noir metallic markers, especially if your paper is dark. These markers are so shiny and opaque, making them ideal for colored envelopes — plus, we could always use more sparkle and shine at Christmas! I adore those brush pens, but for this project, I wanted to do something a little different: embossing.
To emboss, you’ll need a brush embossing pen, embossing powder and a heat gun (and psst… all of these are currently on sale!). And if you want to go even MORE extra (extra-er?), you can get embossing powder with glitter in it. Paper Source calls this type of powder “tinsel,” and the name is accurate. And a little bit of this powder goes a long way. I still have powder from tubs I bought years ago, and I do my fair share of embossing.
Here’s how it works. Script out your number with the embossing brush pen. The “ink” is like a glue, and will go on pink (though if you use a red envelope like I did, it will be nearly impossible to see, so good luck with that!), but will eventually dry clear.

Before it dries, pour embossing powder over every part of the word you scripting. The powder will stick to the glue and the rest will come off with a few taps. You’re going to use a LOT more than you actually need, but that’s okay — just put the leftovers back in the jar.


The last step of the embossing process is to go over your newly dusted work with a heat gun. The heat melts the powder, and you now have a raised, shiny or glittery surface. Yes, technically you could use a blow dryer for this. But if you enjoy this technique, just get a heat gun. It’s way easier and faster than a blow dryer — promise! If you want to see how it works in person before you buy, Paper Source employees are always on hand to do a demo.


Personally, I like to script and add powder first, and then do the heat gun in batches. It takes a minute to warm up, so it’s more efficient to save that step until the end — and we’re all about efficiency here!
STEP 3: HANG YOUR ENVELOPES
When you have all your numbers scripted on your envelopes, you can hang those bad boys up! If you used my method of measuring, first, you’re a genius. Second, use some painters tape or light masking tape to attach the string to the wall — don’t worry, we’ll class it up a bit more than that.

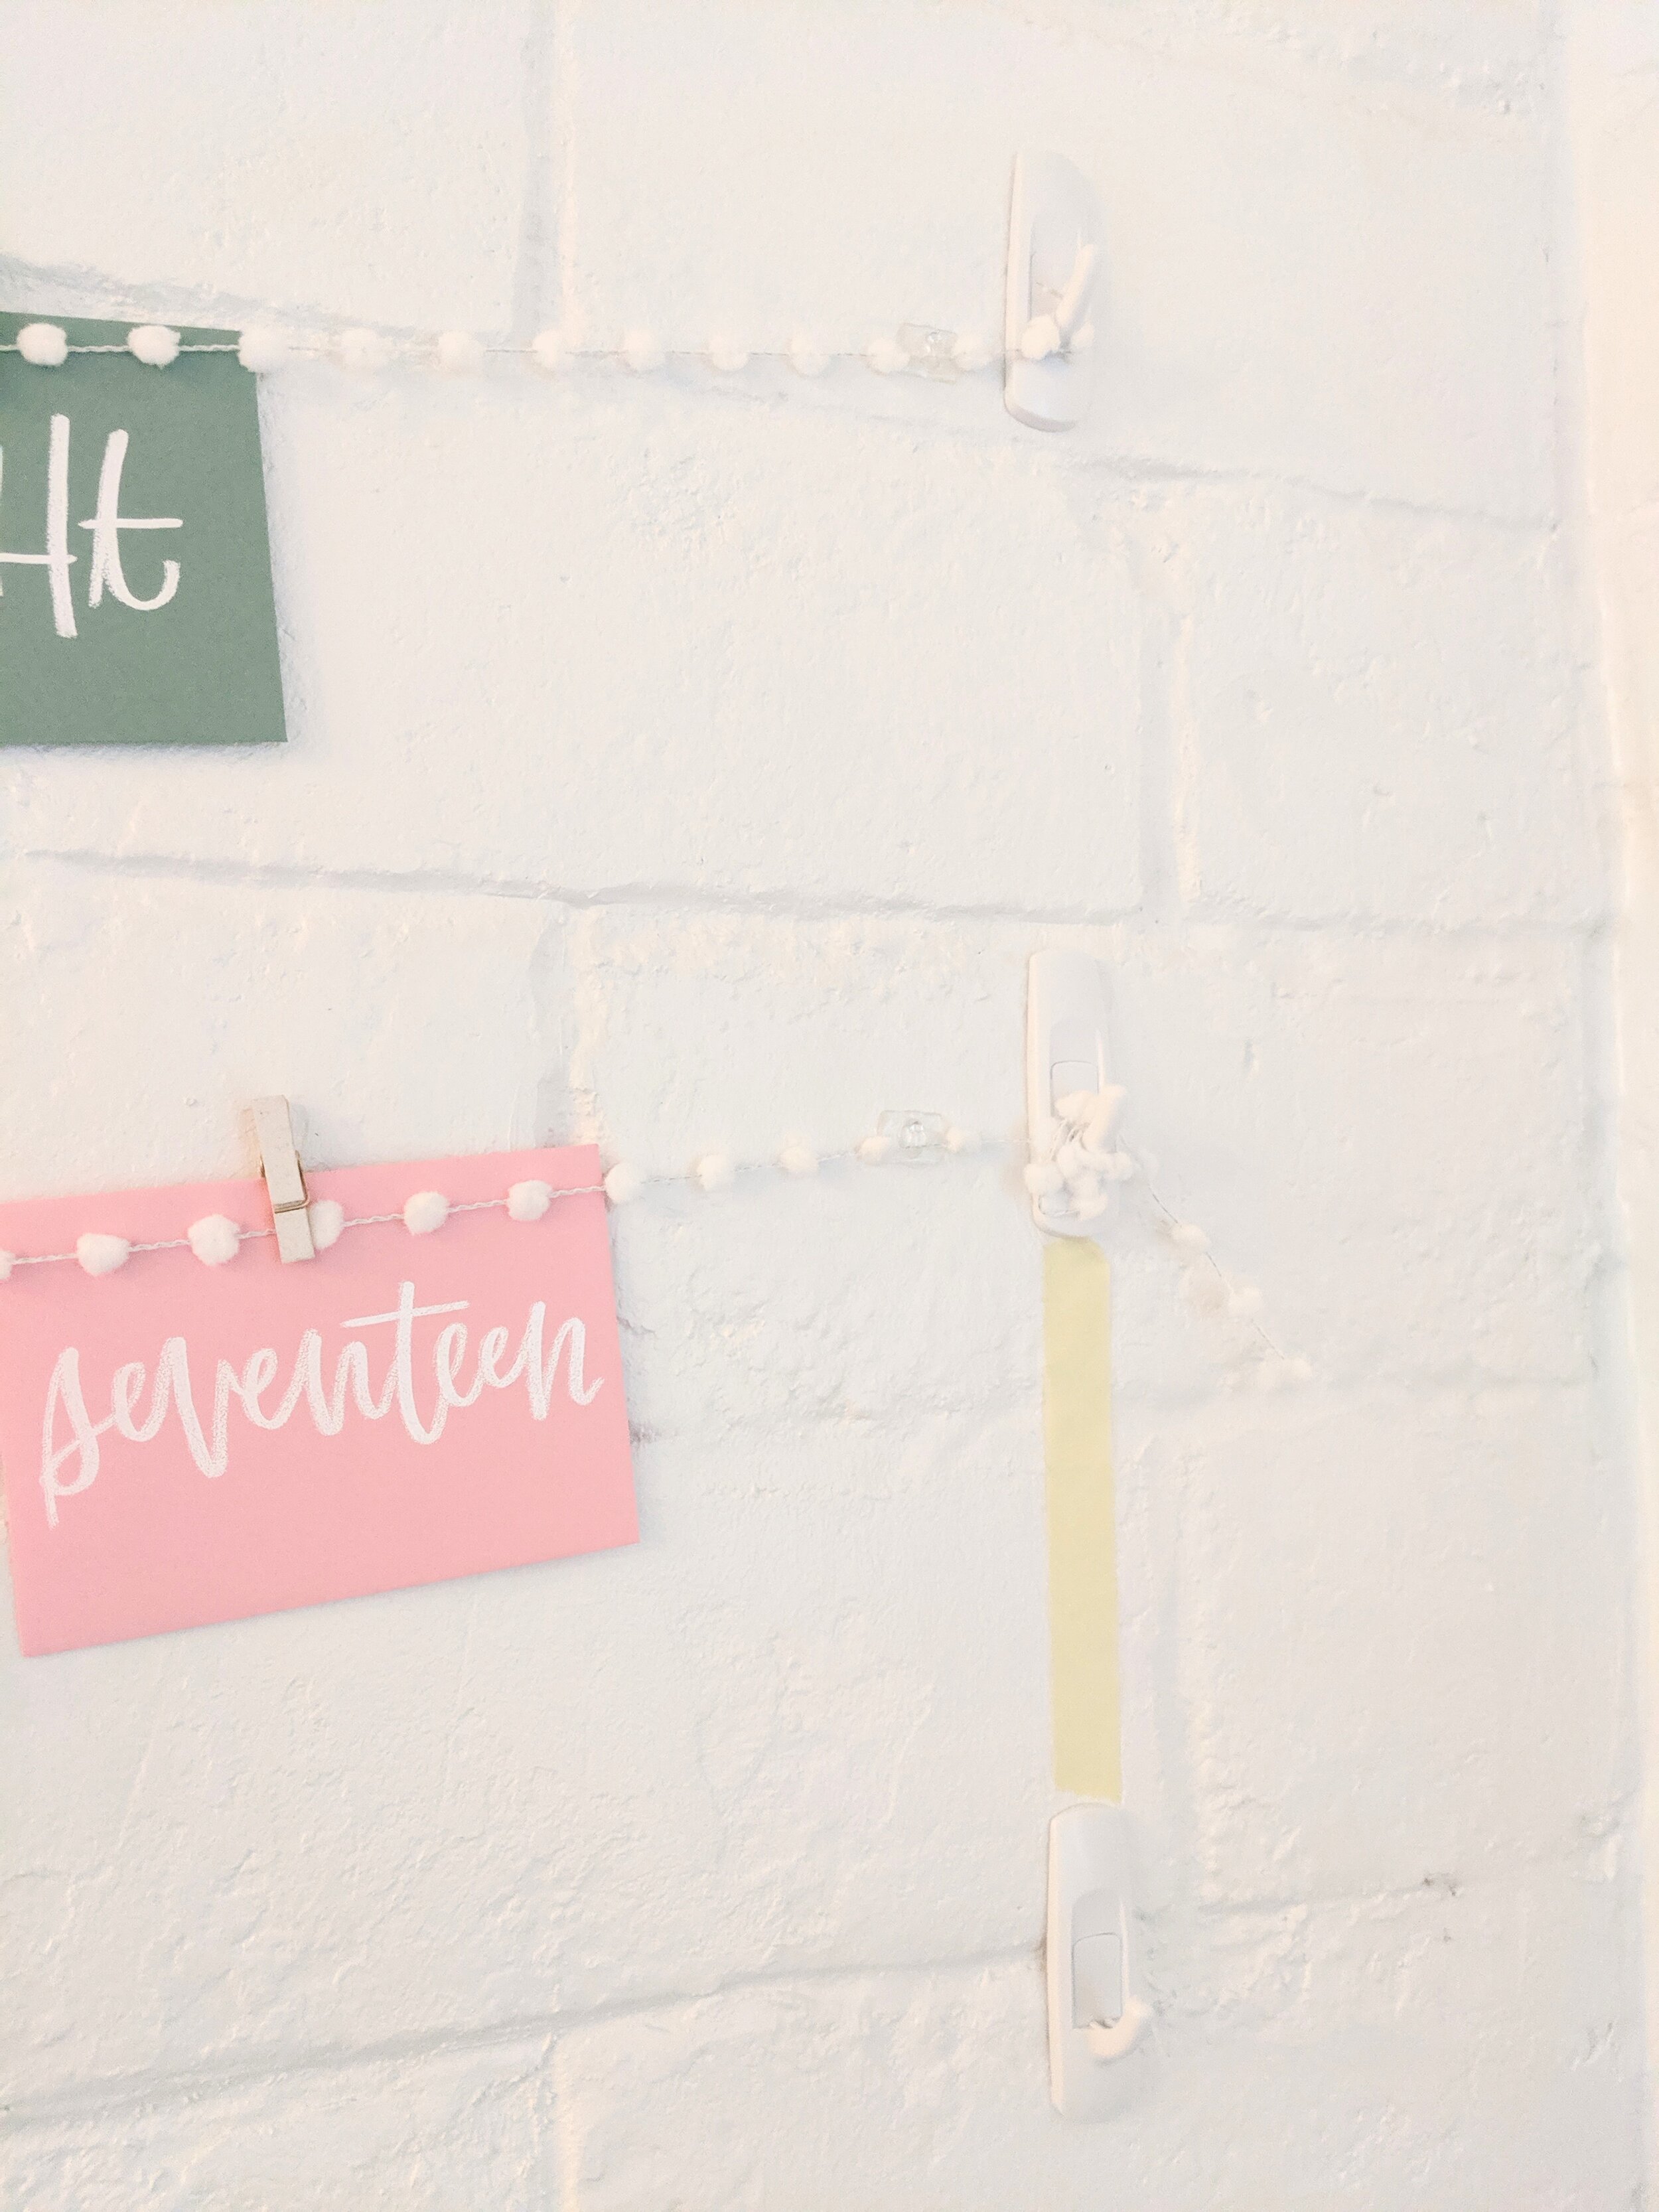
Stand back and make sure it’s centered right where you want it. Then we’re busting out the little miracles known as Command Strips. I seriously love.these.things. They come in all sorts of sizes and really do come off the wall clean. Not sponsored by Command, just a real Command Stan. Attach the hooks to the wall using the string as a guide and making sure you have enough string on either end to loop it around the hook. Hook size doesn’t matter — these are actually a littler larger than I was planning on using, but it’s what we had at home and it totally worked. Because I had a very loooong hanging string, I also added a few of the clear clips to give it extra support. Necessary? Probably not. But I was not — repeat, NOT — going to find my beautiful work crumpled in a heap on the floor.
If you have multiple rows like I did, repeat the process as needed. Here’s a little tip for even spacing that doesn’t involve rulers: use a piece of masking tape. Cut a piece of tape the length of the distance you want between your rows — no need to measure, just eye-ball it. Place the tape under your hook, and then stick your new hook directly under the tape. See picture below. The tape will unstick and restick several times, so you’ll be able to finish hanging your string with just that one little piece of tape… and it will go WAY faster than using a ruler. You’re welcome.
Now you can hang your envelopes on the string with your mini clothespins — seriously, how cute is this?! You’ll have to take them off as you stuff the envelopes, so if you prefer to only hang them once, you can wait until you finish the next step.

STEP 4: CREATE YOUR CARDS
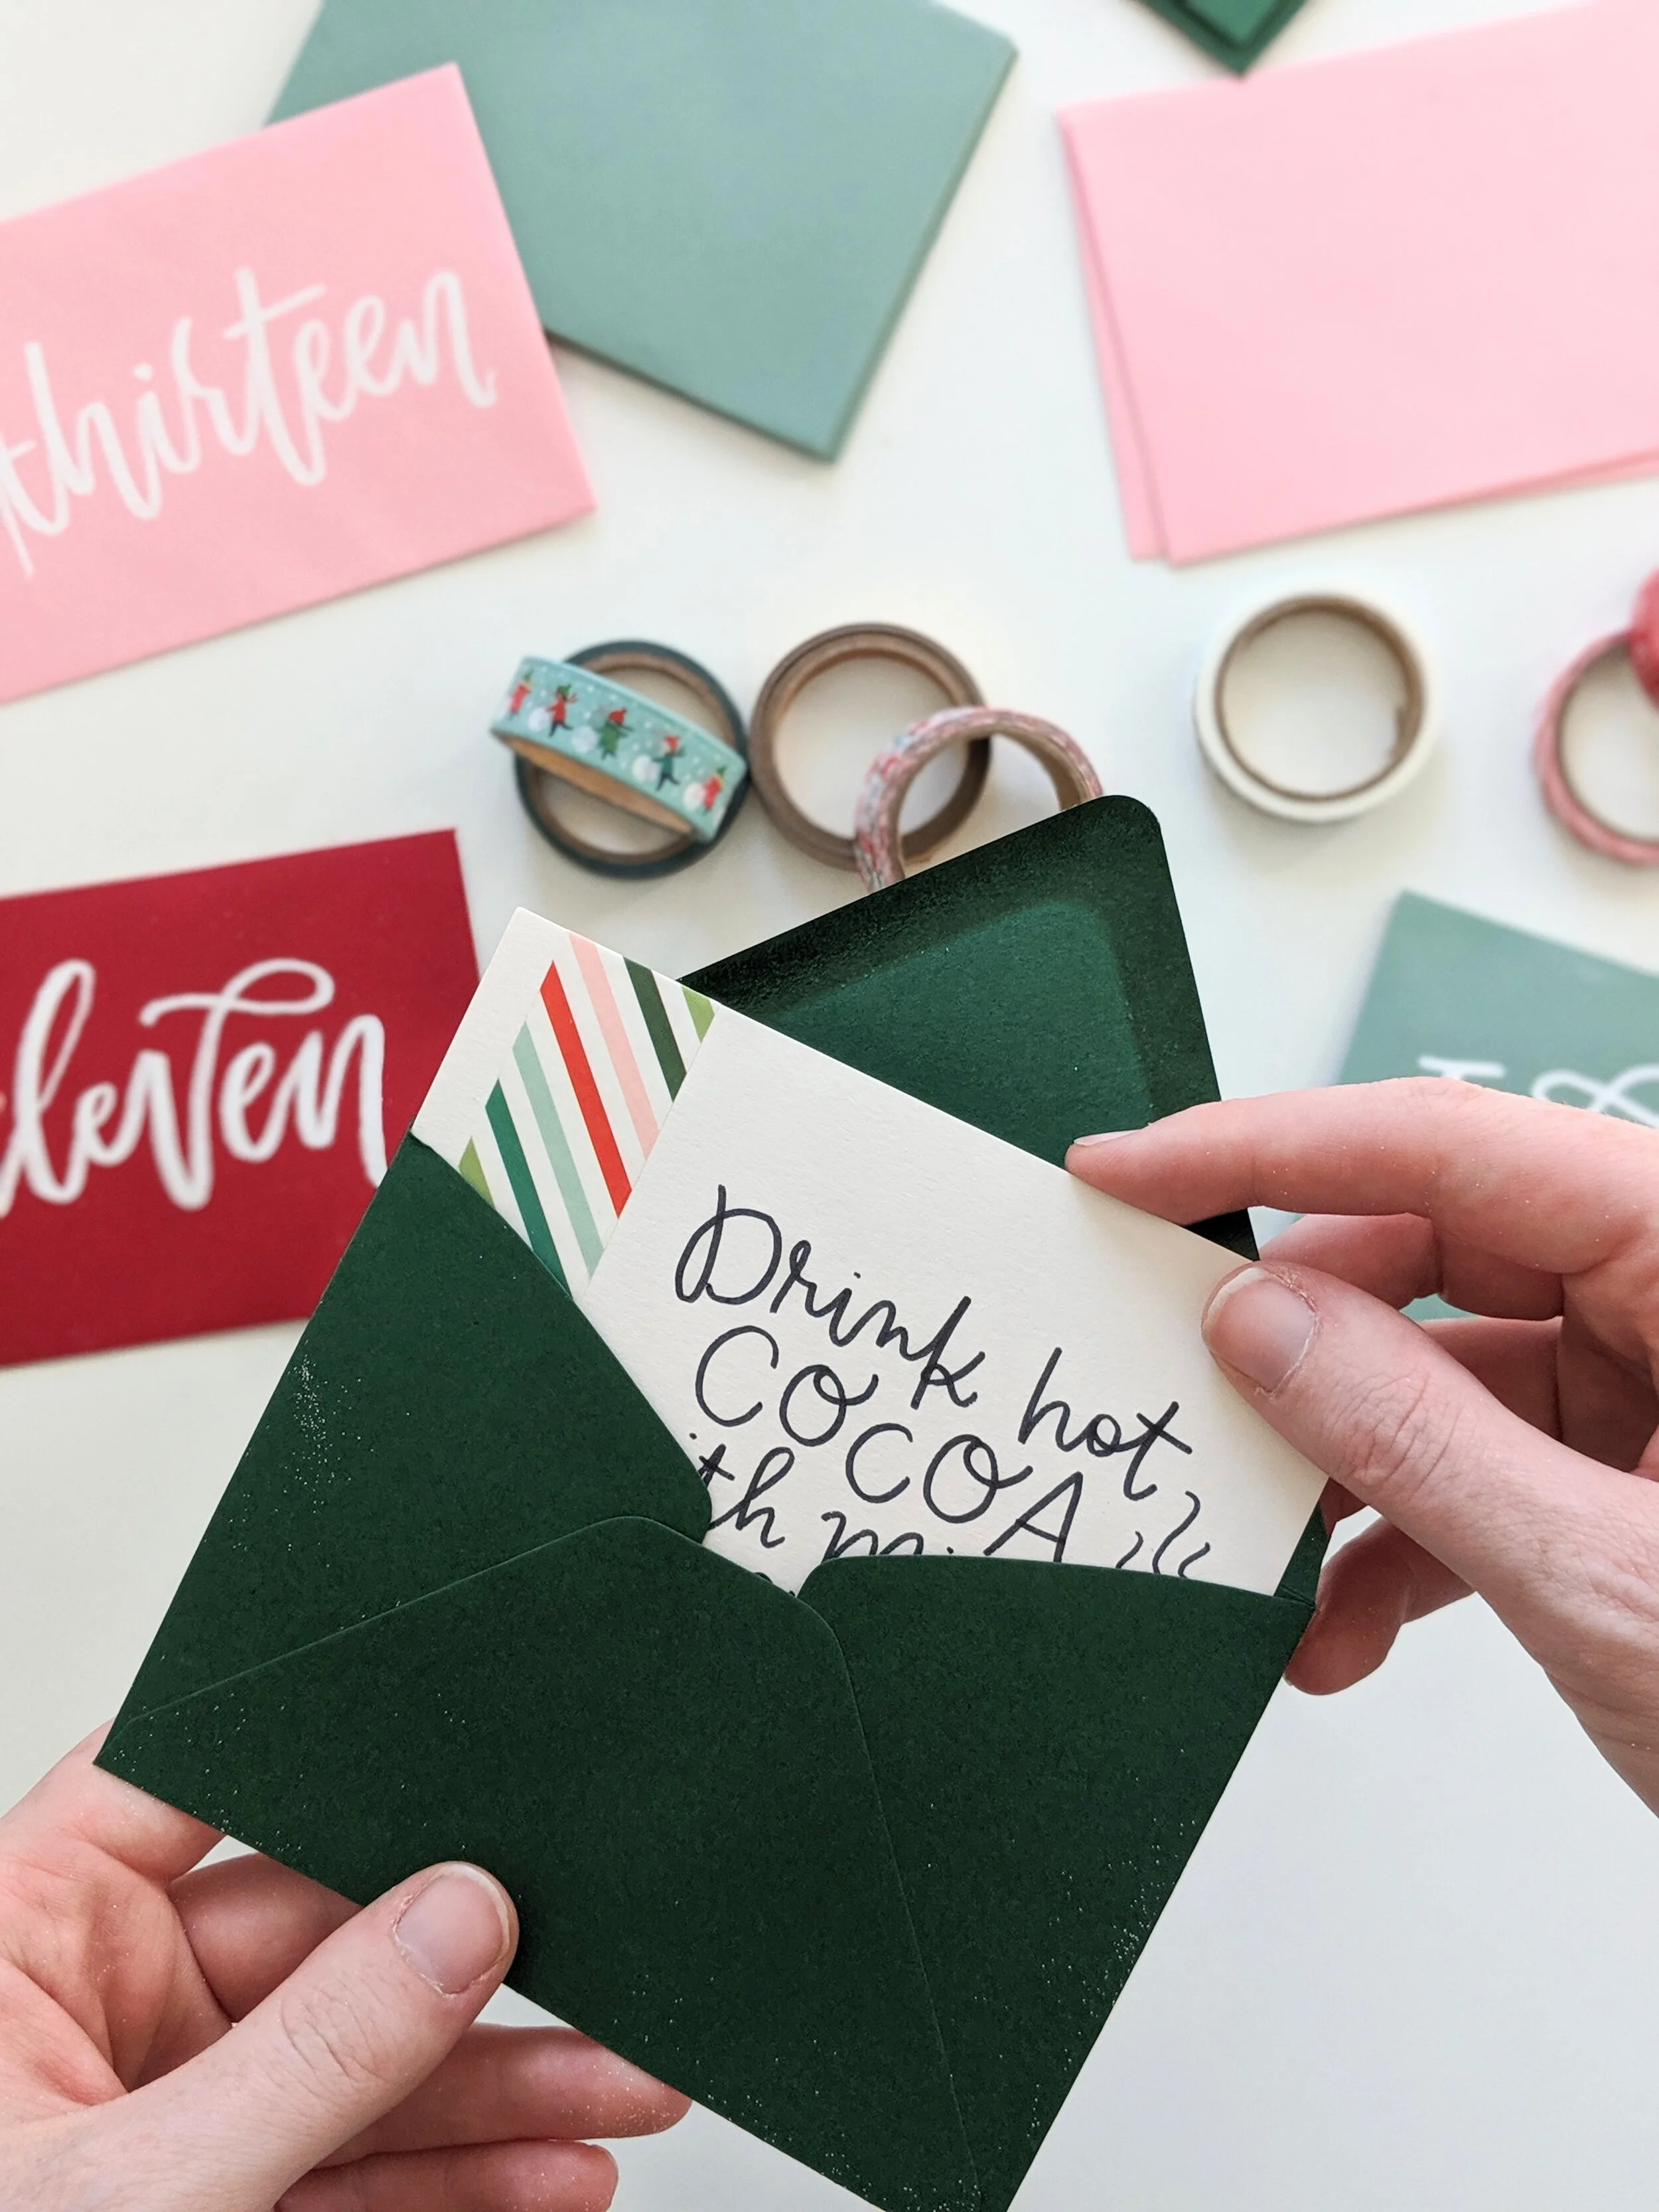
The last step is honestly the most fun: creating the cards to go in your Christmas Countdown Calendar! First, I decorated my cards with coordinating holiday washi tape. I applied it to a bunch of my 4 bar note cards in different patterns. Honestly, I really loved the way they turned out!

Next it’s time to fill those bad boys with fun, festive holiday to-dos. And listen, I get it — 25 activities can seem like a LOT. But you probably already have some scheduled. In fact, this is a good excuse to sit down and look at your holiday calendar. I always get super overwhelmed in December with coordinating everyone’s schedules, and I’m not sure why it only occurred to me in my 33rd year of life that I could handle it better if I scheduled everything in advance. Have you ever heard of “planning in advance”? It’s really life changing.

Anyhoo, I’m going to walk you through how I did it. If you already have your own system of organizing the holidays, girl GET IT. Feel free to just gloss over this and meet me in the next section. First, I asked around the family what everyone wanted to make sure they did this holiday season. My husband wanted to look at lights, my mother-in-law wanted to decorate gingerbread houses and I gotsta get my craft on. I jotted down these items to come back to later.
Next, I started with my cards for the weekends since this is when we’ll have the most time and the bulk of our events. Some were easy because we already had events scheduled. For example, “take a holiday road trip” on a day we’re traveling, and “have tea with the Sugar Plum Fairy” on a day we’re attended a pretty adorable event in Scottsdale. On weekends we didn’t have anything firmly scheduled, I added in those family events everyone wanted to do: “decorate gingerbread houses with Nana,” “look at Christmas lights”, “have a cousin craft day,” etc. Weekends are also a good time to add in activities for things you wouldn’t have time to do on a weeknight, like taking cookies to neighbors or having a Hallmark movie marathon (admit it, you’ve done it).
Next comes the tricky part: the weekdays. Sure, it would be awesome to fill all the days with Norman Rockwell-esque holiday activities, but this is the real world and you guys, I’m just so tired. With the help of Pinterest and my big-ass brain, I compiled a big ol’, Santa-belly-sized list of low effort/high holiday factor activities for my little family. Here is everything we have on our list, sans the special events and plus a few extras that didn’t make the cut.
Decorate the tree (okay, technically, this isn’t low effort, but we put up a tree anyway, so add it to the list!)
Read a book about Christmas
Listen to Christmas music
Drink hot cocoa
Donate 3 things to Salvation Army
Watch a movie starring Santa Claus
Bake cookies (you can change this to “eat cookies” if baking isn’t in the cards)
Build a snowman (… and when you live in the desert, you build snowmen with marshmallows!)
Color a Christmas picture
Eat a candy cane
Take a walk and look at neighbors’ decorations
Make a Christmas card
Watch a movie starring a reindeer
Christmas shopping!
Eat gingerbread
Drink egg nog
Write a letter to Santa
Wear a Christmas outfit
Read a book about giving
Wrap presents
Deliver treats to neighbors
Kisses under the mistletoe
Sing Christmas carols
Track Santa’s flight (you can do this on Christmas Eve on the NORAD website - so.much.fun)
Super low effort, right? Of course, you can go all out as well. But for me, I gotta stick with easy during the week or I’m gonna fall off the countdown calendar wagon real quick. Once you have finished your cards, put them in the envelopes and start opening on December 1!

After you pull out each day, just clip the card in front of the envelope. Ahhh, it’s so cute, I can hardly stand it!

… YOU SAID SOMETHING ABOUT PRE-MADE?

Why, yes I did! Look, I get it. This is a busy time of year. And as much as you may want to do a fun DIY, there aren’t always enough hours in the day. So I have a premade Christmas Countdown Calendar for you to download, print and hang — doesn’t get much easier than that! Each card features calligraphy by yours truly, plus the low effort/high holiday factor activities I listed above. You can print double-sided on cardstock at home OR you can do what I did and let Staples do the work. Either way, you’ll have a super fun Christmas Countdown Calendar in less time than it probably took you to read this blog post (I know, I’m wordy).
You can get your Printable Christmas Countdown Calendar here.
Will you be making a Christmas Countdown Calendar this year? Have any ideas for holiday activities to add? Bonus if they involve food. Let me know in the comments below!