Send Some Love: Valentine’s Mail Art Tutorials
I know it’s en vogue to hate Valentine’s Day, but damn it, I can’t. Truth is, I LOVE this holiday. Candy? Check. Flowers? Check. Heart-shaped everything, cutesy food puns and pink on pink on pink? Check, check and check. While my favorite part of Love Day is heart-shaped food (hubs and I get a heart-shaped pizza just about every year because we are adorable), my second favorite part is exchanging Valentines. And I don’t think kids should get all the fun.
That’s why today I’m sharing two super cute Valentine’s Day mail art tutorials so you can do a little card exchanging of your own! To make things a bit easier, I’ve created templates you can download, print and trace. If you’re on the mailing list, they are already in your inbox. If not, you can sign up below. Without any further ado, let’s make some love! I mean, mail art! Whatever, get your mind out of the gutter.
Conversation Heart Mail Art
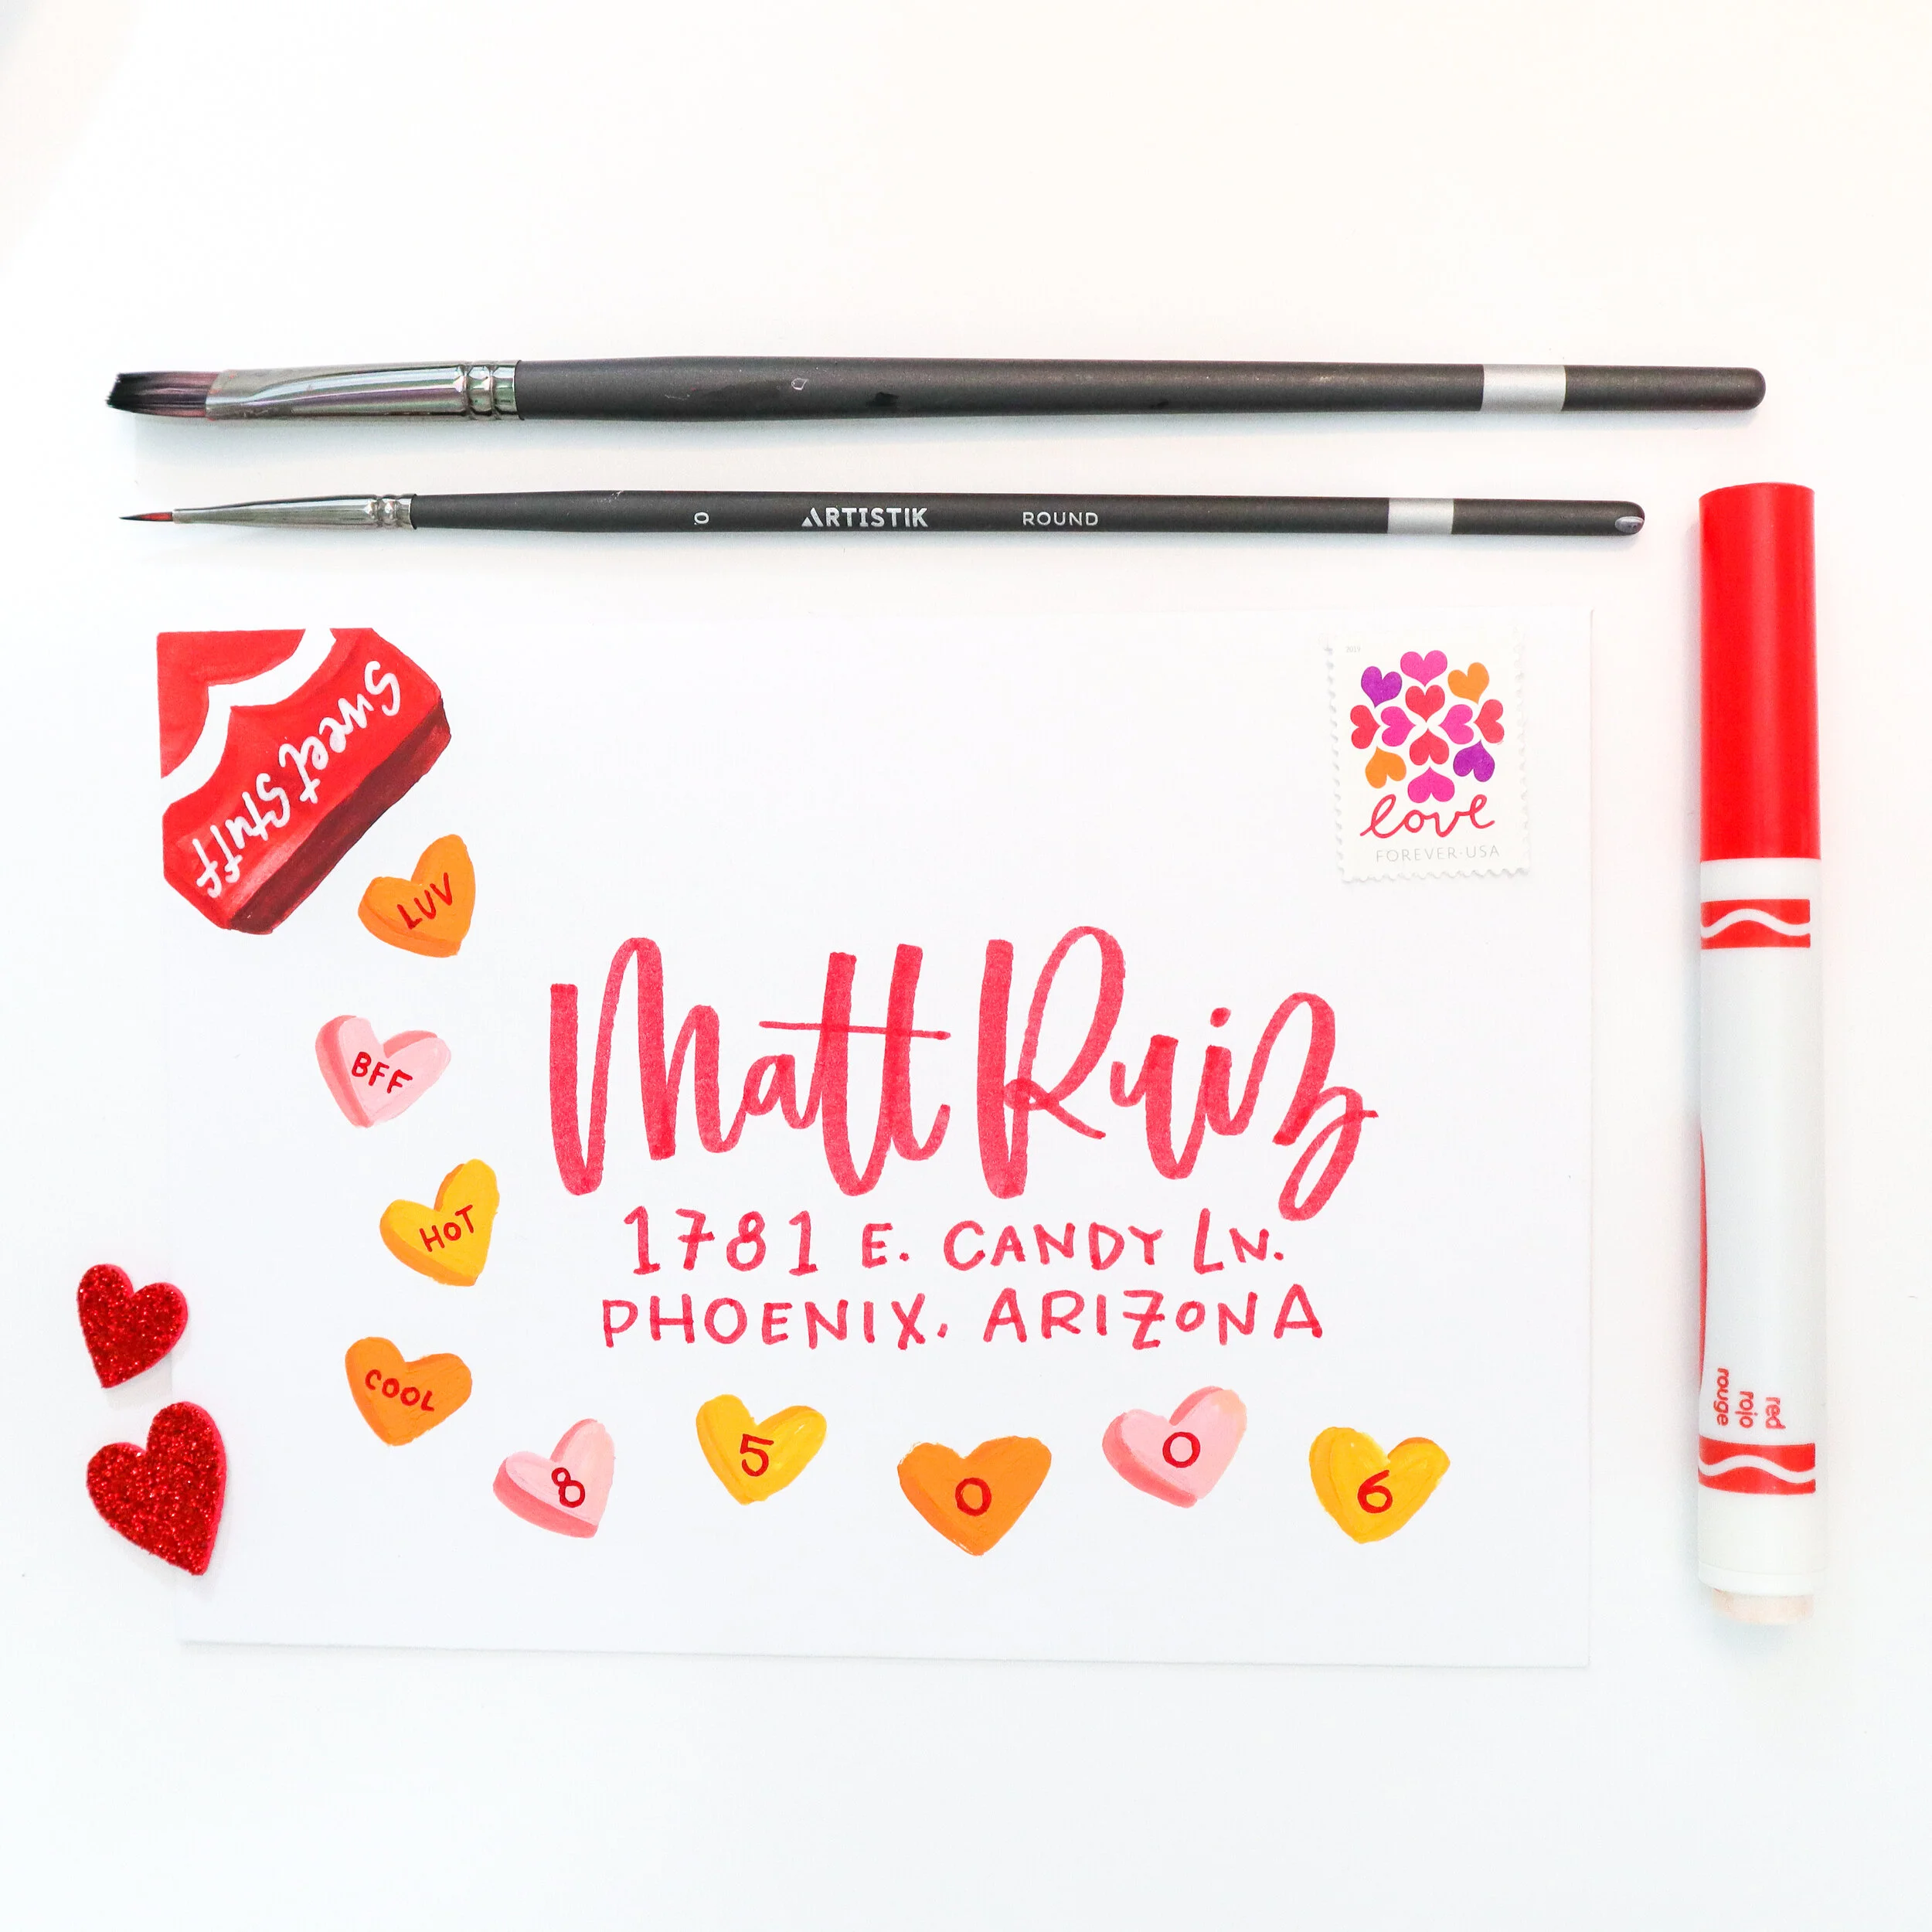
Another unpopular opinion: I love conversation hearts. The old school, Necco Sweet Hearts are the only acceptable option. To celebrate the best seasonal candy other than the Cadbury Creme Egg (I will fight anyone who says otherwise), I’ve created this pretty little envelope using a Crayola marker, acrylic paint and a fine-tipped red Sharpie.
Supplies
Template
White, unlined 5 x 7 envelope
Red marker (I used a Crayola Broad Line marker)
Red acrylic paint for box
Pink, yellow and orange acrylic paint for candy hearts
Small paint brush
Red fine line Sharpie
White acrylic paint pen (optional)
Directions
Print & cut out template. Slide into the envelope. You should be able to see the design though it. You can lightly outline in a pencil, or just trace as you go.
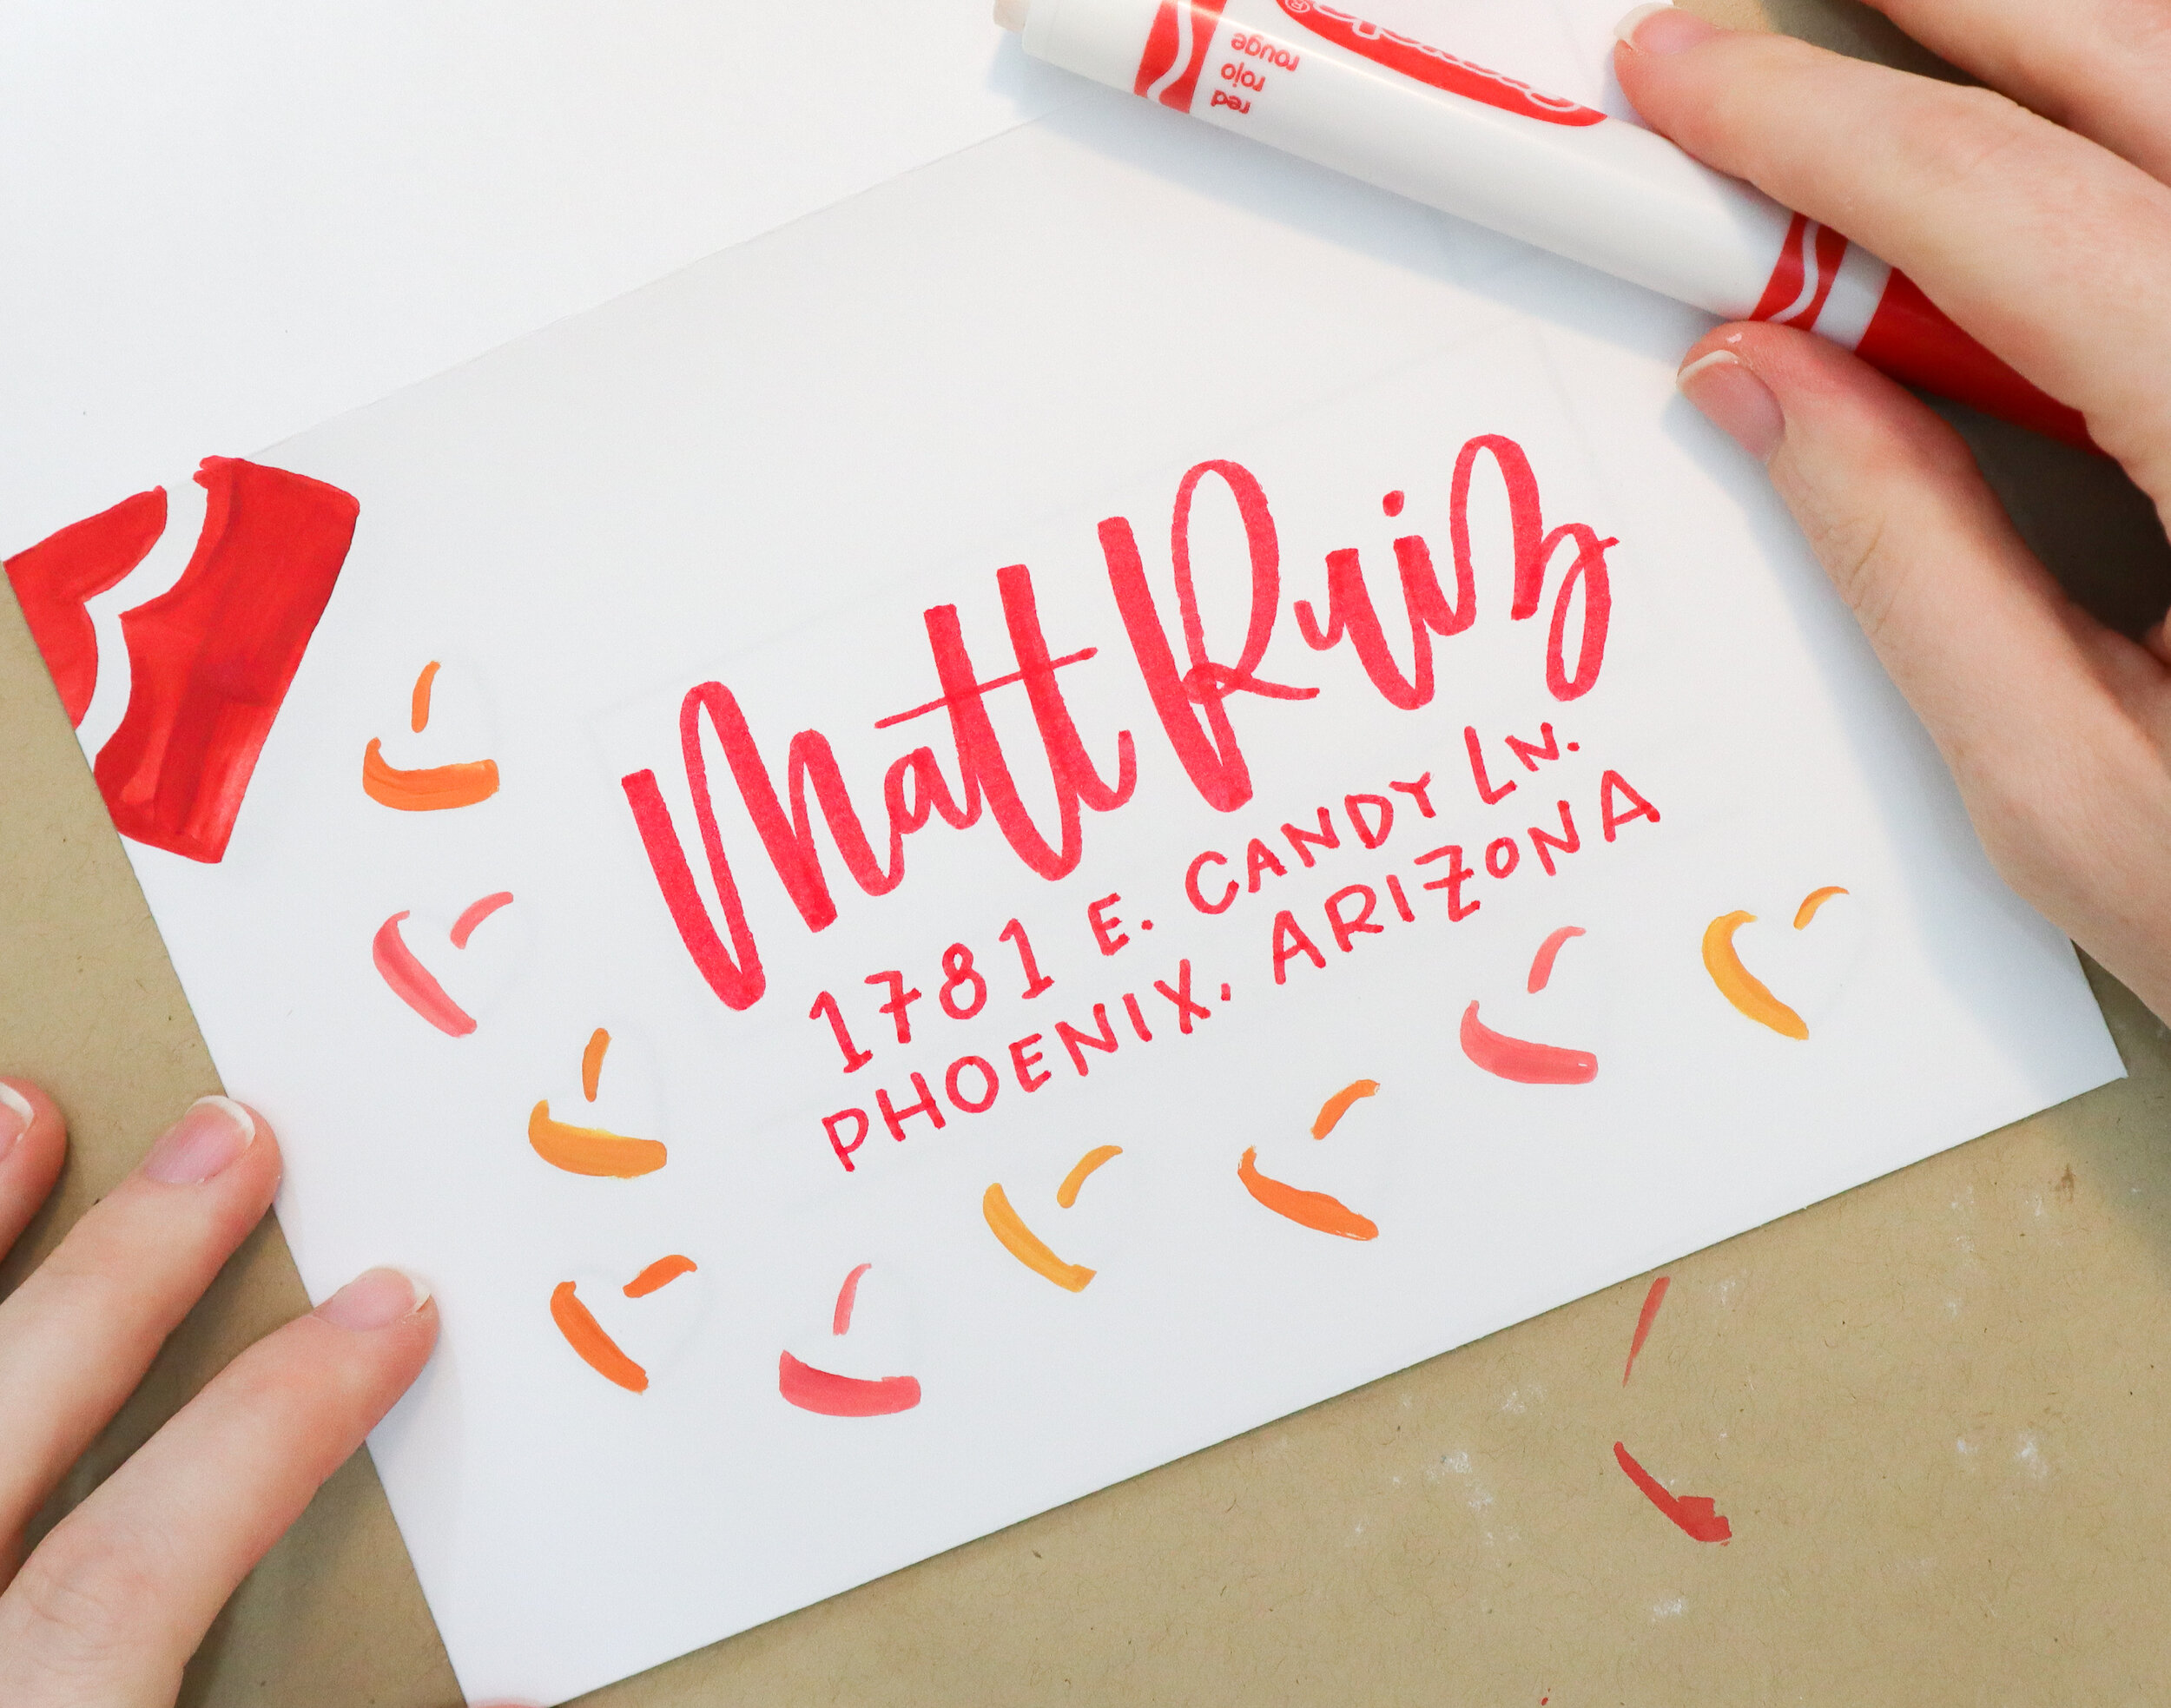
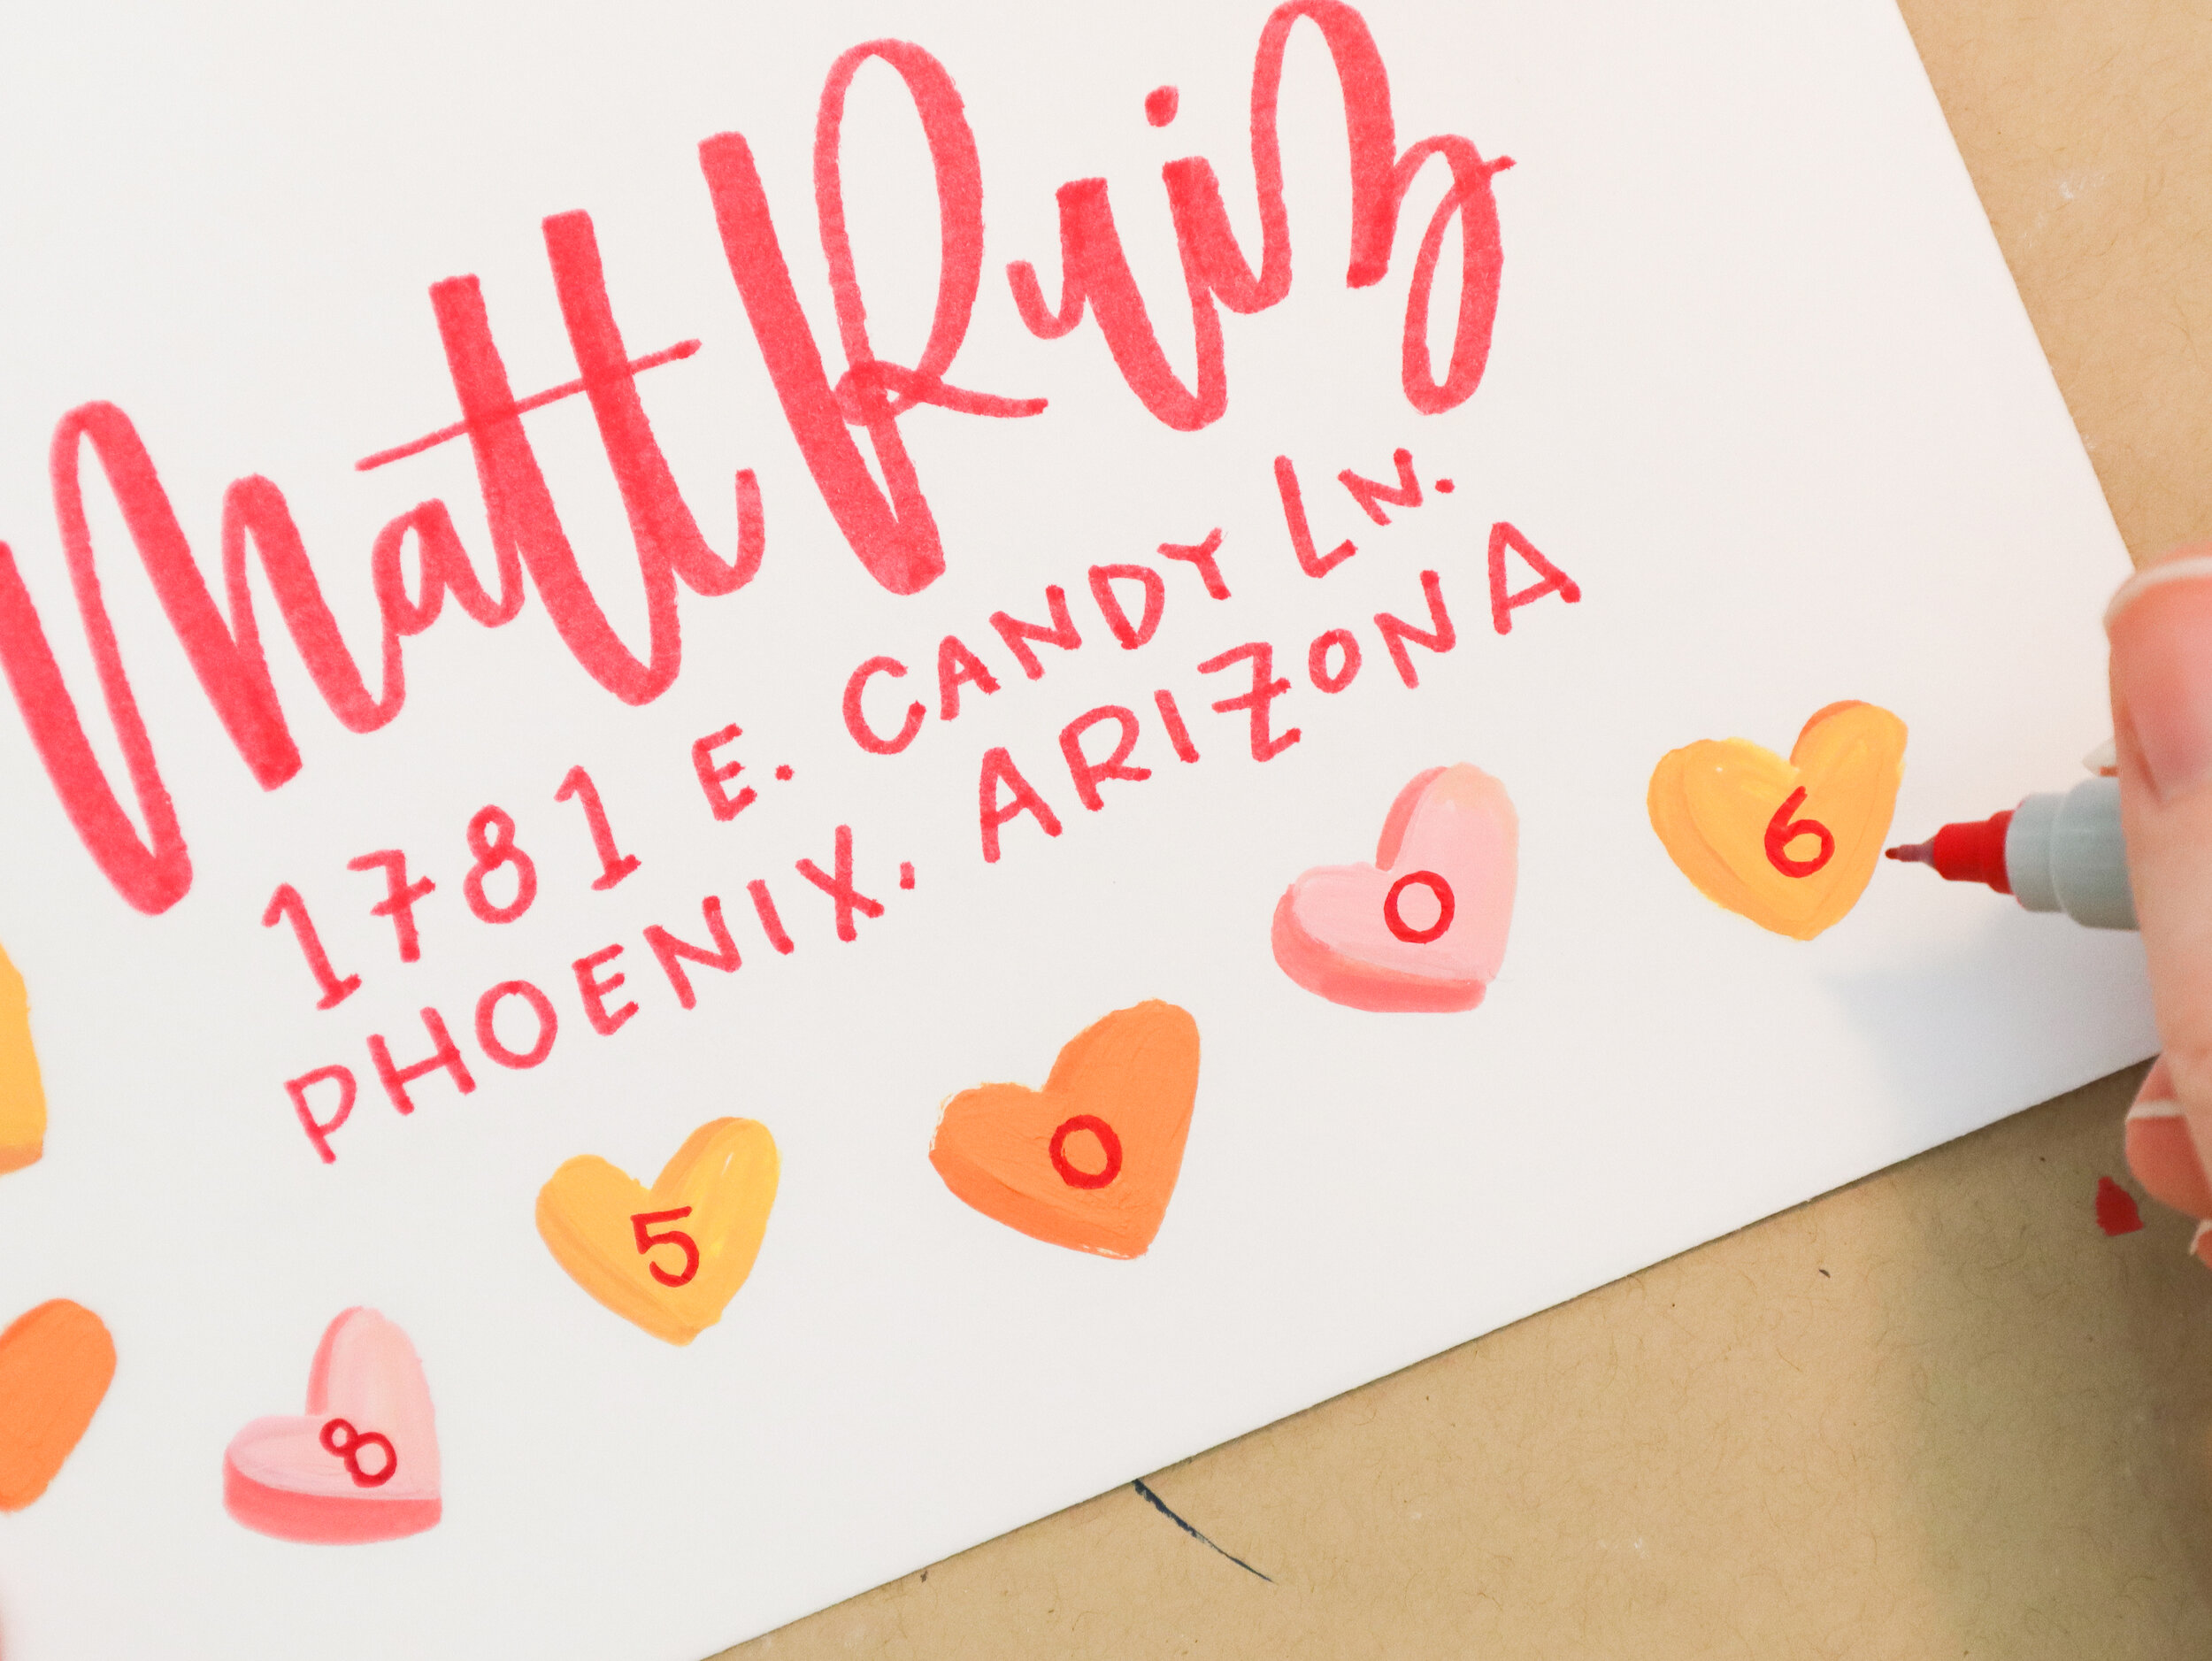
First, script the address without the zip code -- don’t worry, we’ll add that later. I used my red Crayola for the address.
Set up your paint palette (my palette was just a paper plate - use what you have on hand!). Make sure all portions of color are separated by at least an inch as you’ll be doing some mixing. I don’t have exact measurements for you here -- just eyeball it. For reference, a dollop equals about 2 dots.
Dollop of red
Two dots of pink
Two dots of orange
Two dots of yellow
Paint candy box red.
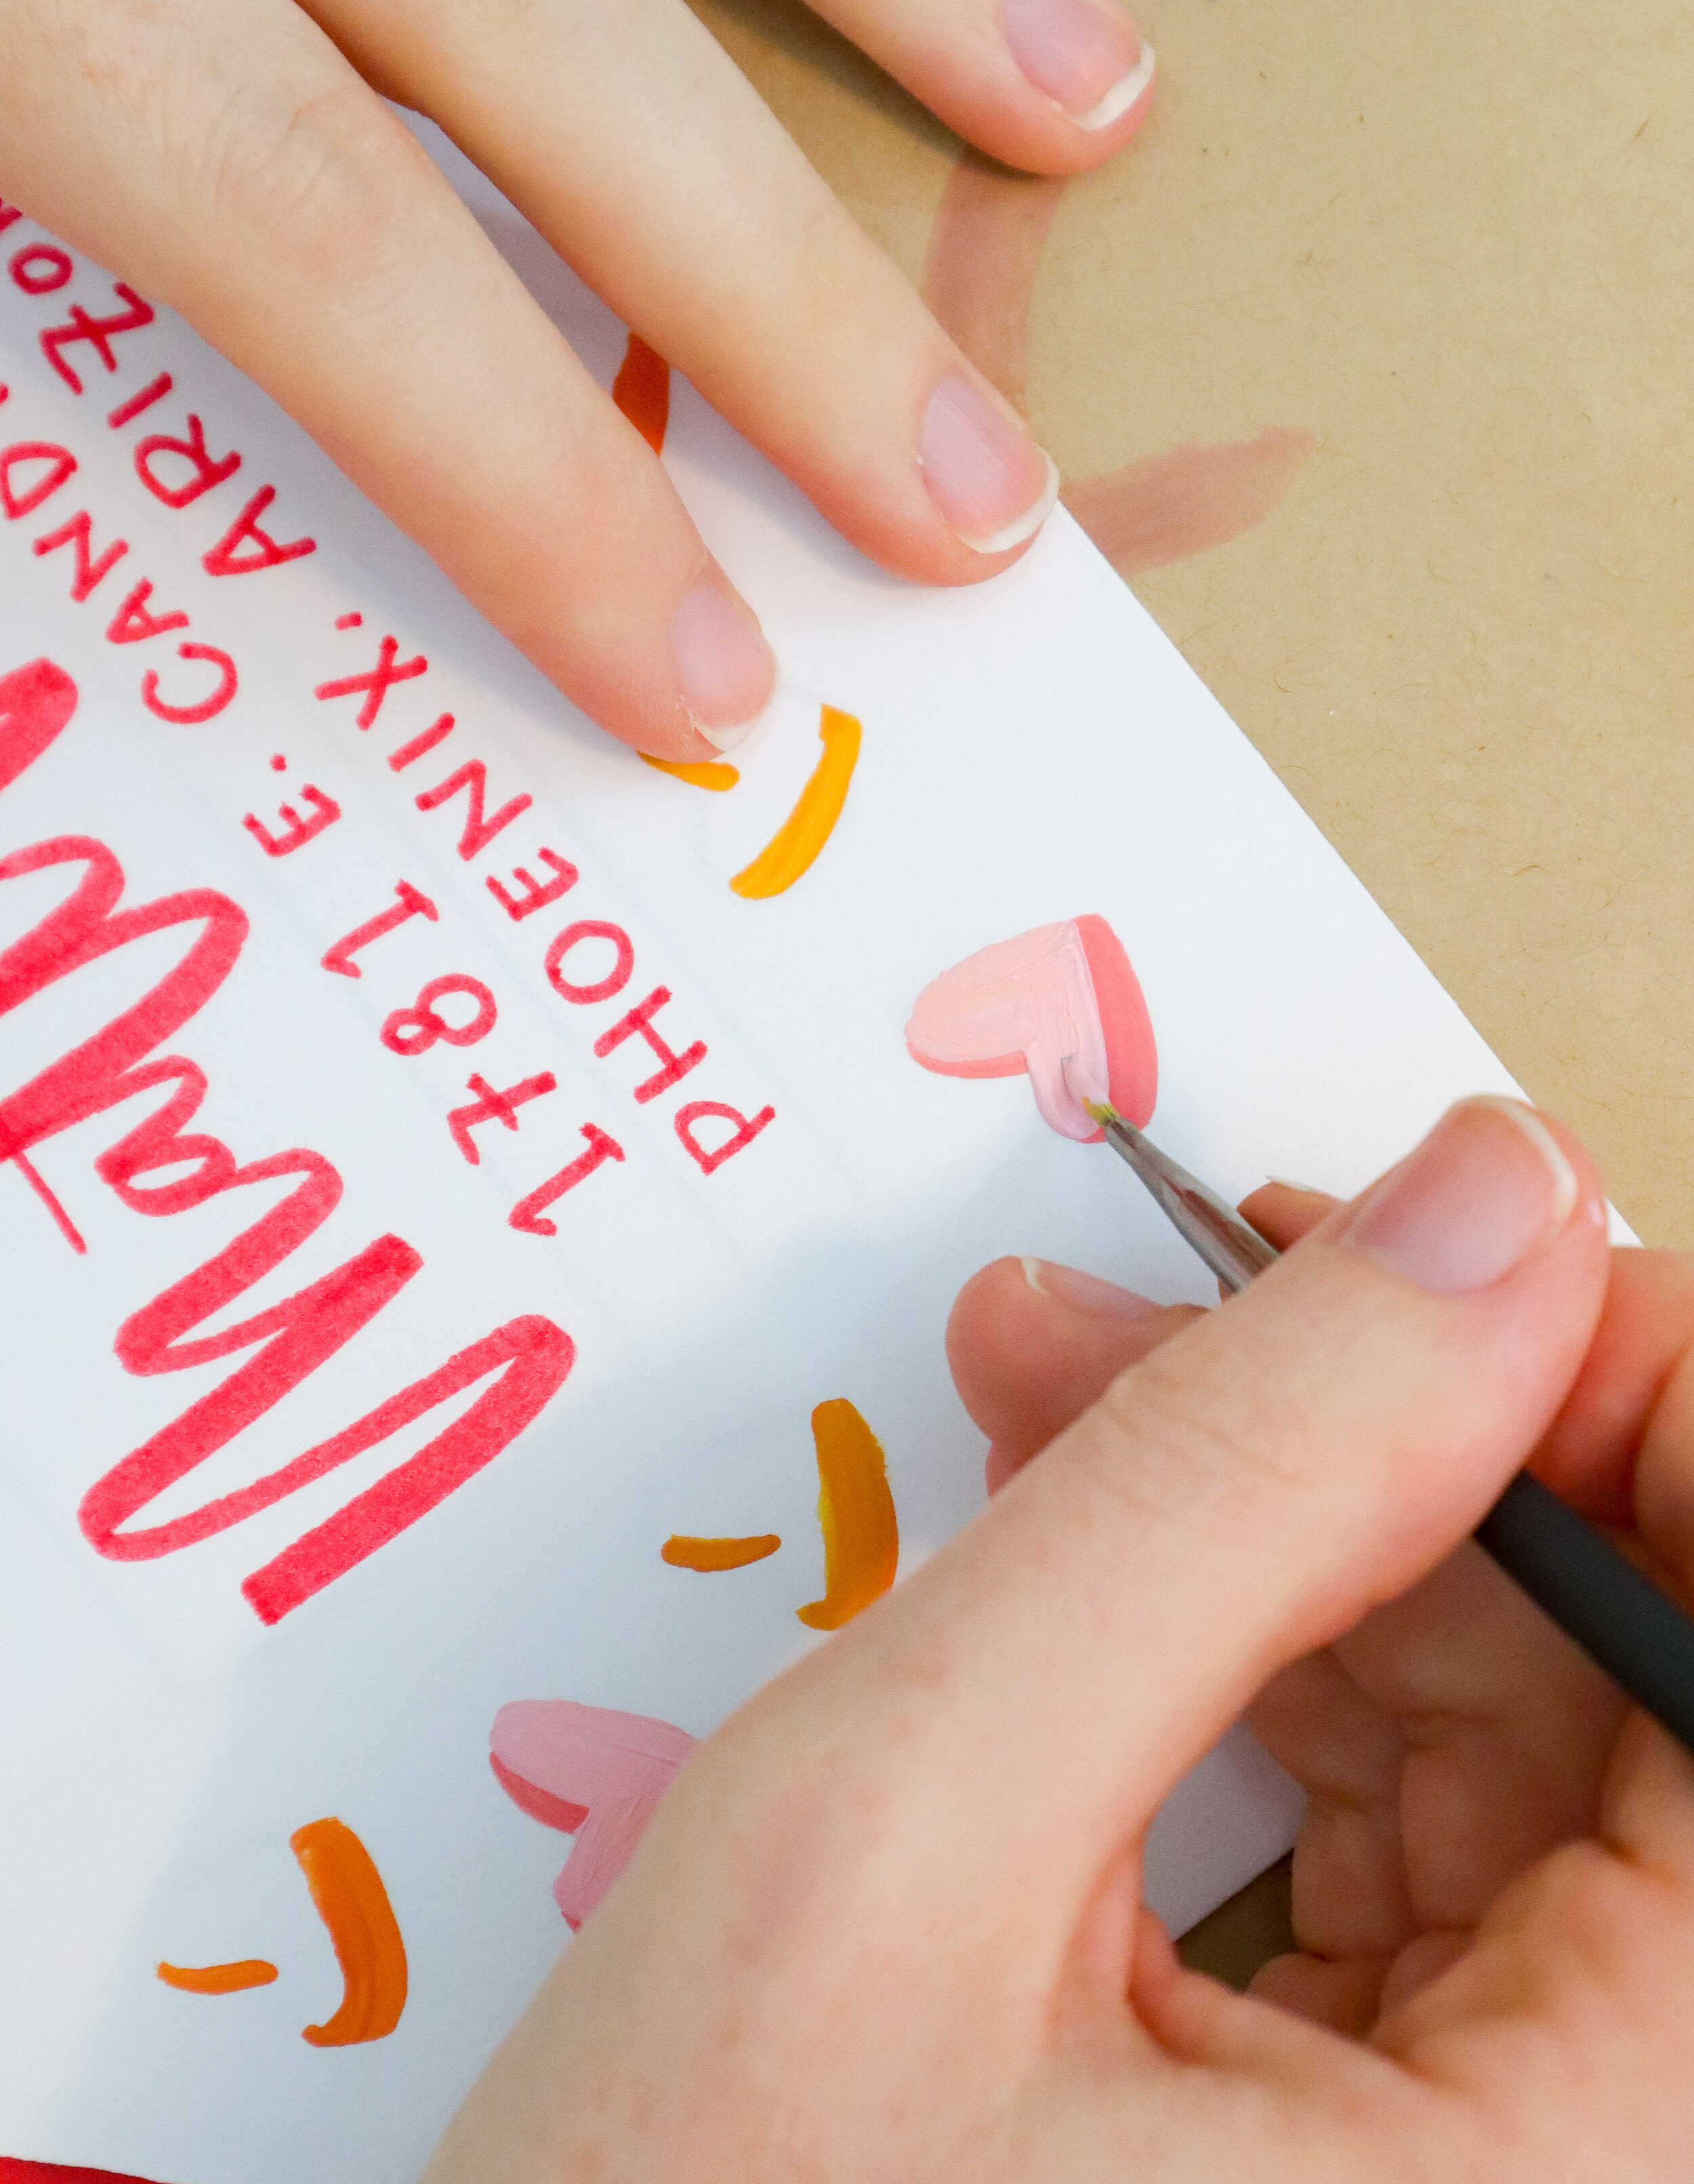
Mix a small amount of red (about half a brushful) into one dot of each color. This should be just slightly darker than the untouched dot. Paint this darker color in the shadow portion of the candy hearts. Let dry.
Using the untouched dots of paint, paint the heart over the corresponding shadow. Let dry.
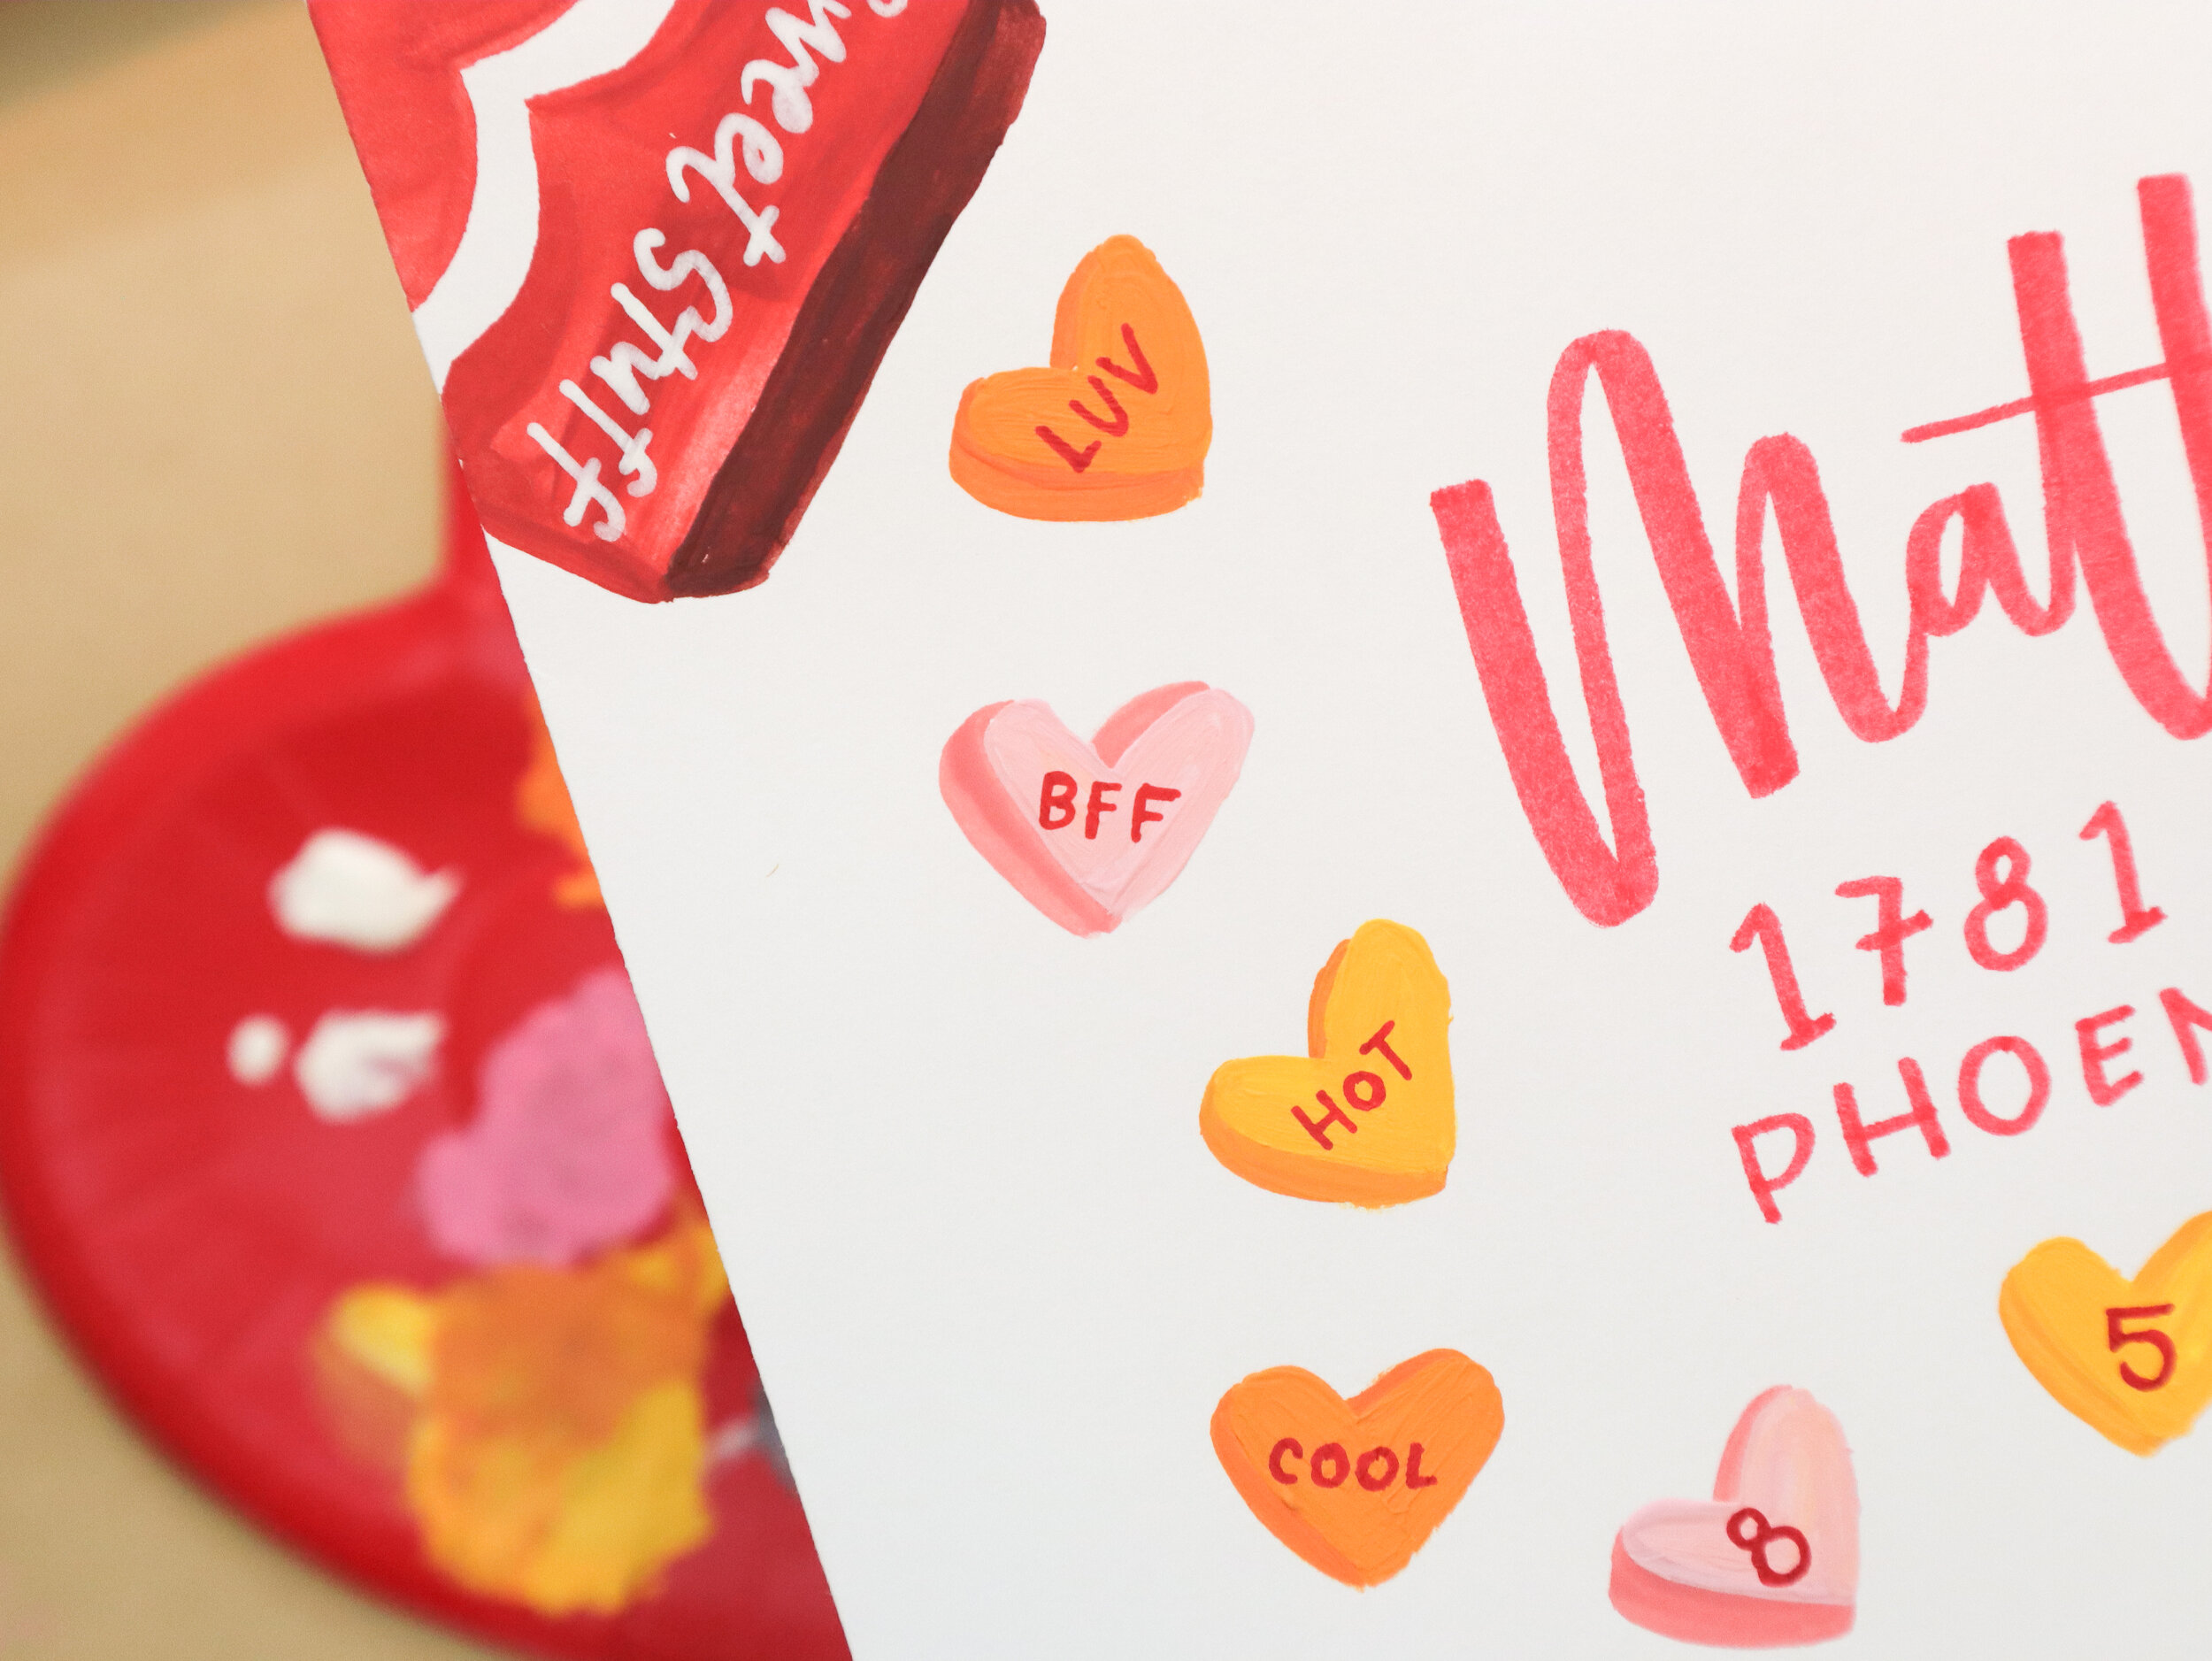
Use fine-tip red Sharpie to write phrases to the 4 candy hearts to the left of the address, and the zip code to the 5 hearts under the address.
OPTIONAL: Use the white paint pen to script the logo on the candy box.
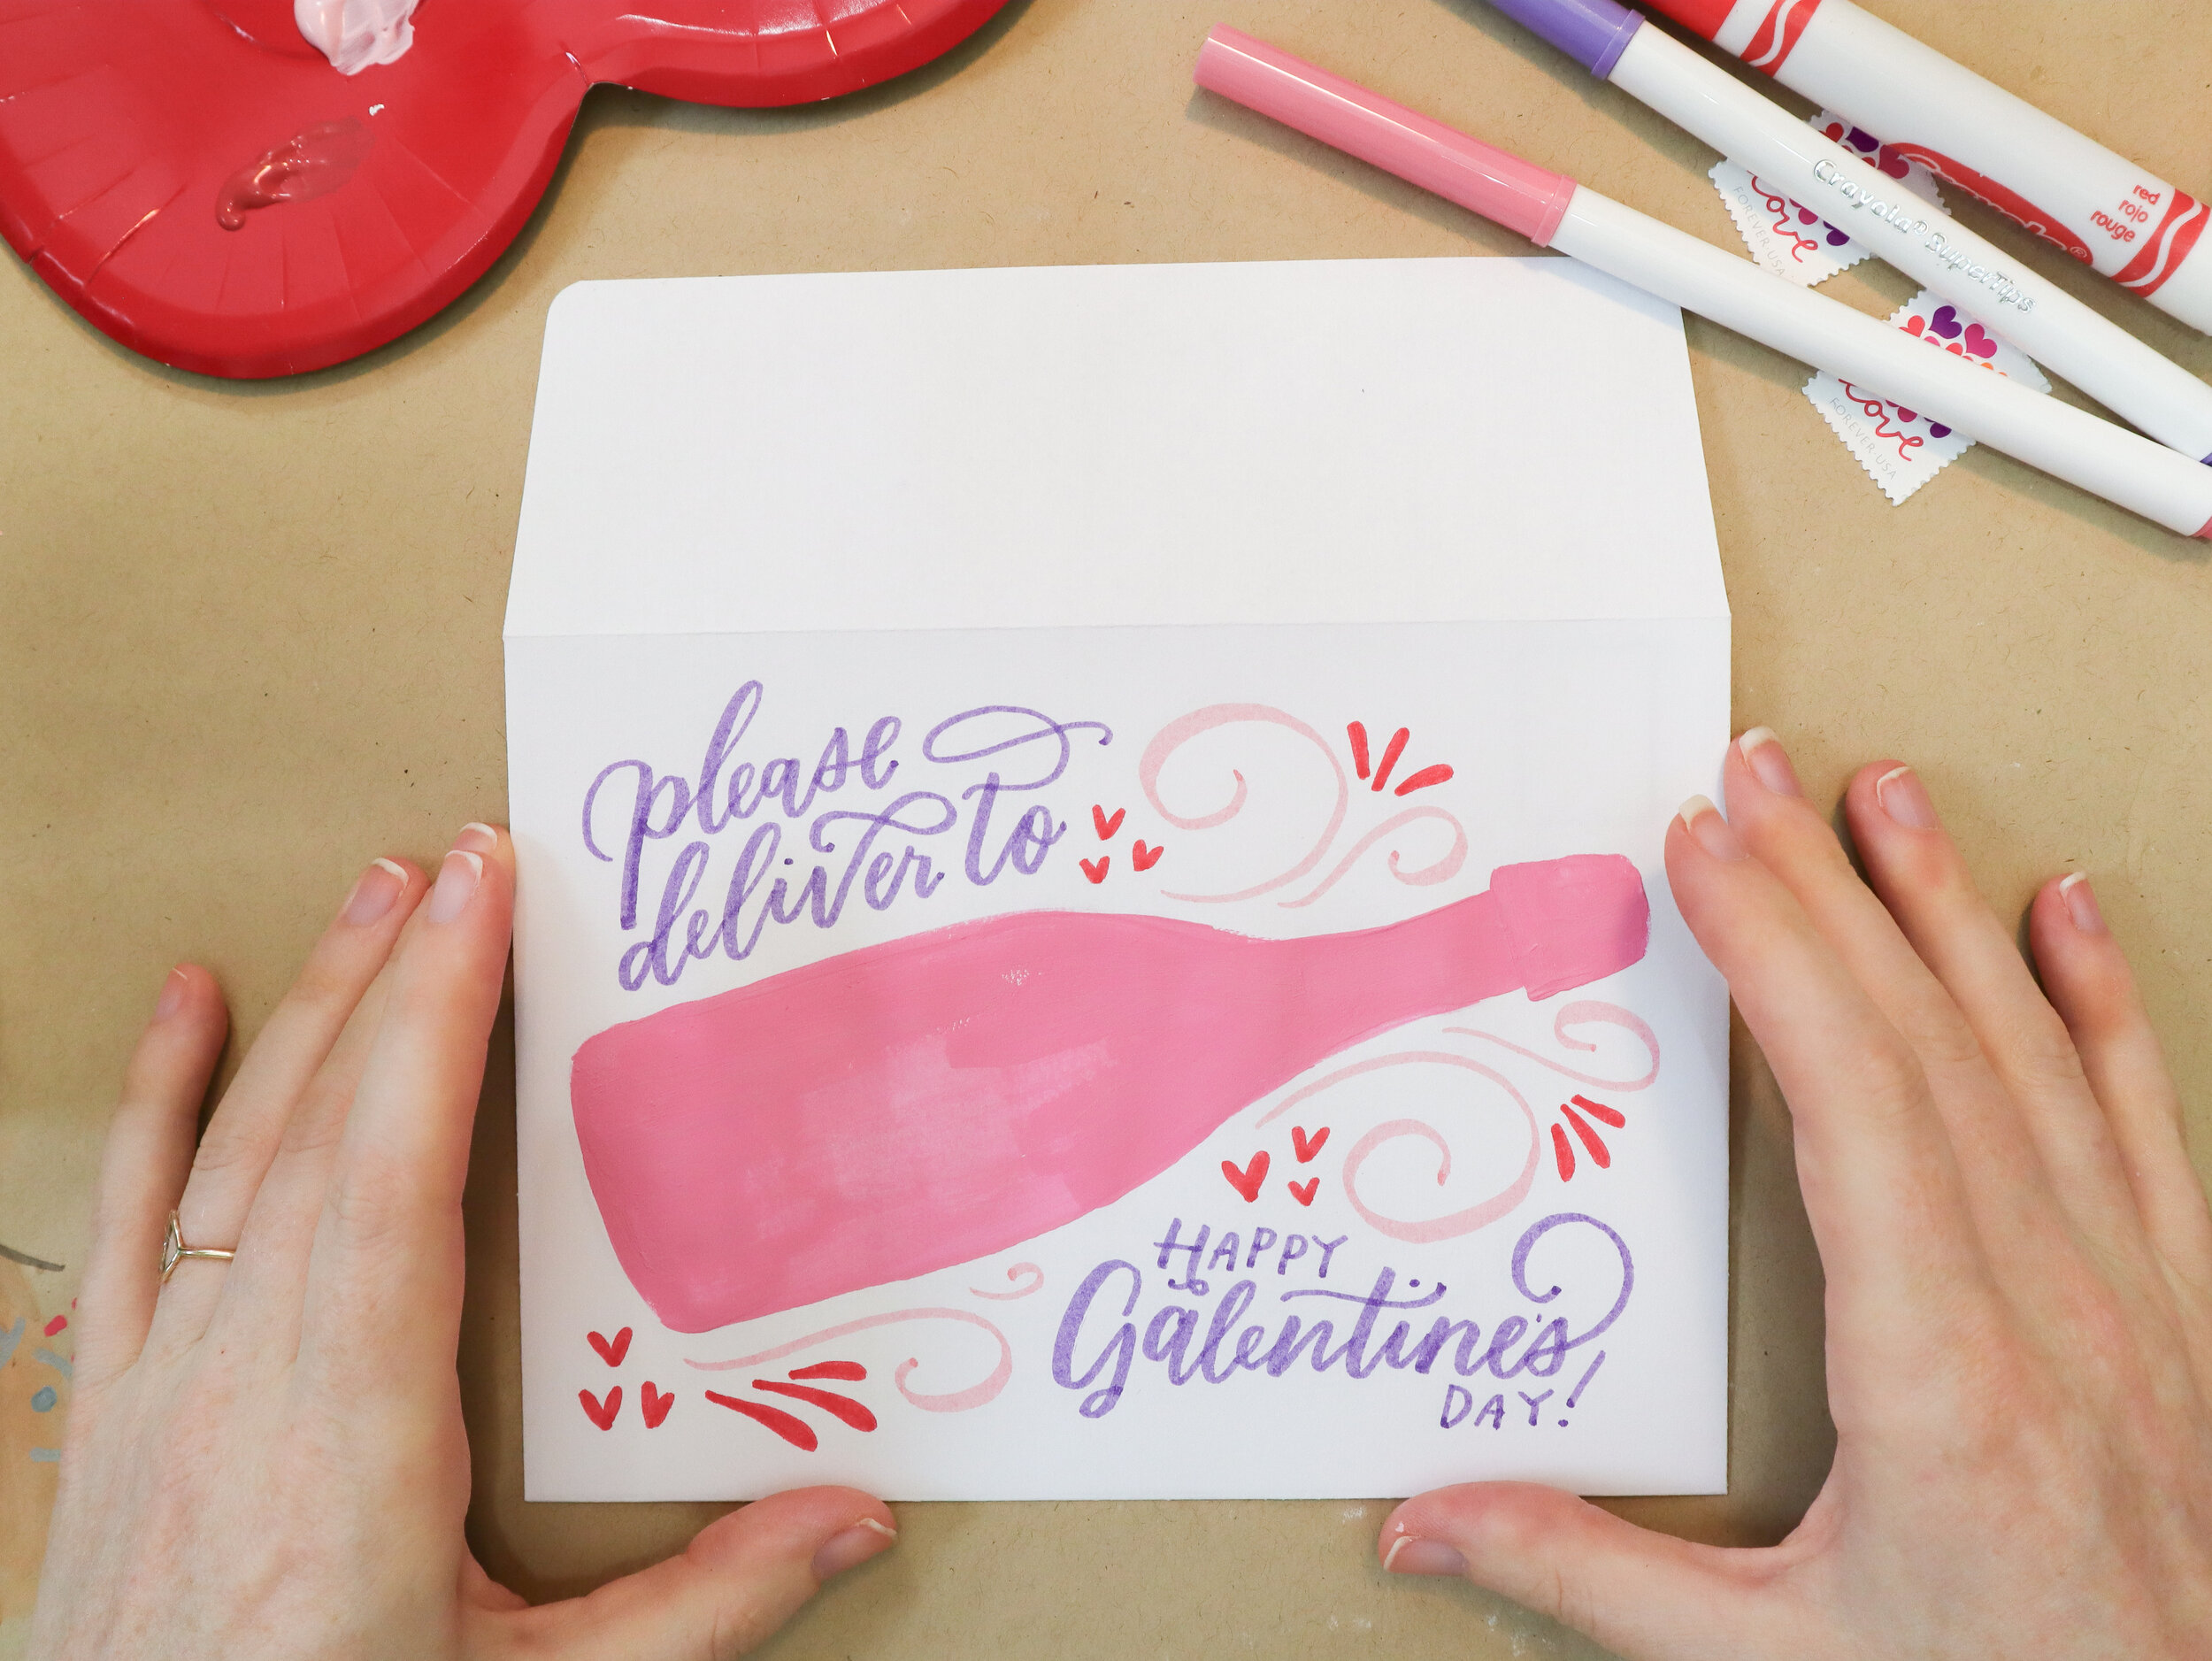
Galentine’s Champagne Mail Art

Oh, how I love Galentine’s Day! When I lived in Indianapolis, I would through a big champagne brunch for all my Hoosier girlfriends, and it was something I looked forward to every year. Even though we now have to brunch via Zoom (tear), I can still send a little bubbly their way with this design.
Supplies
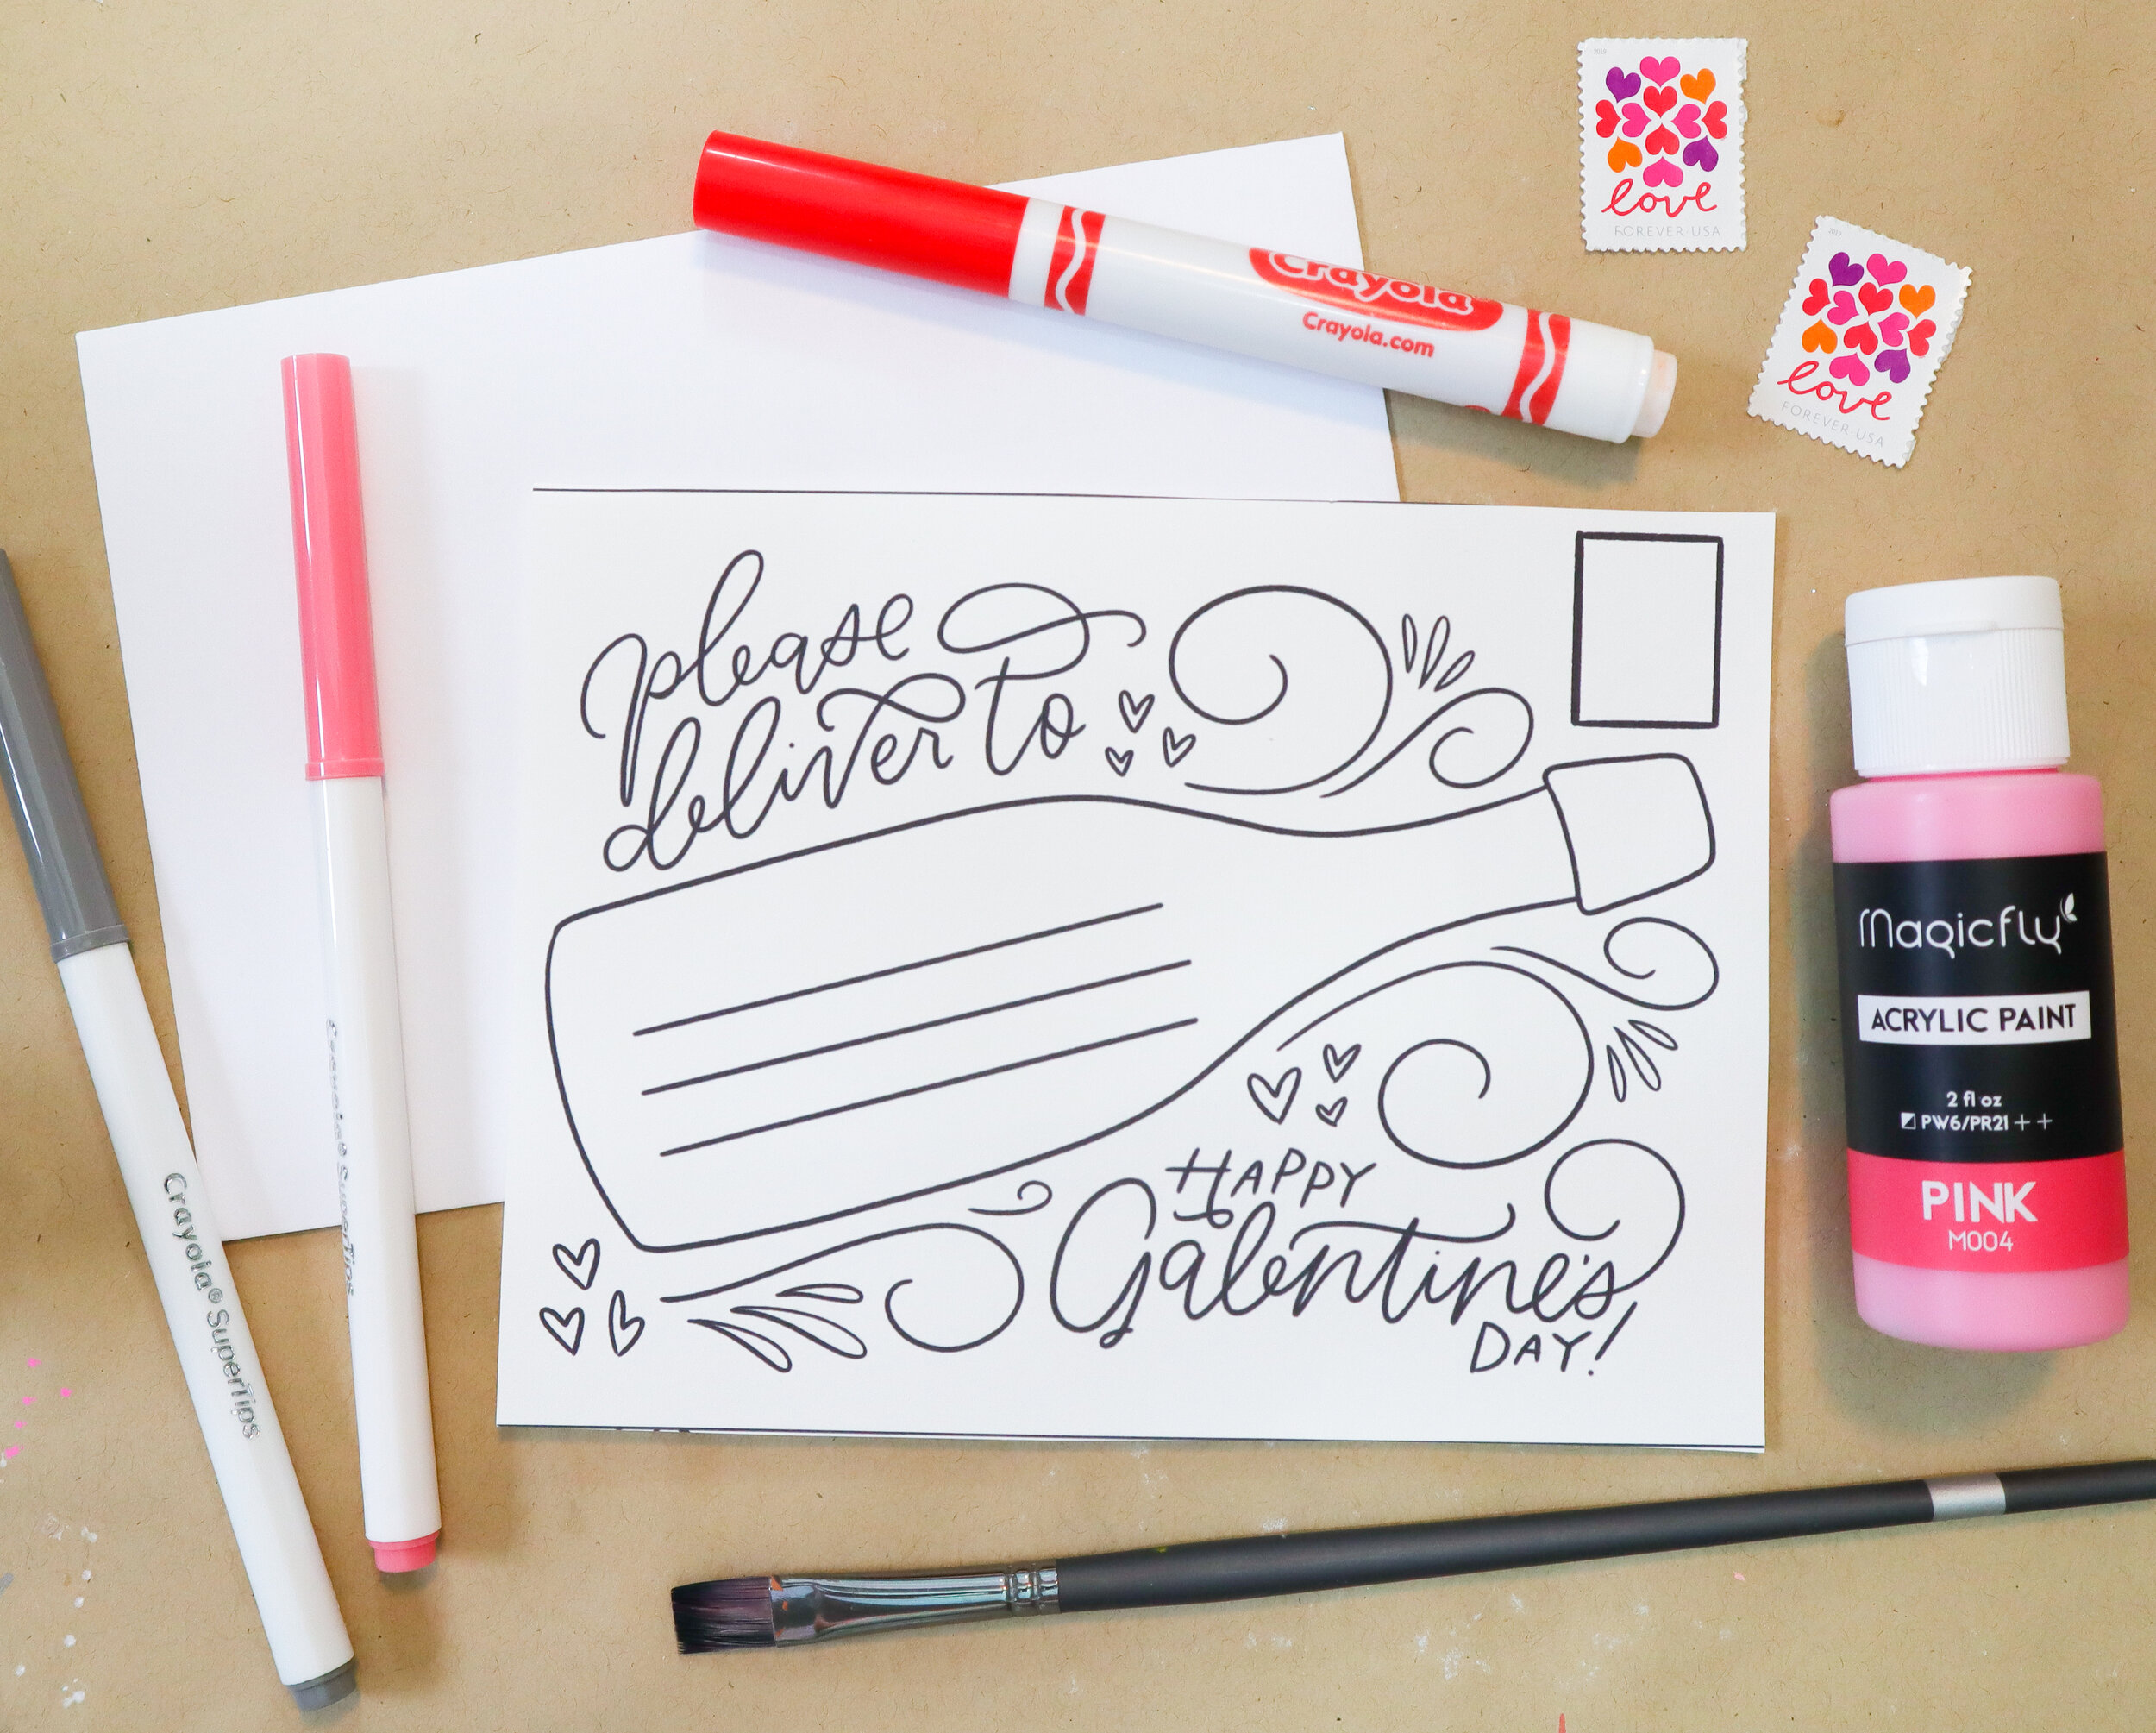
Template
White, unlined 5 x 7 envelope
Red, light pink & purple markers (I used Crayola Broad Line and SuperTips markers)
Dark pink acrylic paint
Paint brush
White acrylic paint pen
Directions
Print & cut out template. Slide into the envelope. You should be able to see the design though it. You can lightly outline in a pencil, or just trace as you go.
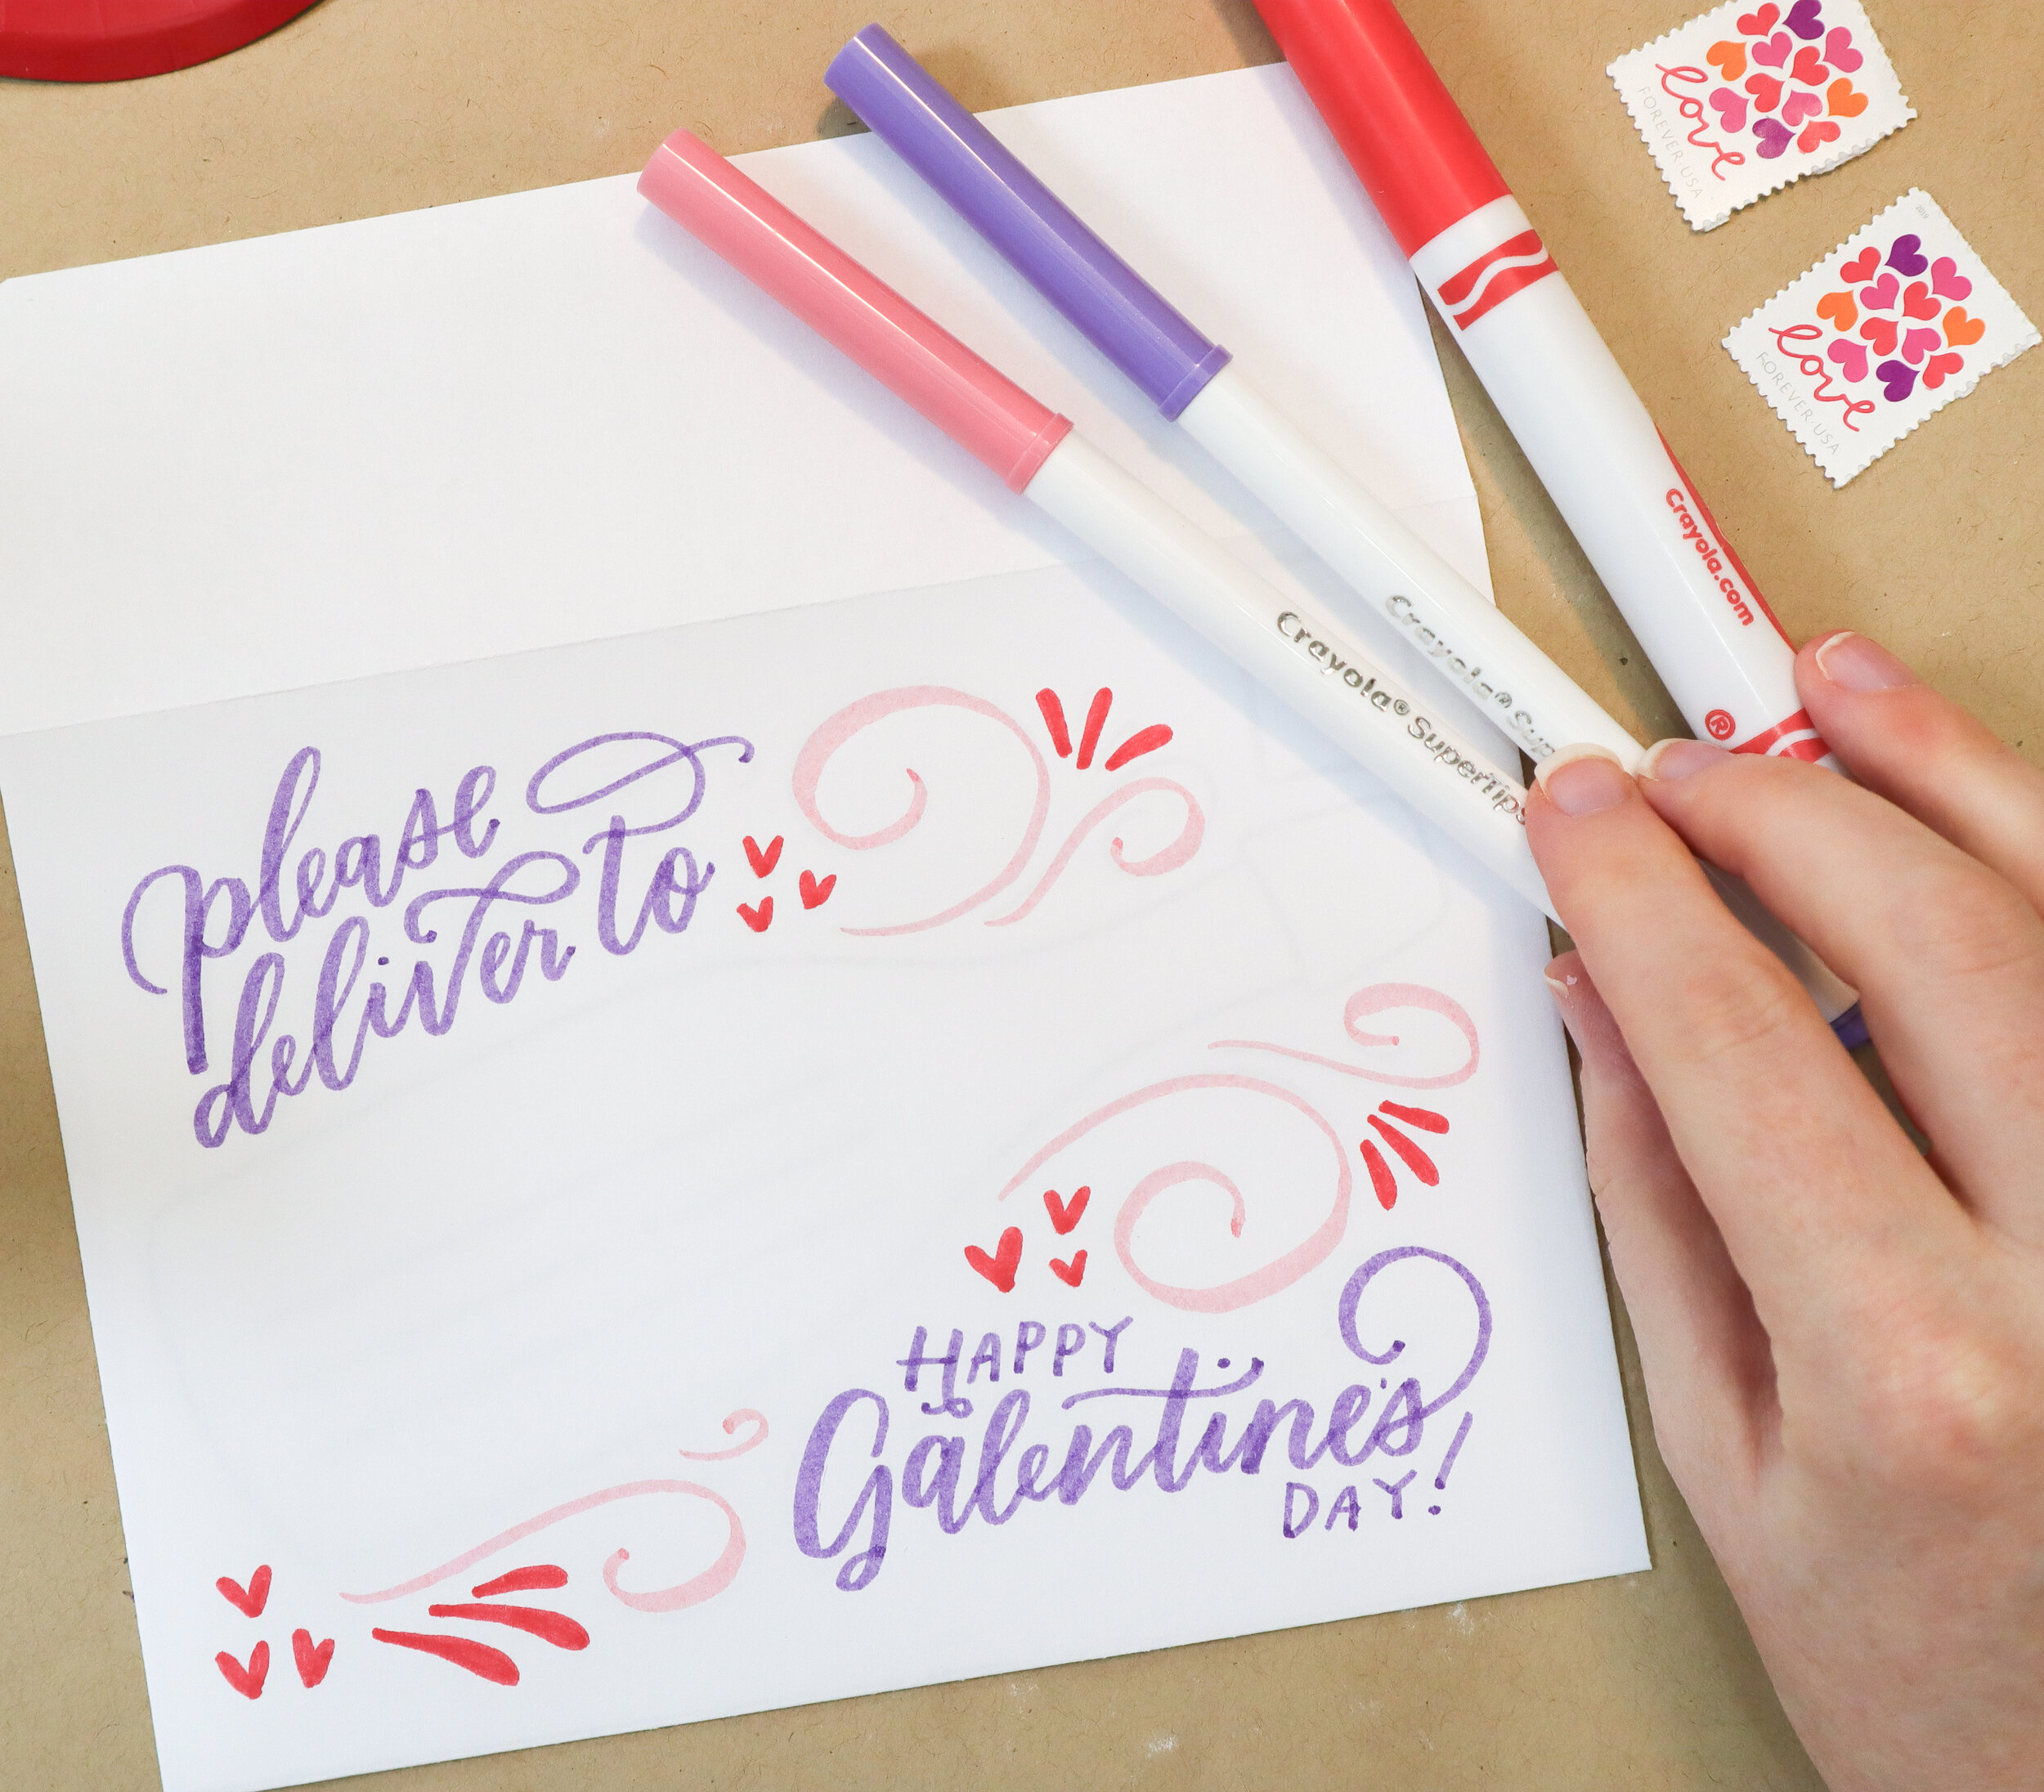
Script everything outside the bottle in marker. I used purple for the words, light pink for the flourishes and red for the droplets and hearts.
Paint the champagne bottle with your dark pink acrylic paint. Let dry.
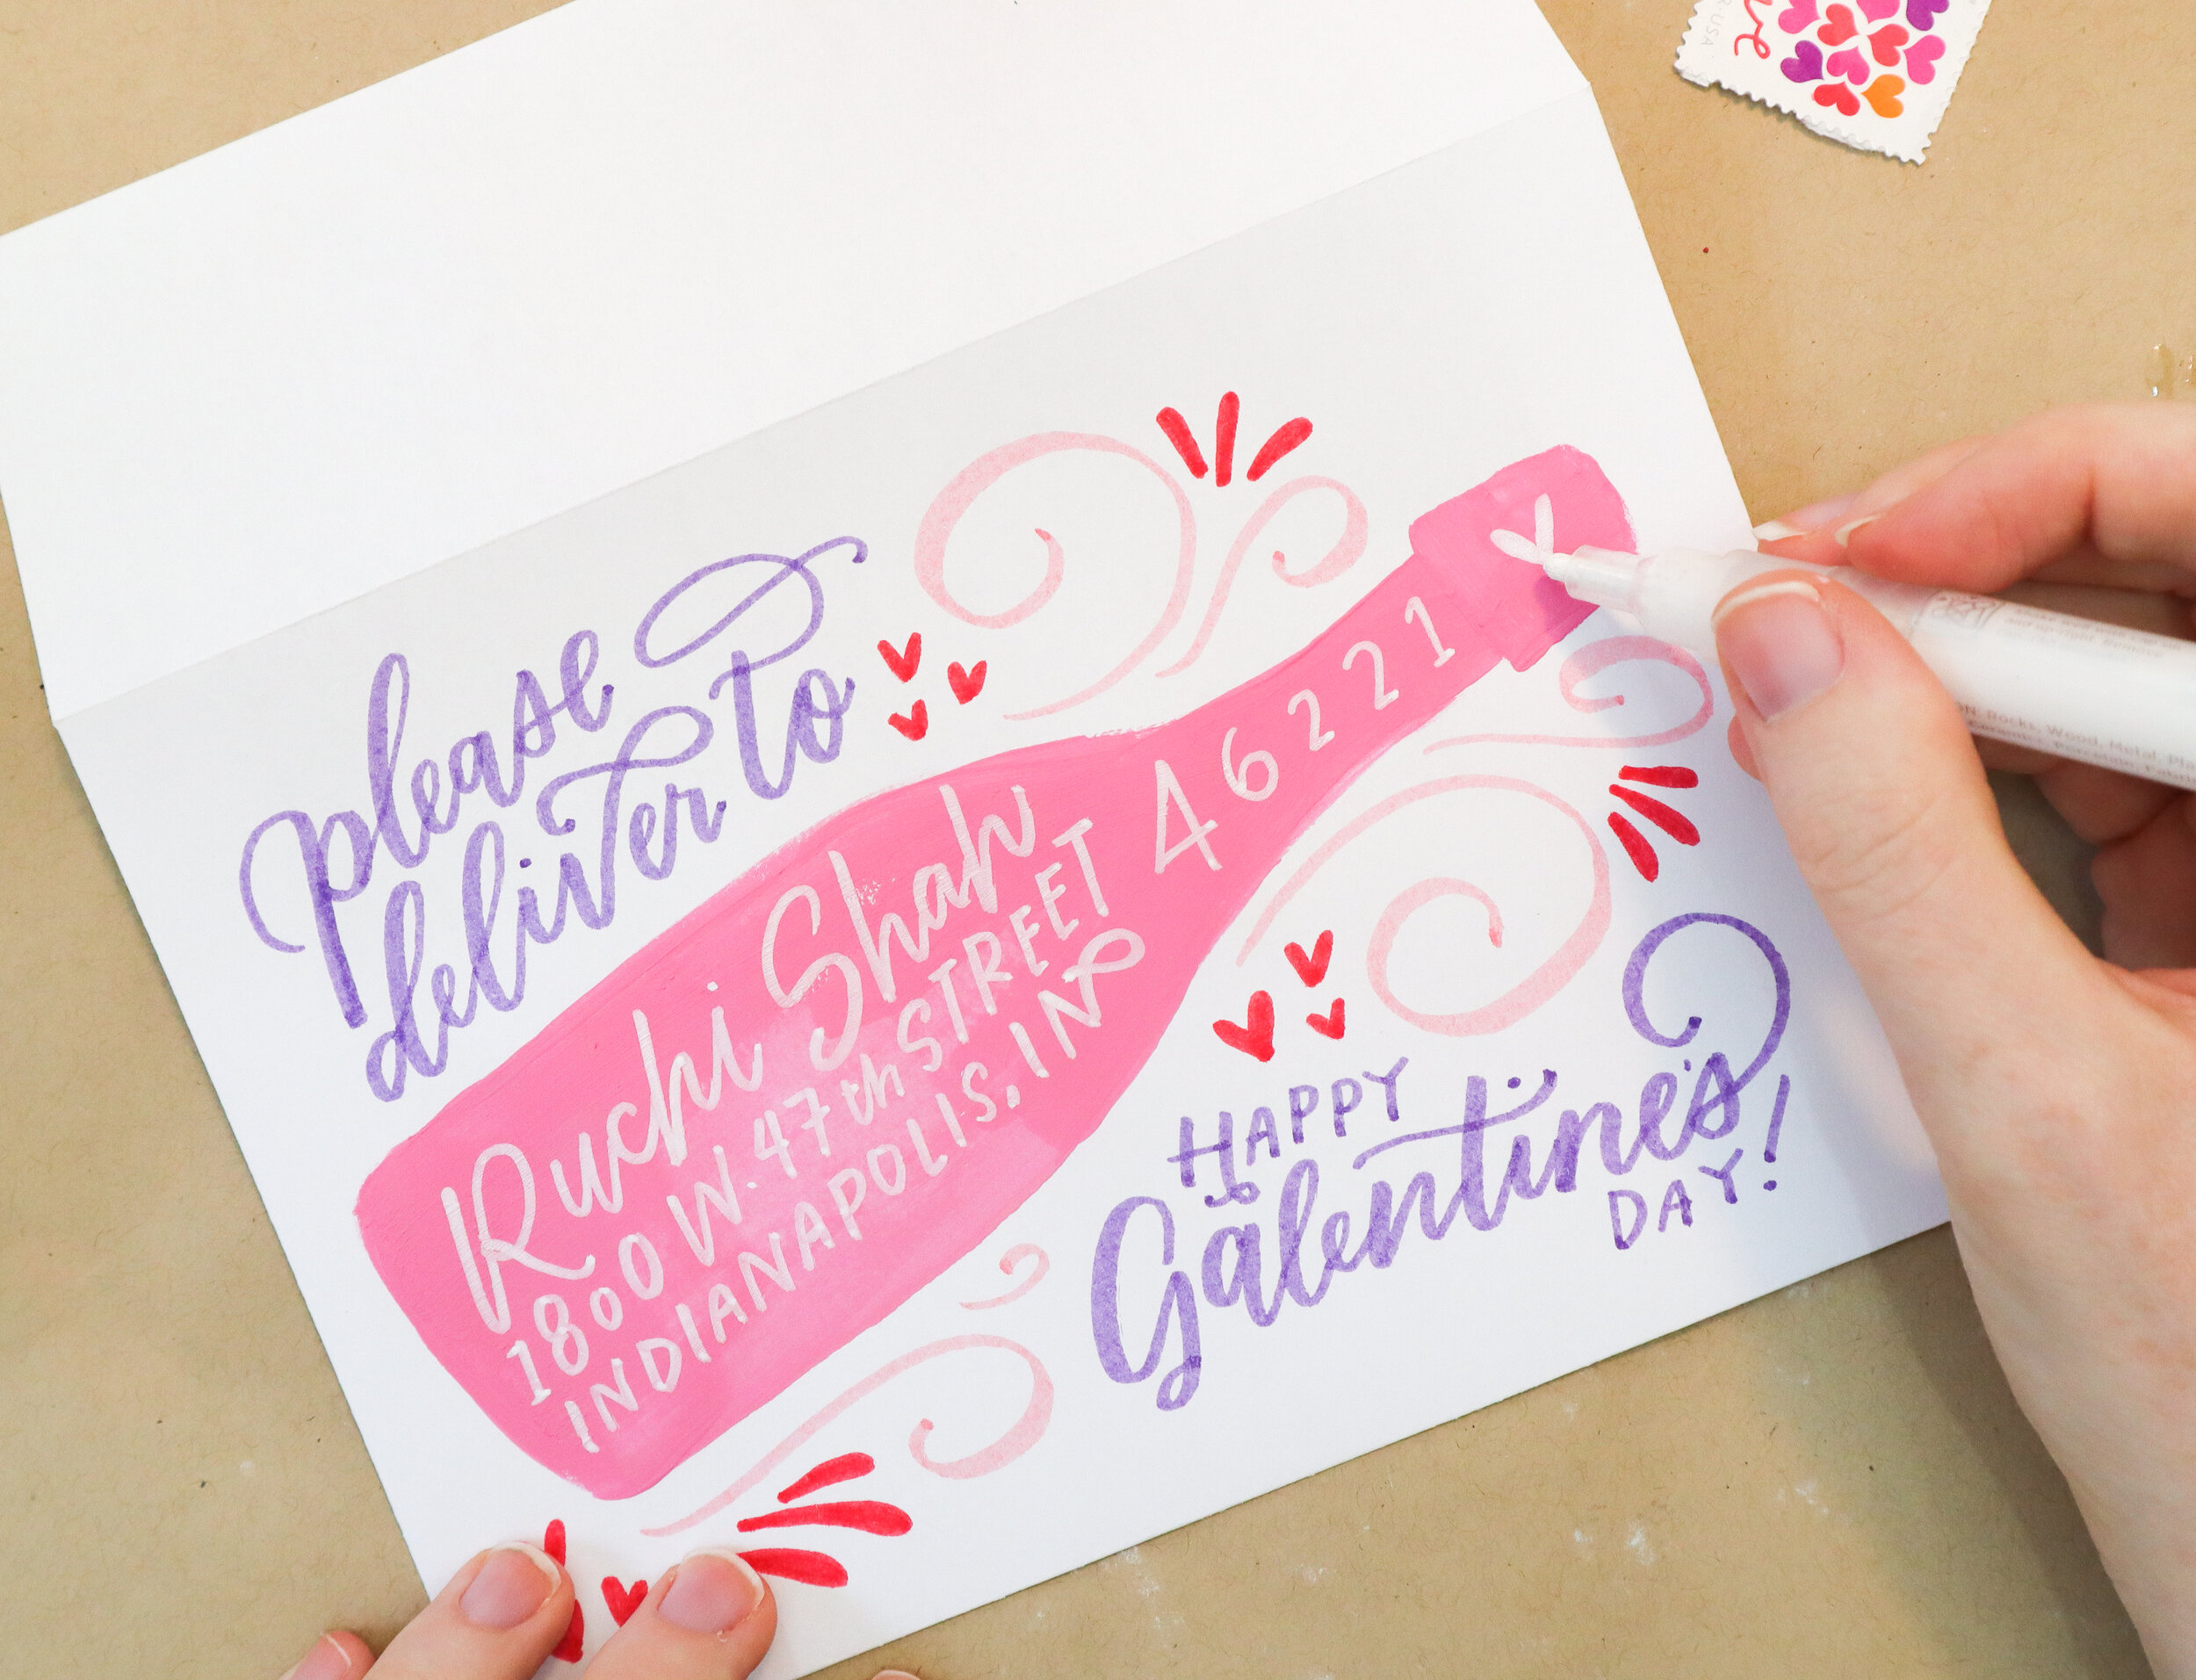
Script the address in white paint marker over the top of the bottle, putting the zip code in the neck.
And that’s it! But before I go, here are a few tips:
I used a mix of Crayola markers and acrylic paint for these tutorials, but you can use just one or the other. If you plan on using just marker, be sure to fill in any large spaces by coloring in small circles to avoid dramatic streaks.
If your acrylic paint is a little thick, you can add a smidge of water… just don’t overdo it or your envelope with wrinkle up like a pumpkin in the sun.
To give your painted envelope some extra protection, you can spray with a fixative or a bit of cheap aerosol hairspray. It won’t stop it from bleeding under a faucet, but will hold up to a bit of rain.

Ready to make yours? Sign up for the mailing list below and get your free templates (don’t worry, I hate spam as much as you). If you try these out, be sure to share and give me a tag on Instagram at @hooplaletters. Just be sure to obscure portions of the address so we don’t broadcast their whereabouts to the Internet. I hope you enjoyed these little gems, and I cannot wait to see what you create!