3 Mail Art Tutorials for Kids
Look, you know I’m a fan of snail mail… especially when it comes with a little extra. And no, I’m not talking about cash (though mom, if you’re reading this, feel free to send money whenever you want). I’m talking about mail art, of course!
While a majority of my mail art tutorials are geared toward adults, today we’re going to mix it up with 3 envelope art tutorials for toddlers, big kids and tweens– because why should grown-ups get all the fun?
Okay, I know what you’re thinking – sending a letter is already enough work – why add mail art? First of all, each of these tutorials can be completed in a jiffy, so don’t you worry your pretty little head about that. Second, I think we can all agree that a little artsin’ and craftsin’ with our kids is much more fun than watching Daniel Tiger for the 50th time. And third, making something is one way to say “I love you.” And yes, that is a song from Daniel Tiger. I know because I’ve seen that episode 49 times and I’ll be damned if I see if for a 50th. But he’s RIGHT on this one. Adding a little extra touch and effort is a great way for your kids to show their grandparents, aunties, cousins, friends and other special people in their lives that they care about them.
Now that I have you convinced (and humming that Daniel Tiger song in your head… sorry), let’s get started! Please note, to give you the best instructions and images, this blog post shows my versions of these envelopes — but head over the ‘gram to see some examples from my daughter and niece. They are pretty great. :)

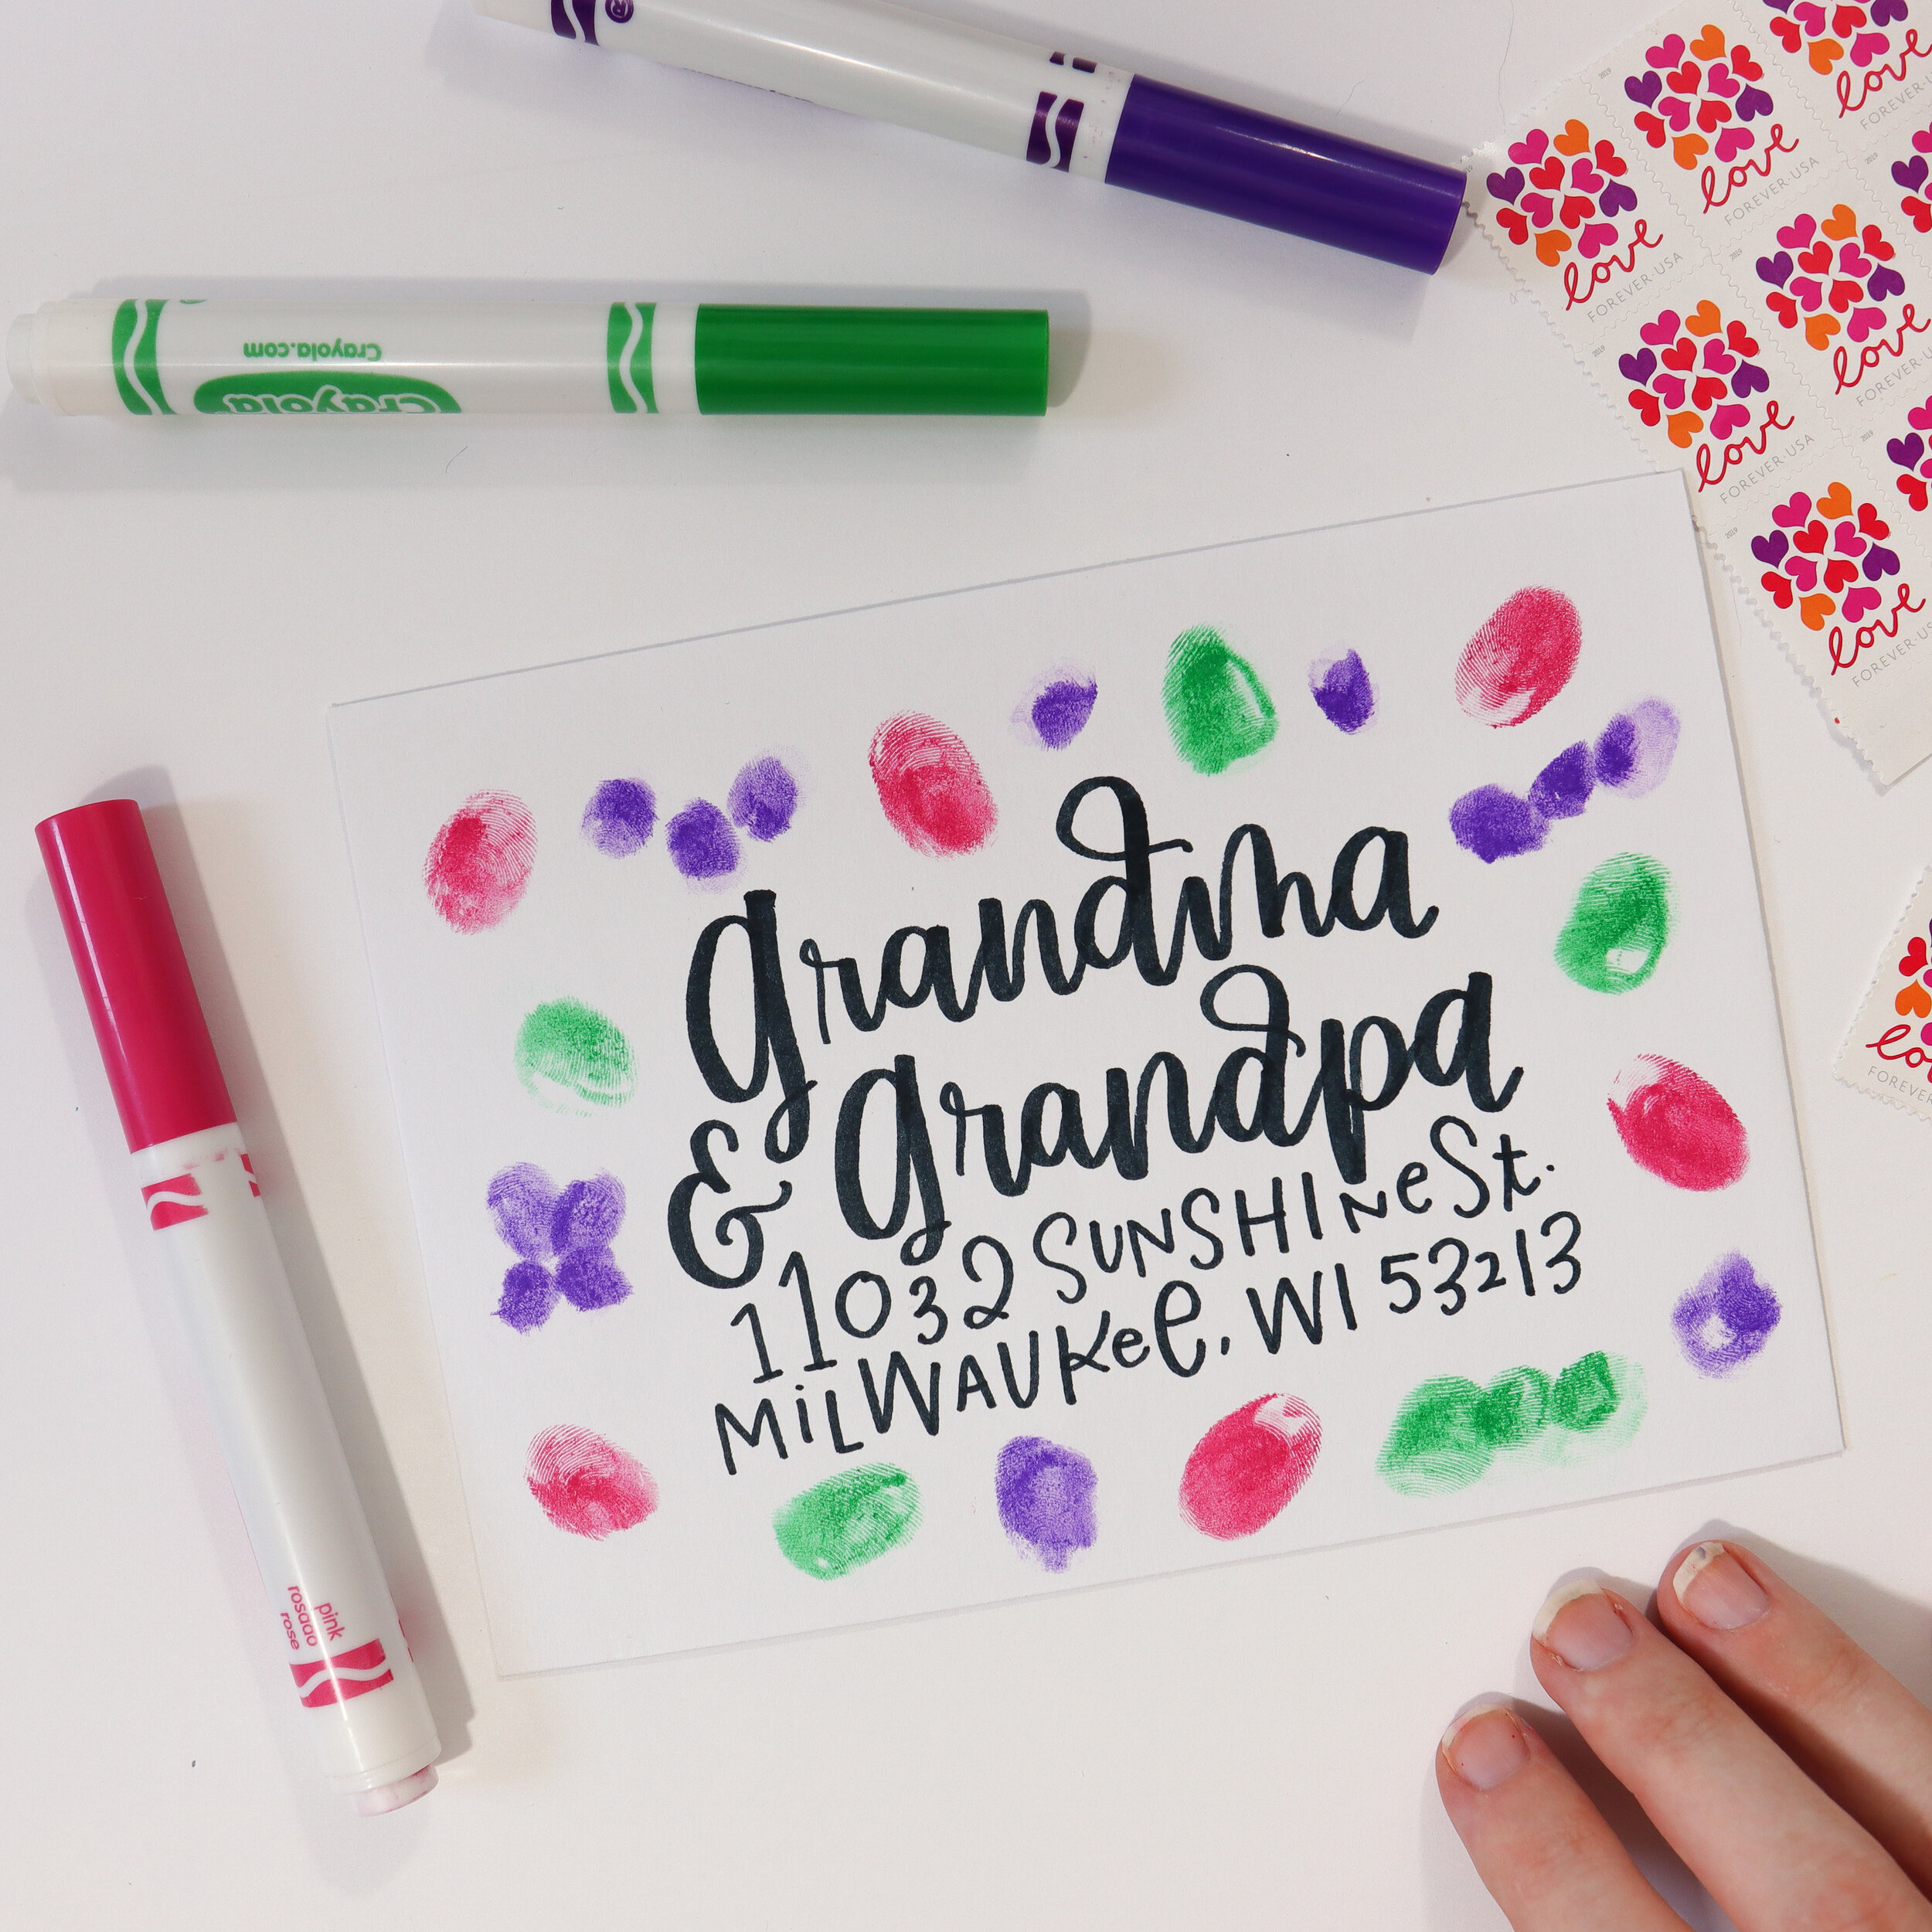
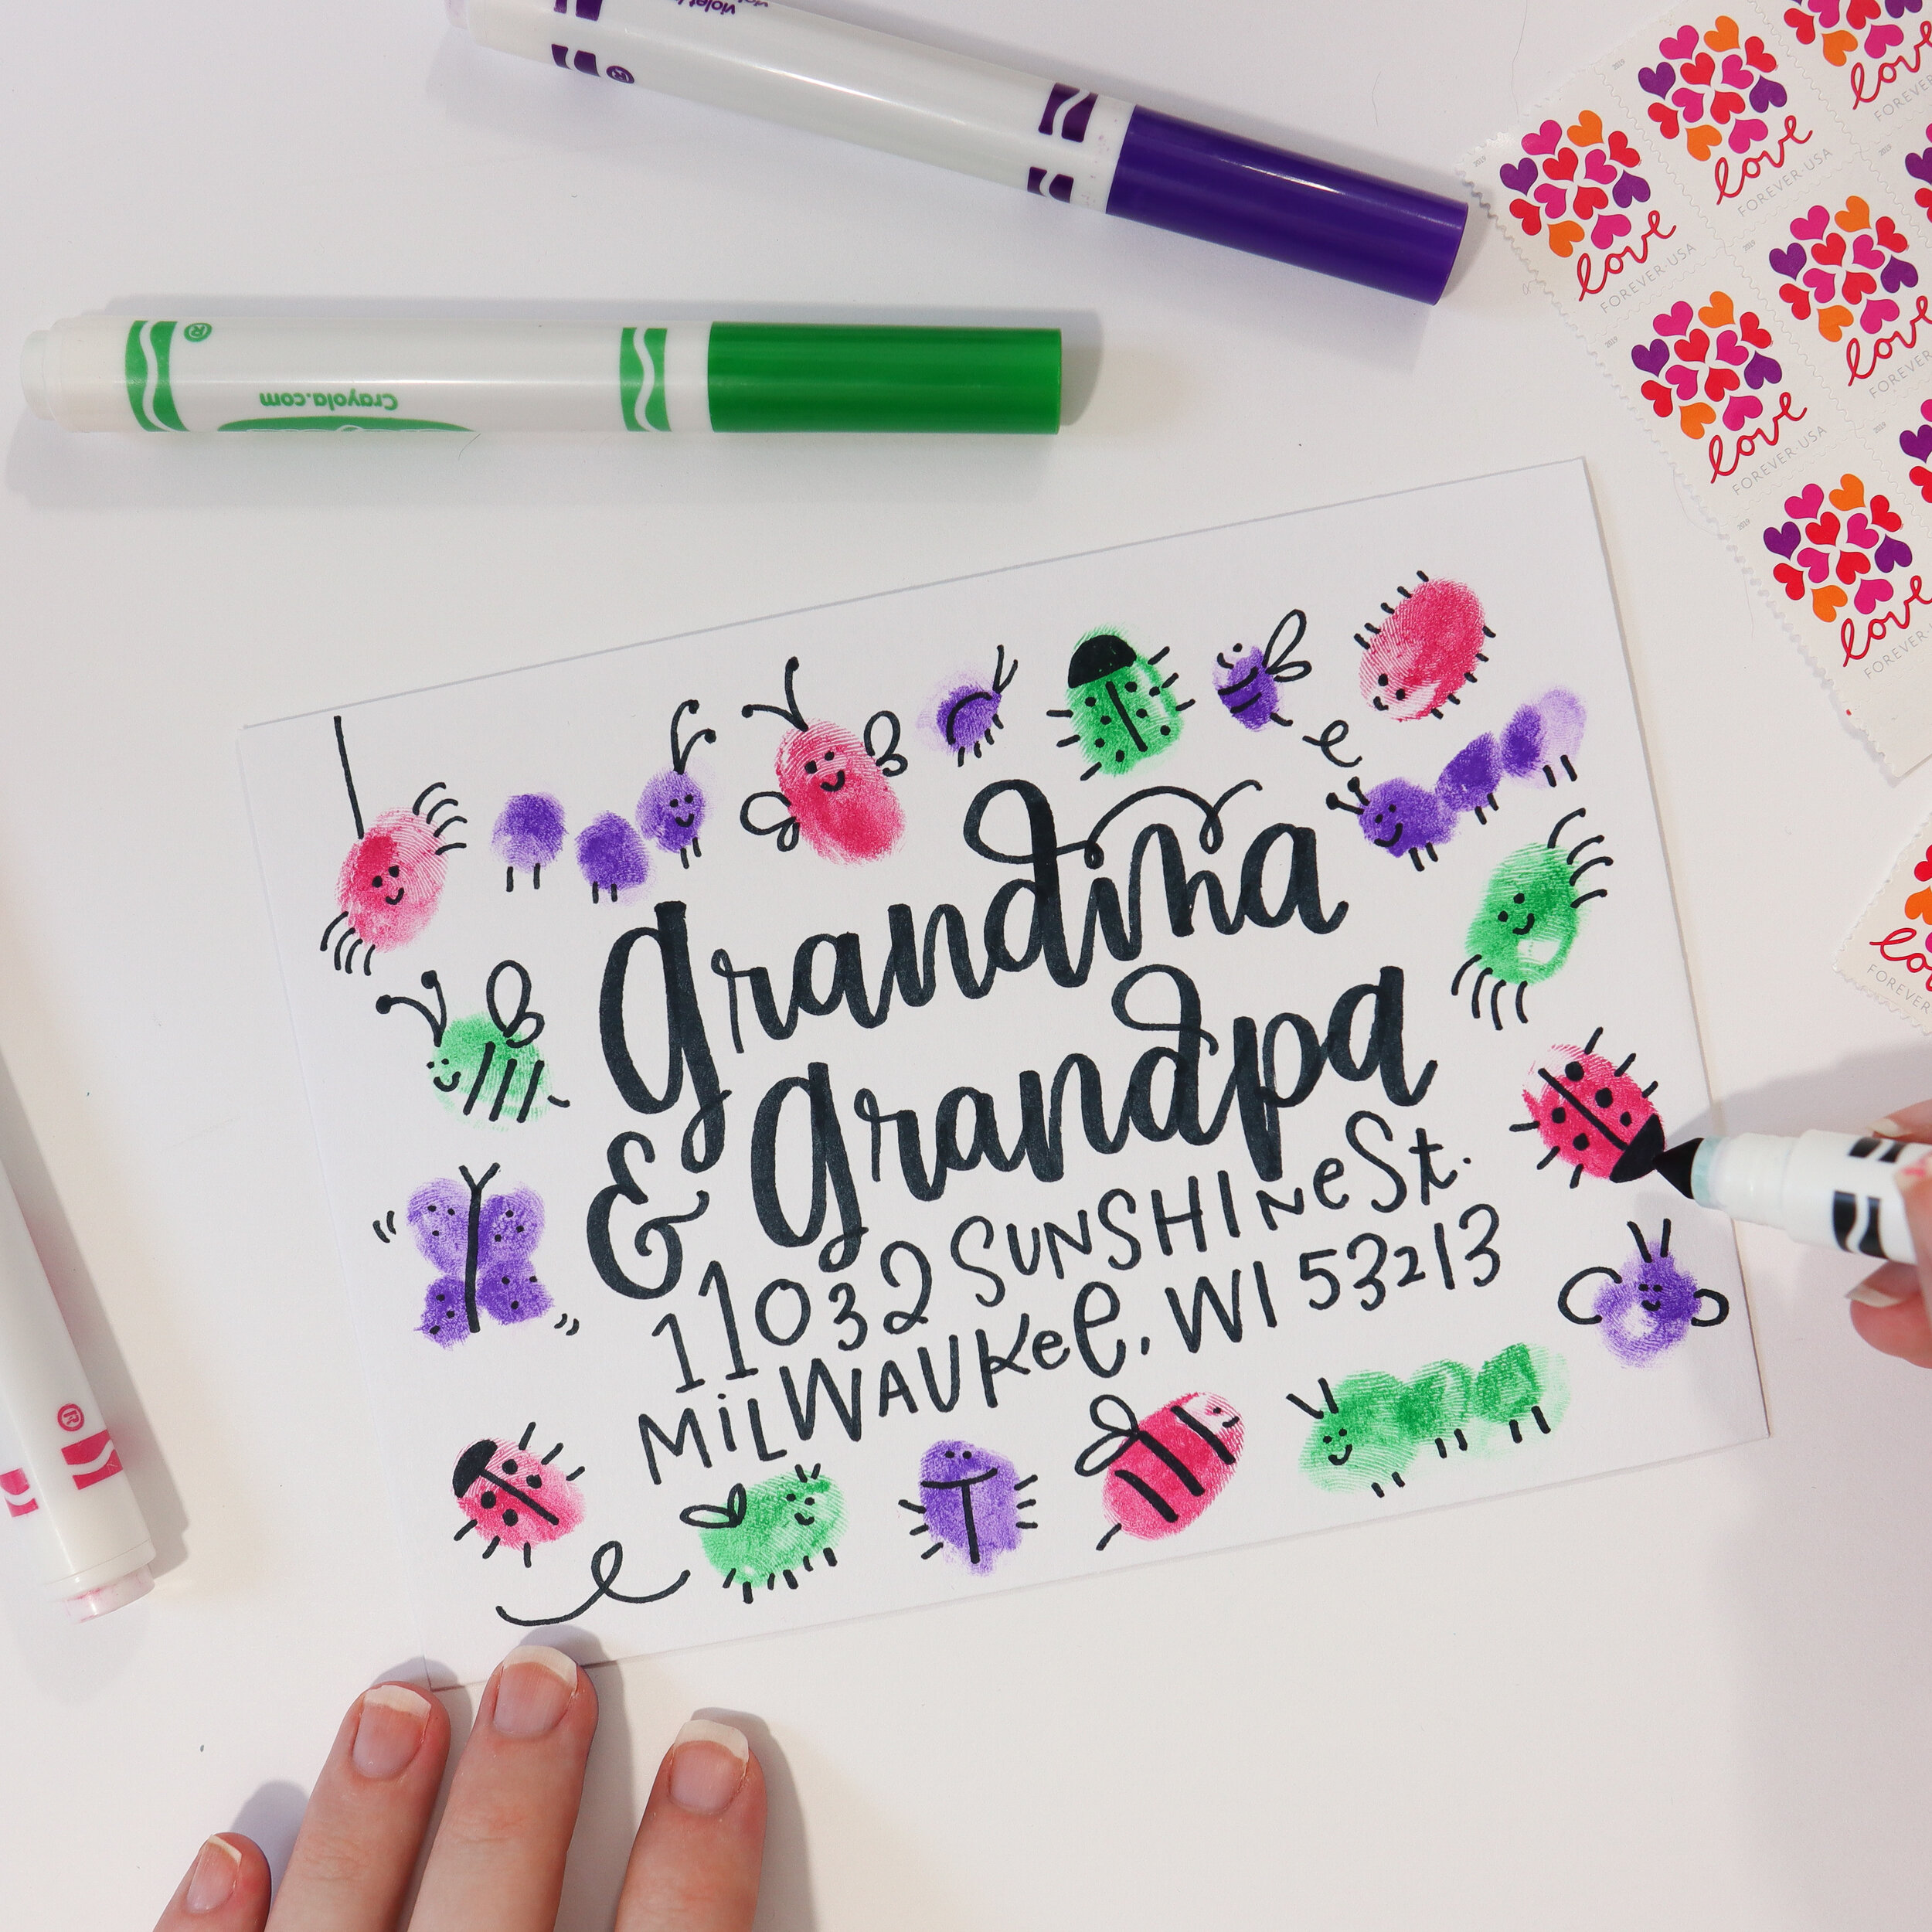
Fingerprint Bugs Mail Art Tutorial
Suitable for toddlers and big kids
I don’t know about you, but my almost 3-year-old is OBSESSED with bugs, so she really had a blast helping me with this one. This is great to make with toddlers (with a little help from mama or papa, of course), but older kids can also have some fun with this one.
Here’s what you need:
Envelope & stamp
Crayola Washable Markers OR ink pads
Fine tip black marker/pen
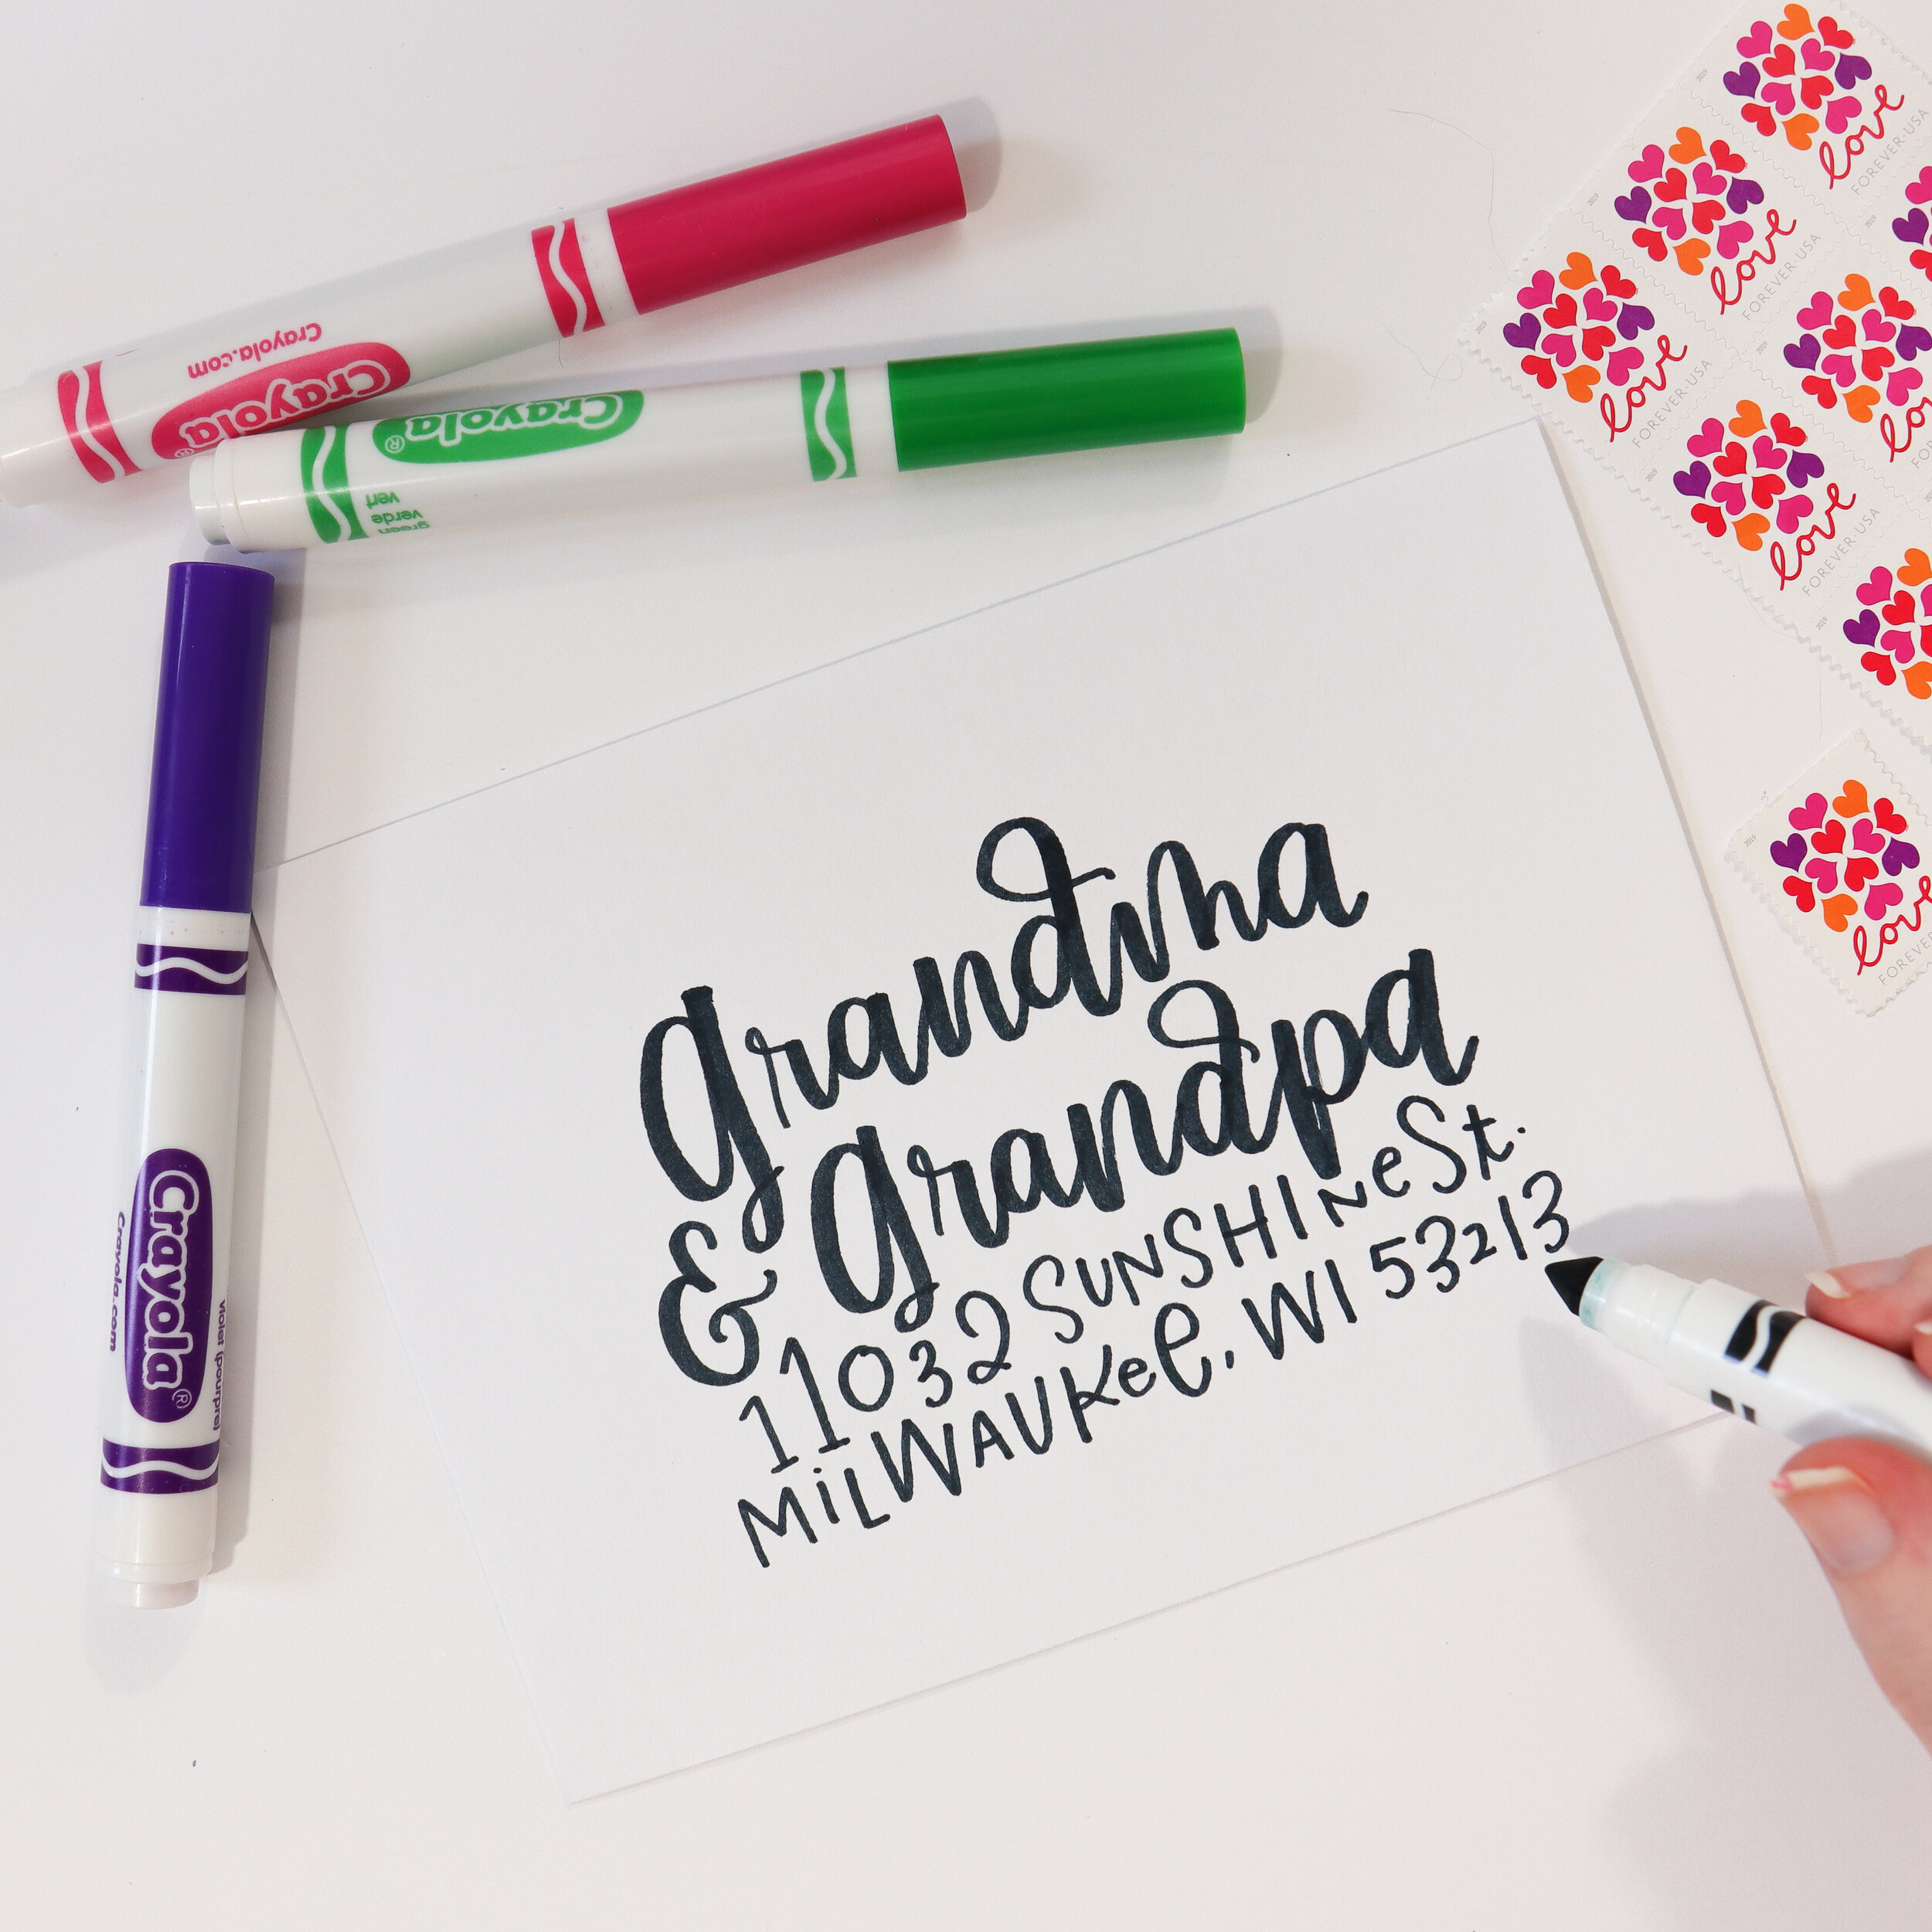
Step 1: Write out the address.
Depending on the age of your child, you may need to help out with this one. But it’s best to write this out first to ensure we’re going to have enough room.
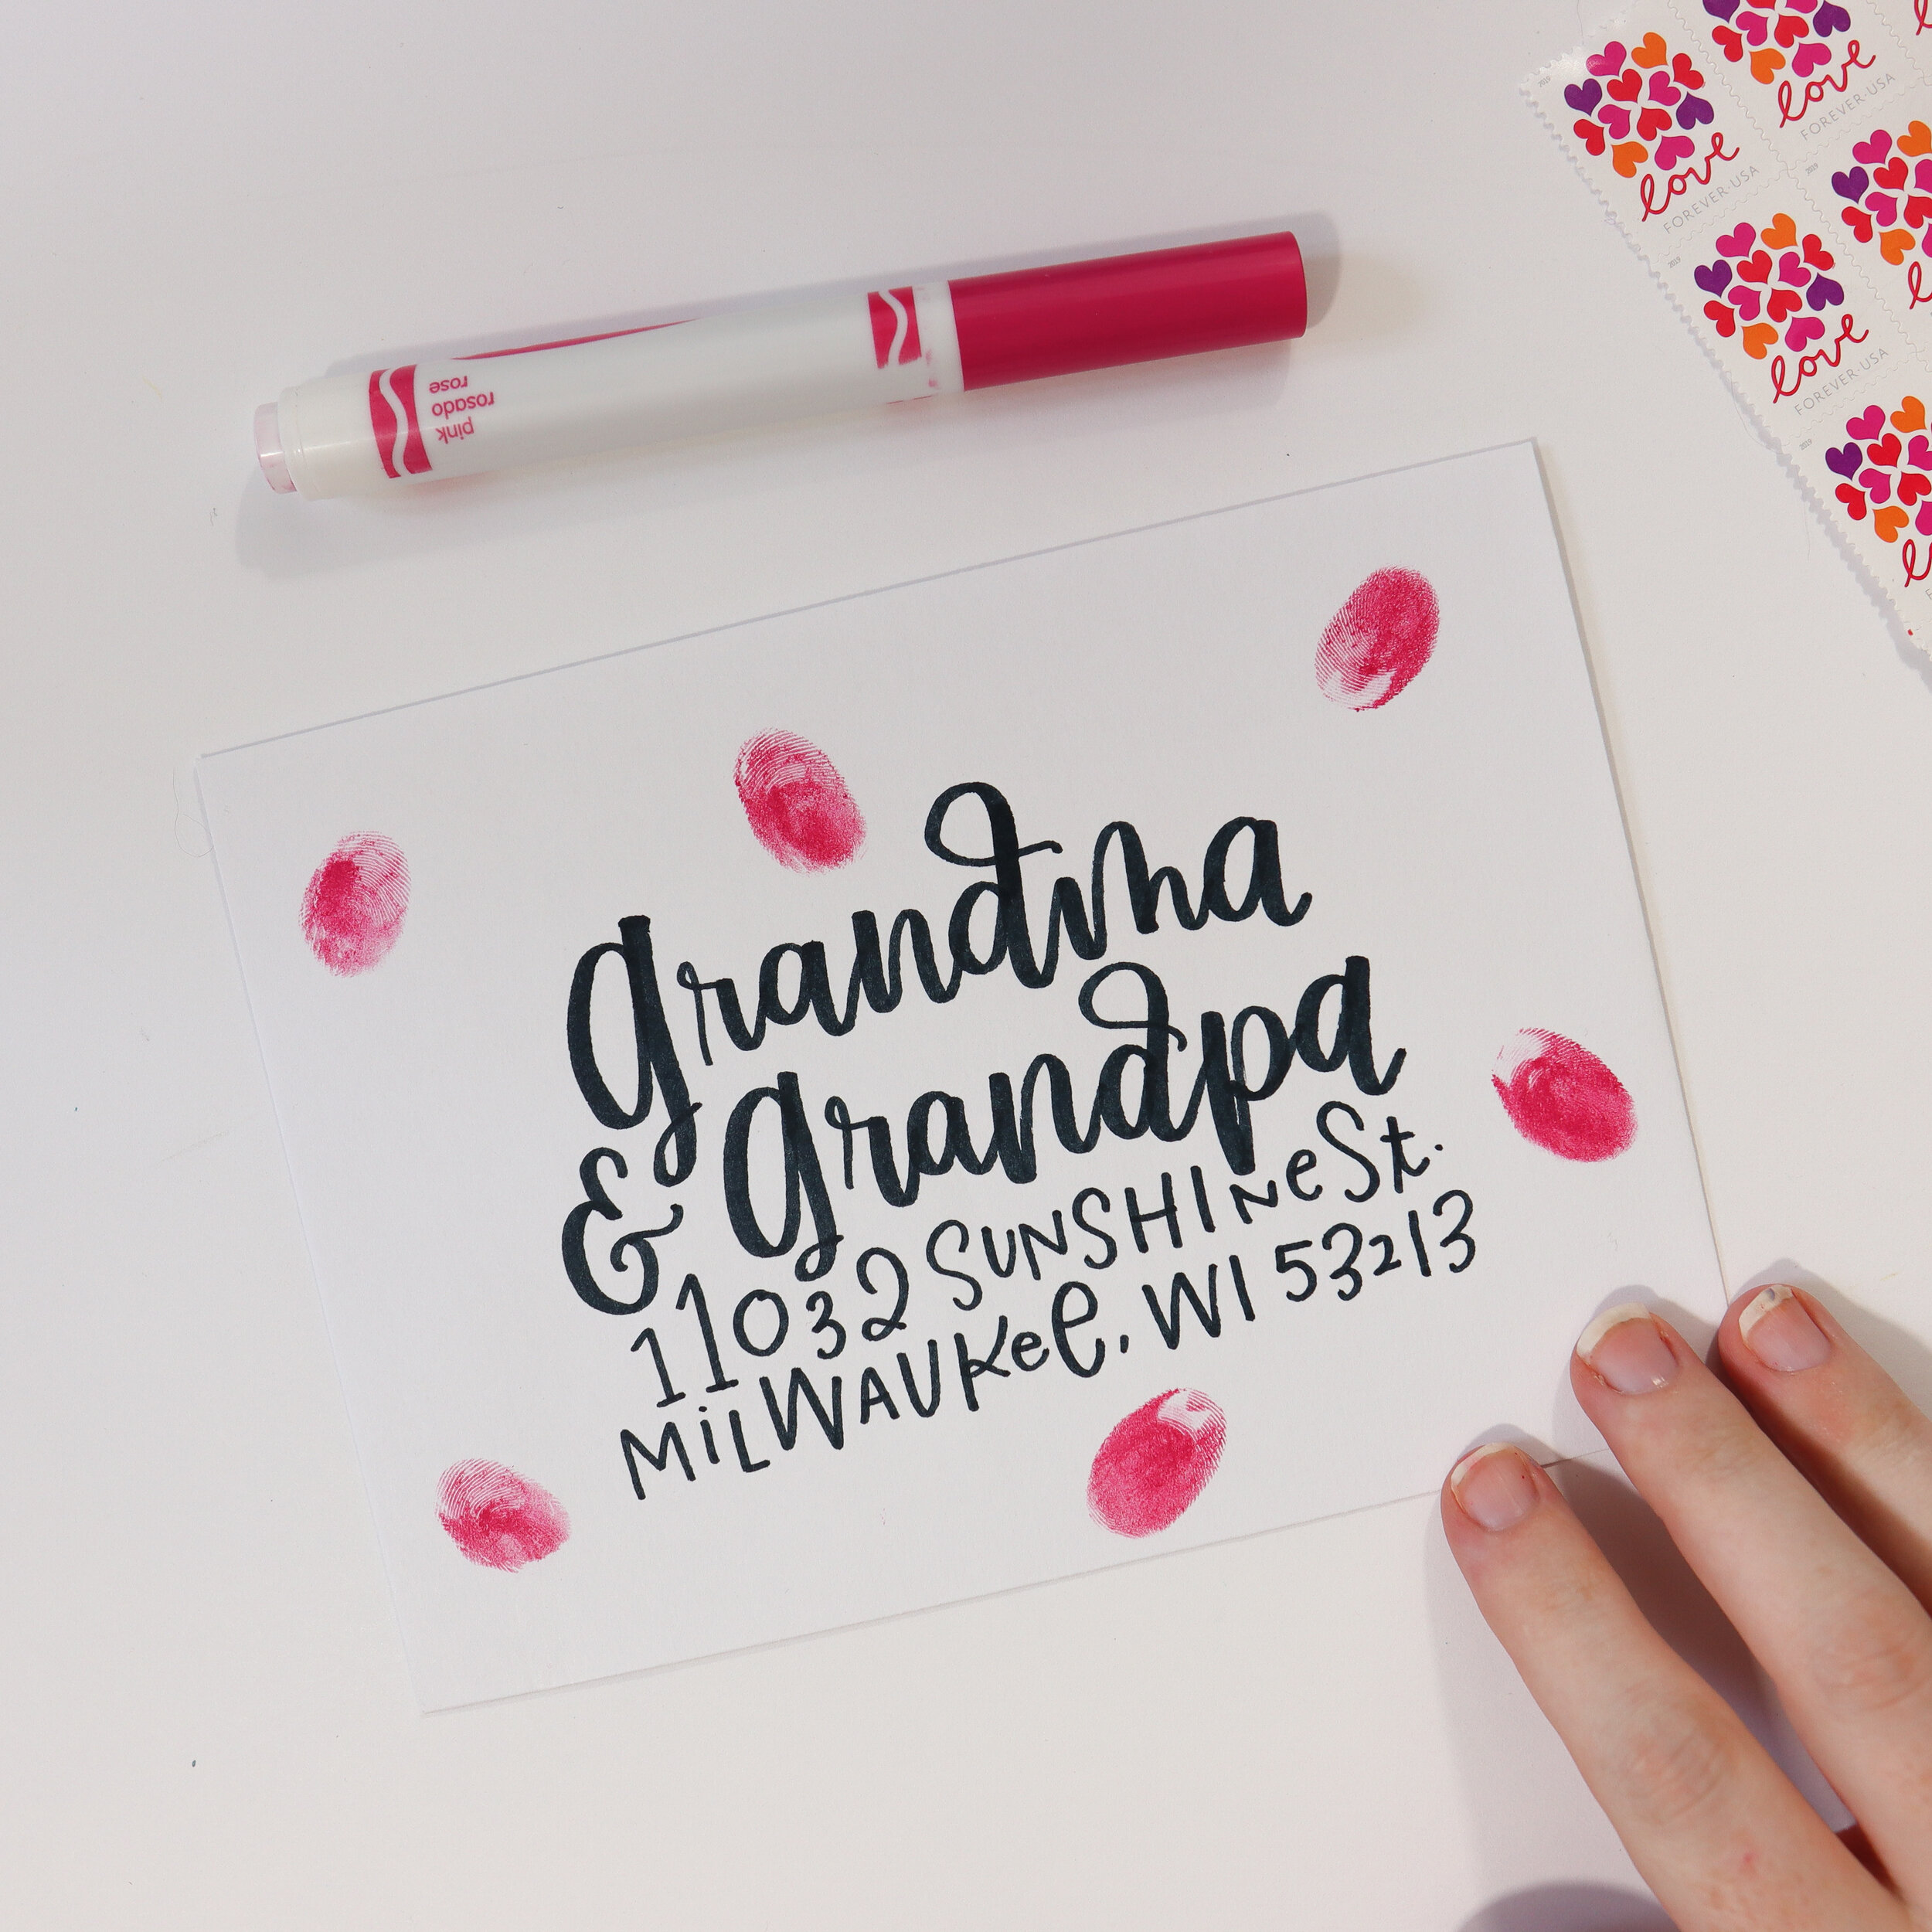
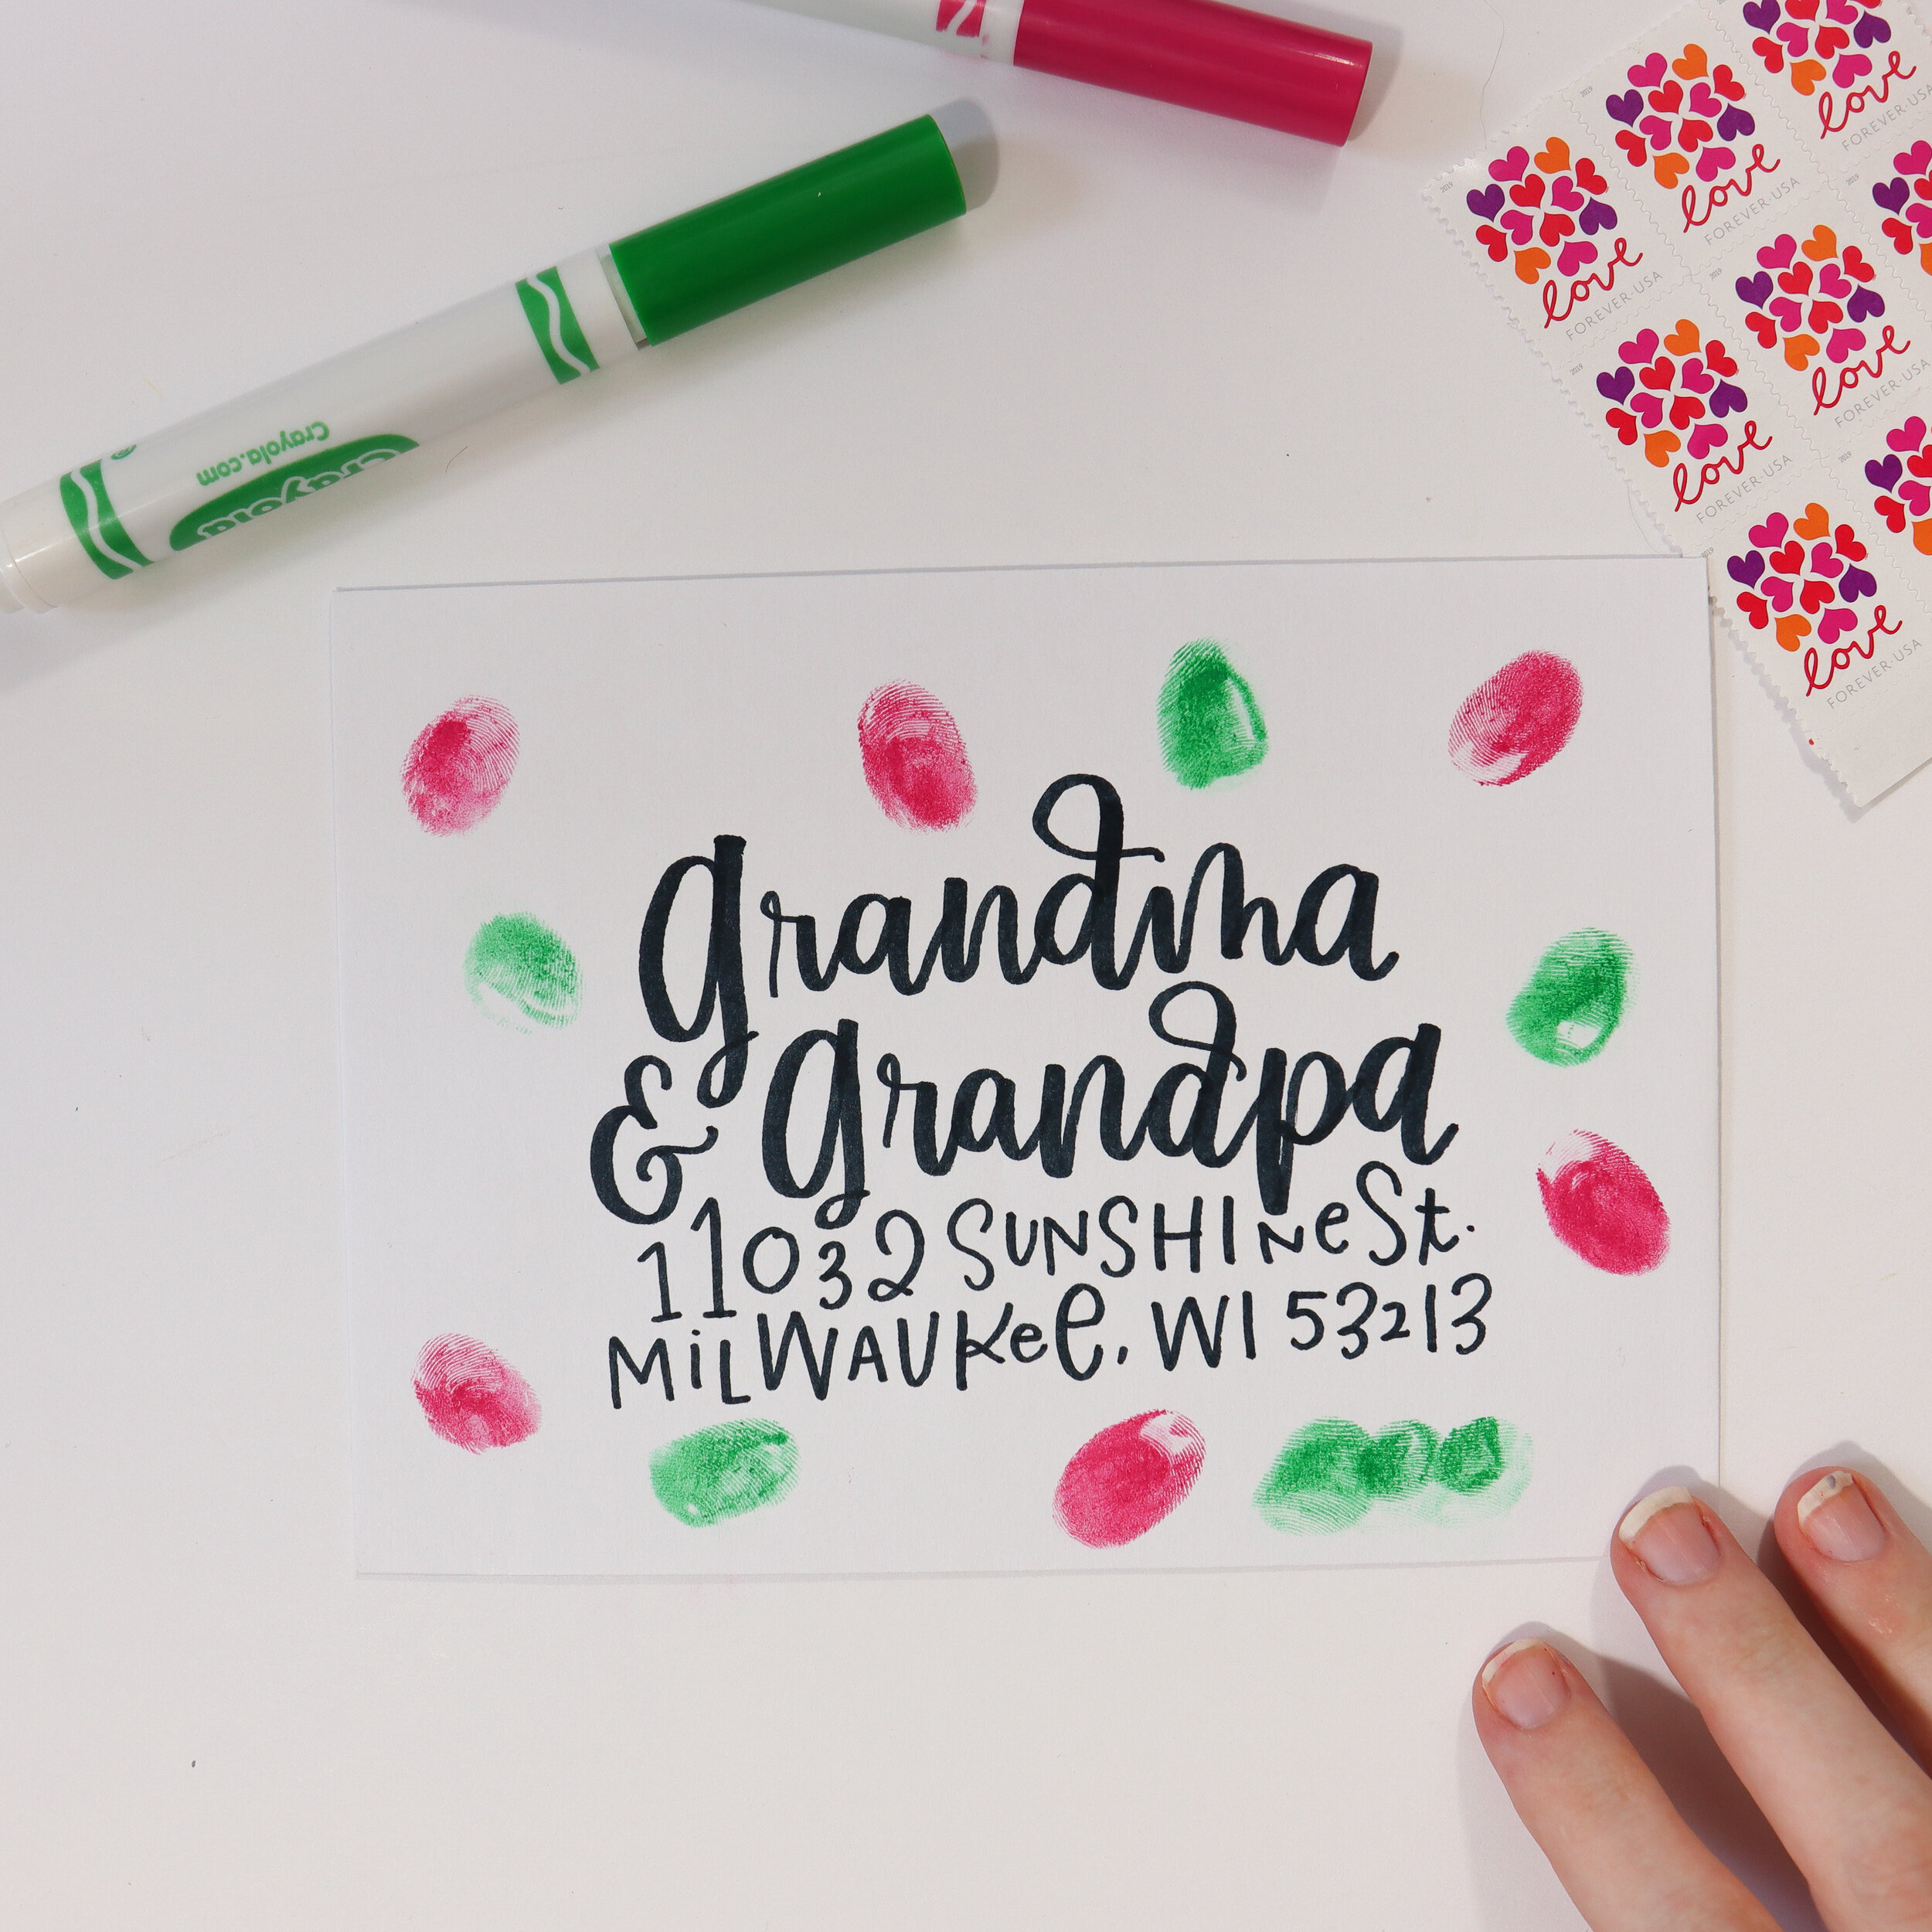
Step 2: Add your fingerprints.
Here’s the fun part! Our “bugs” are actually going to be our child’s fingerprints. If you are using Crayola markers*, simply color on the pad of your child’s finger, and have them immediately press their finger to the paper. These markers dry super fast, so you don’t want to wait too long! If you’re using an ink pad, just have them press their finger onto the pad and then onto the envelope – easy peasy! Continue this process until your envelope is full of plenty of “bugs.” Be sure to spread them out, but feel free to have a few touching – those can become caterpillars and butterflies! Again, depending on their age, you may or may not need to help with this. I had to help Wren in the beginning, but she insisted “I do it myself” after a few tries.
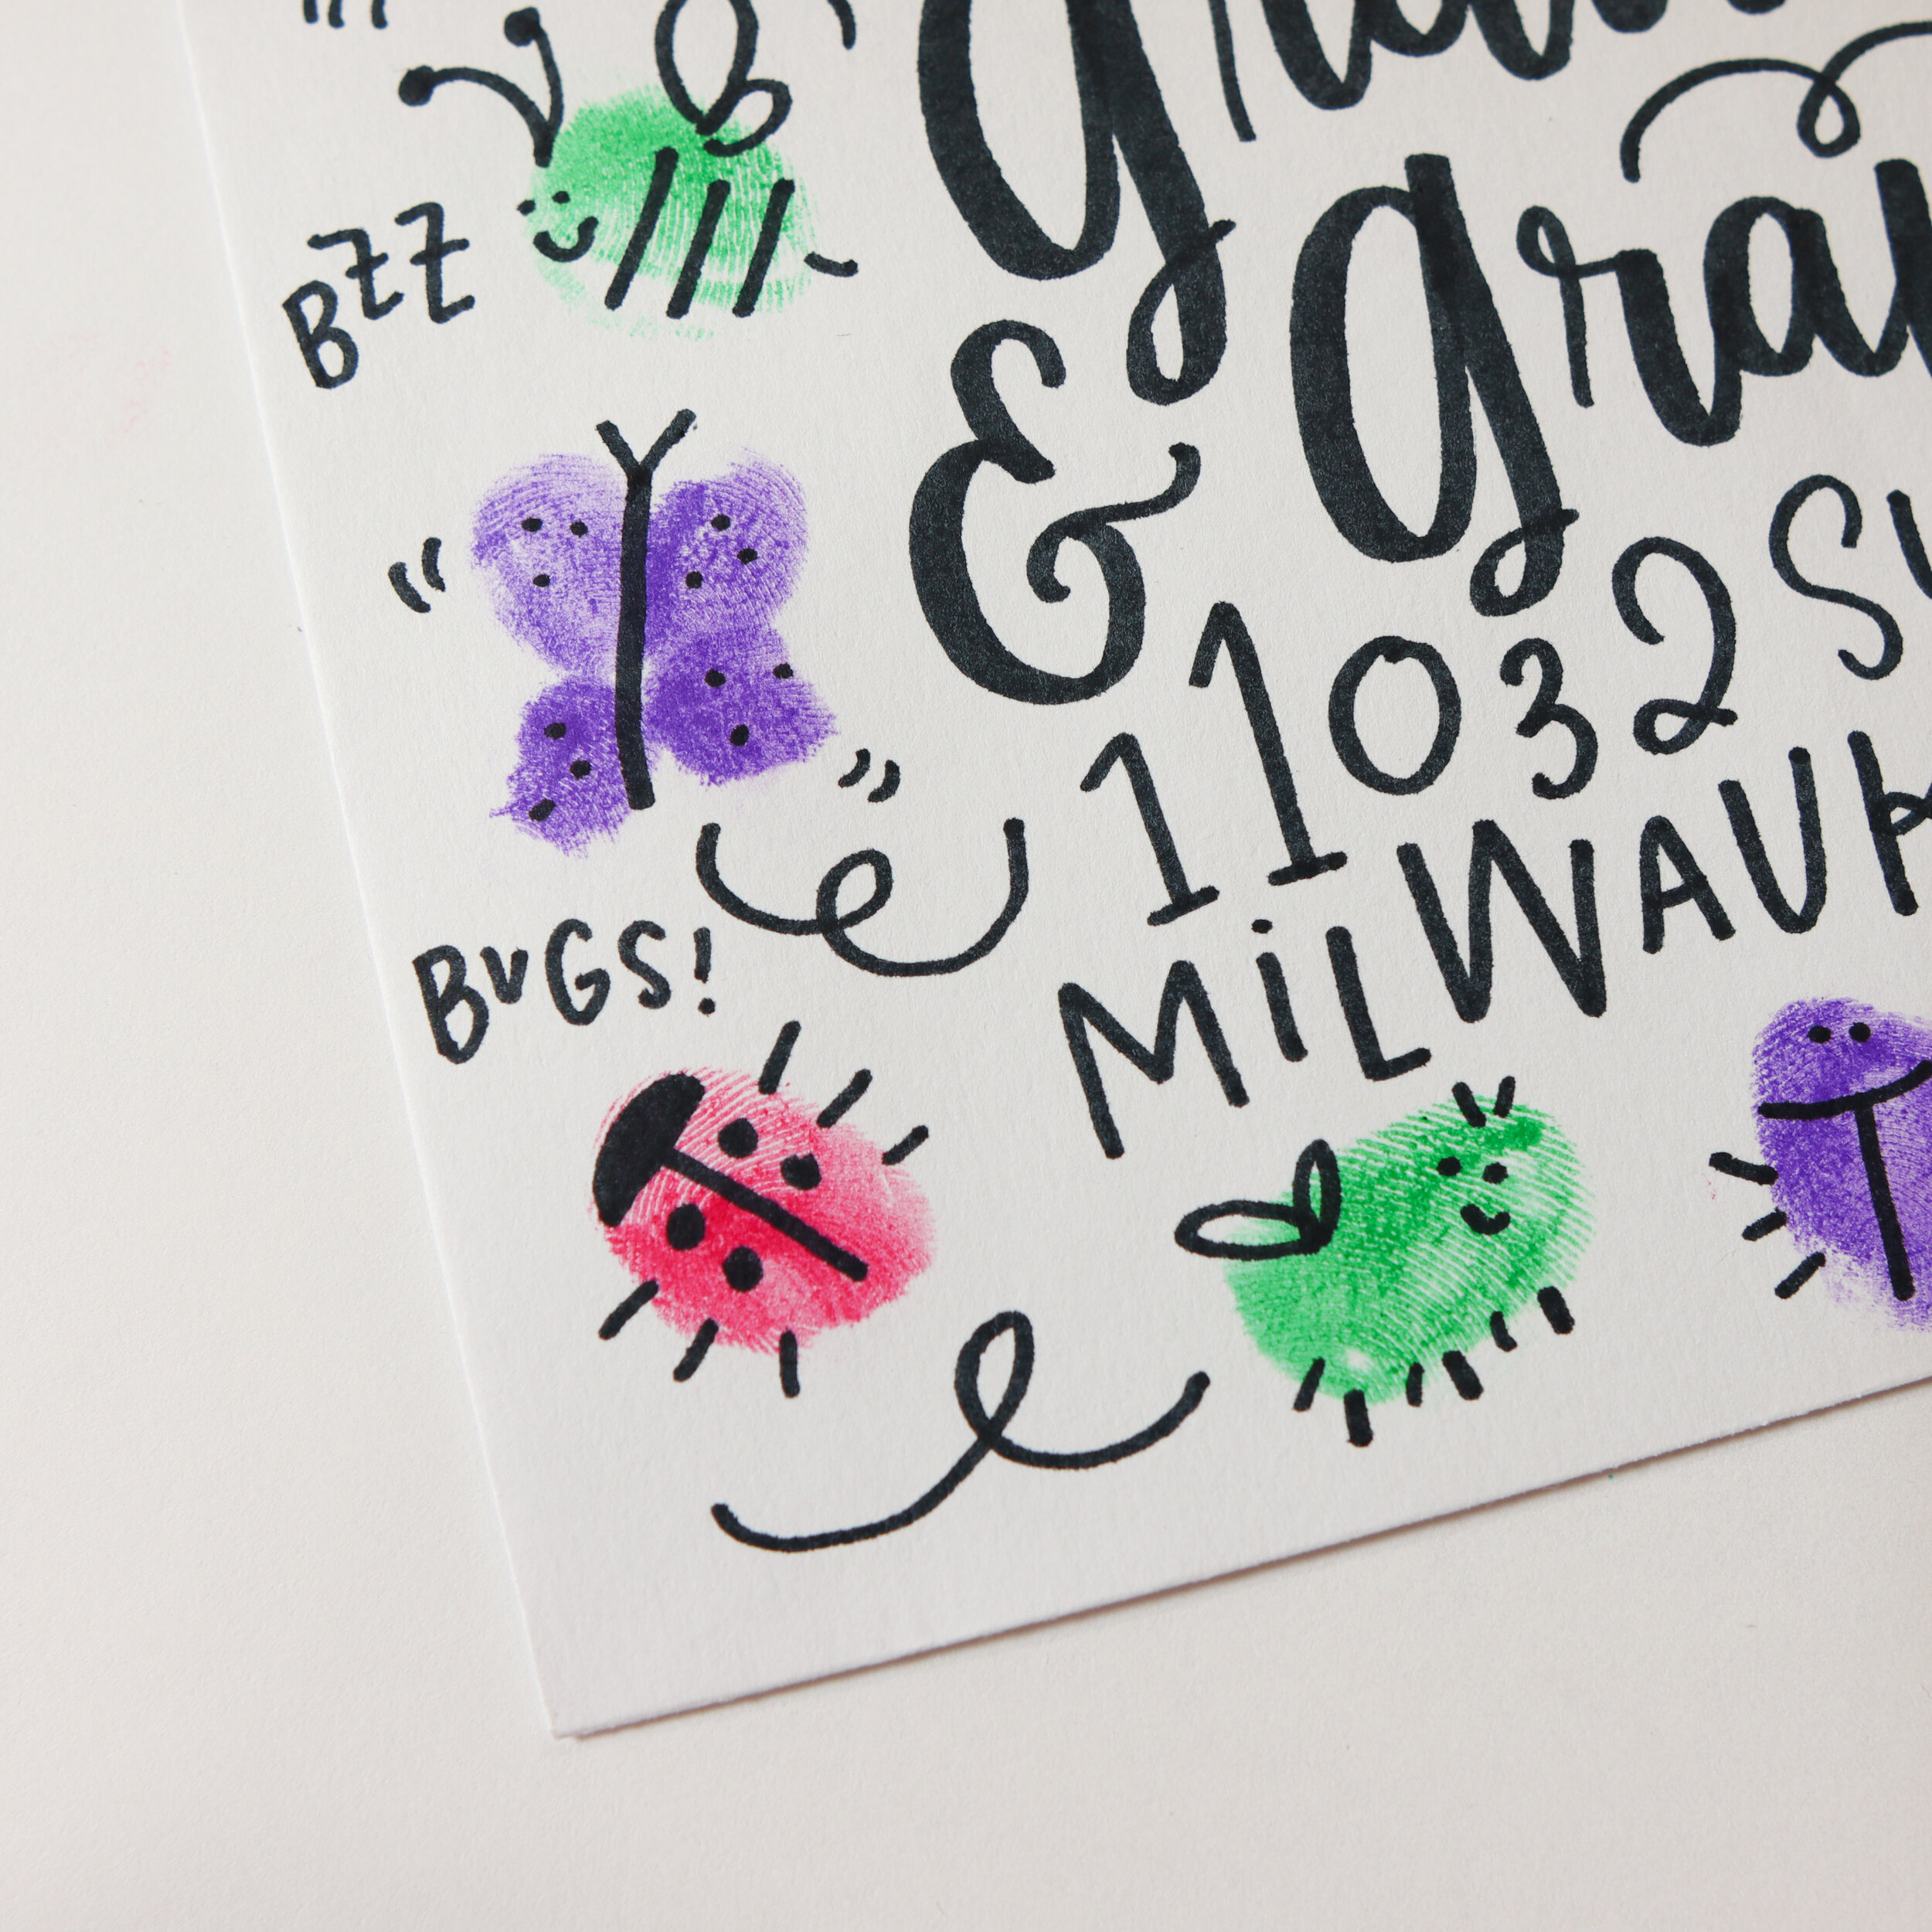
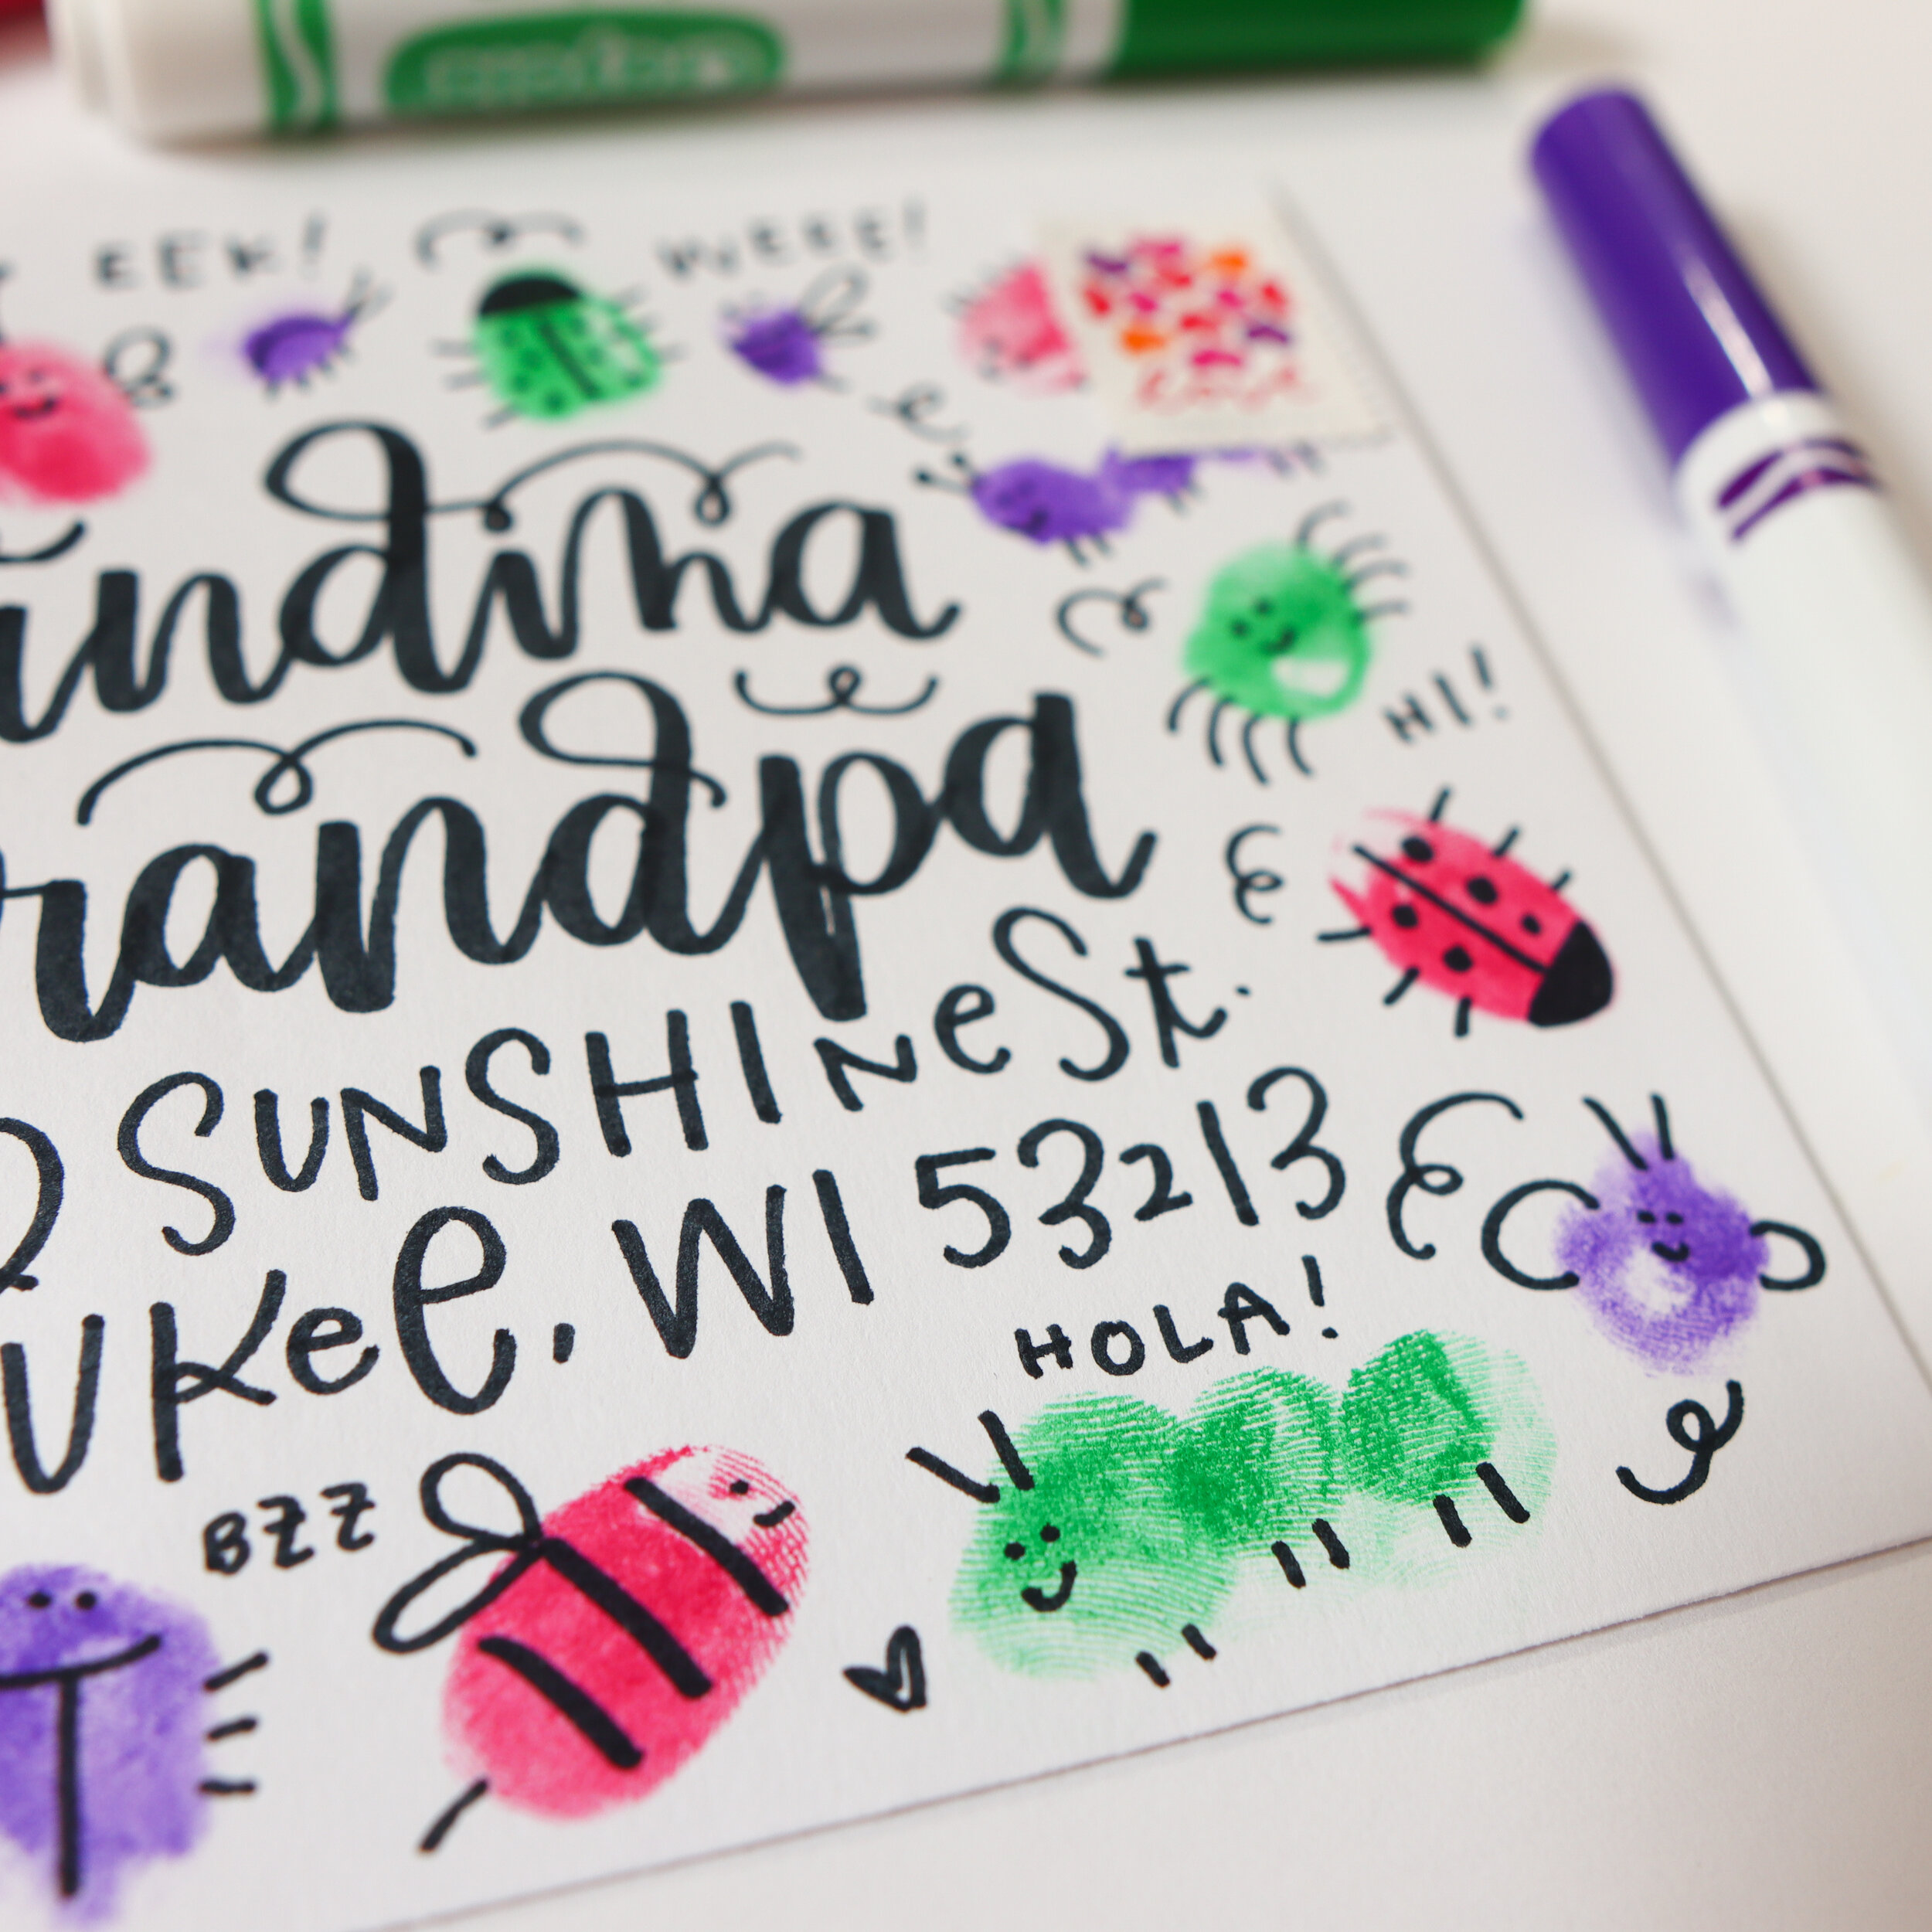
Step 3: Add your buggy qualities.
If you’re working with a toddler, this is another parent step, but older kids will have fun doing it on their own. Using your black pen, begin to add little legs, eyes and wings to the fingerprints to create some adorable little bugs. If you did this step, be sure to show your child before you drop it in the mailbox!

*Please note “washable” refers to clothes, not skin, as I found out the hard way! But all color was gone by the end of the next day. :)
MIX IT UP: Bugs aren’t your thing? You can also transform the fingerprints into flowers or funny faces!

Coloring Book Decoupage Mail Art Tutorial
Suitable for toddlers, big kids & tweens
Raise your hand if you have a million half-filled coloring books laying around? Yeeeeah, us too. With this tutorial, you can put them to good use. This tutorial includes coloring, cutting and gluing, so it’s basically an elementary student’s dream. This is also great for tweens who may have upgraded from Mickey Mouse and crayons to Lisa Frank and colored pencils.
Here’s what you’ll need:
Envelope & stamp
Coloring book pages
Crayons or colored pencils
Kid-safe scissors (or regular scissors and help from an adult!)
Glue stick or Mod Podge, whichever you have on hand
Pen for writing address
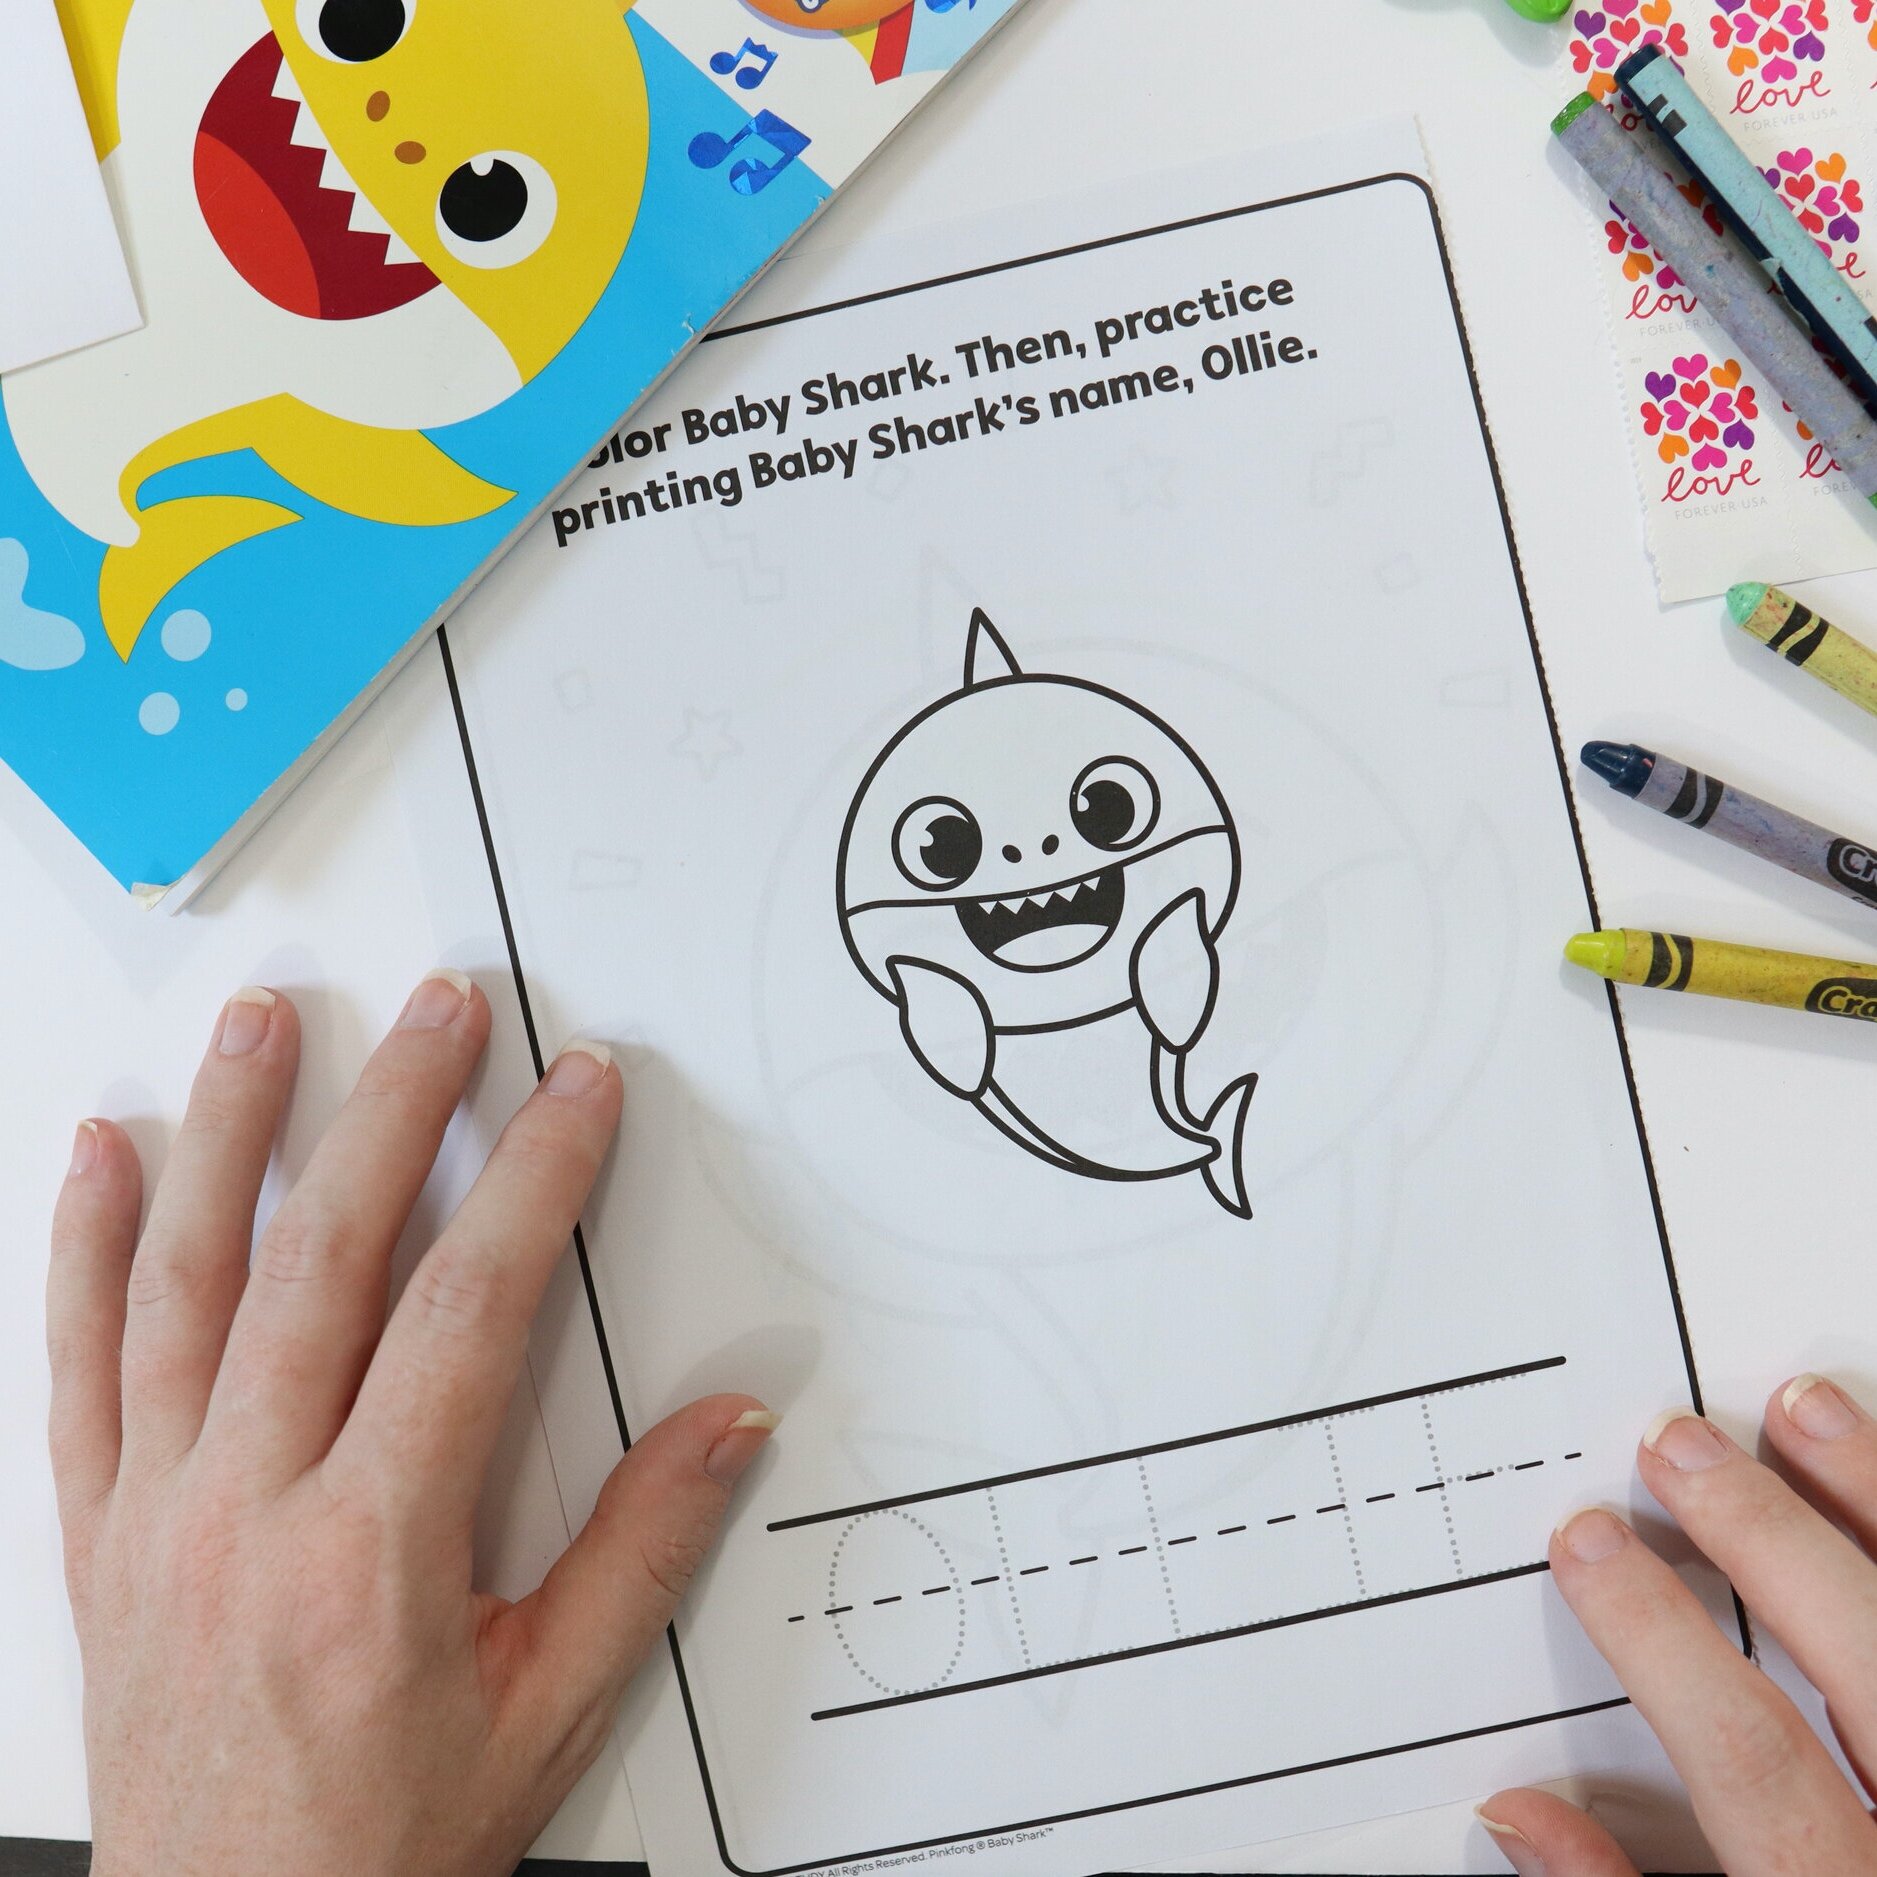
Step 1: Choose your coloring book image.
Have your kiddo flip through their coloring book and choose one or two potential pages to color. You’ll be cutting out a specific character/image, so be sure the page includes at least one large character. Keep in mind that it needs to fit on the envelope, so it shouldn’t be too large. Helpful, right? Big, but not too big. :) Because I used a 5 x 7 envelope, I made sure my main image was no taller than 4.5 inches. Don’t worry so much about width, because you can always wrap it around to the back of the envelope for a cool effect. Here are some examples of the coloring pages we tried.
Don’t have any coloring books laying around? Crayola has a ton of free coloring pages available for download on their website.
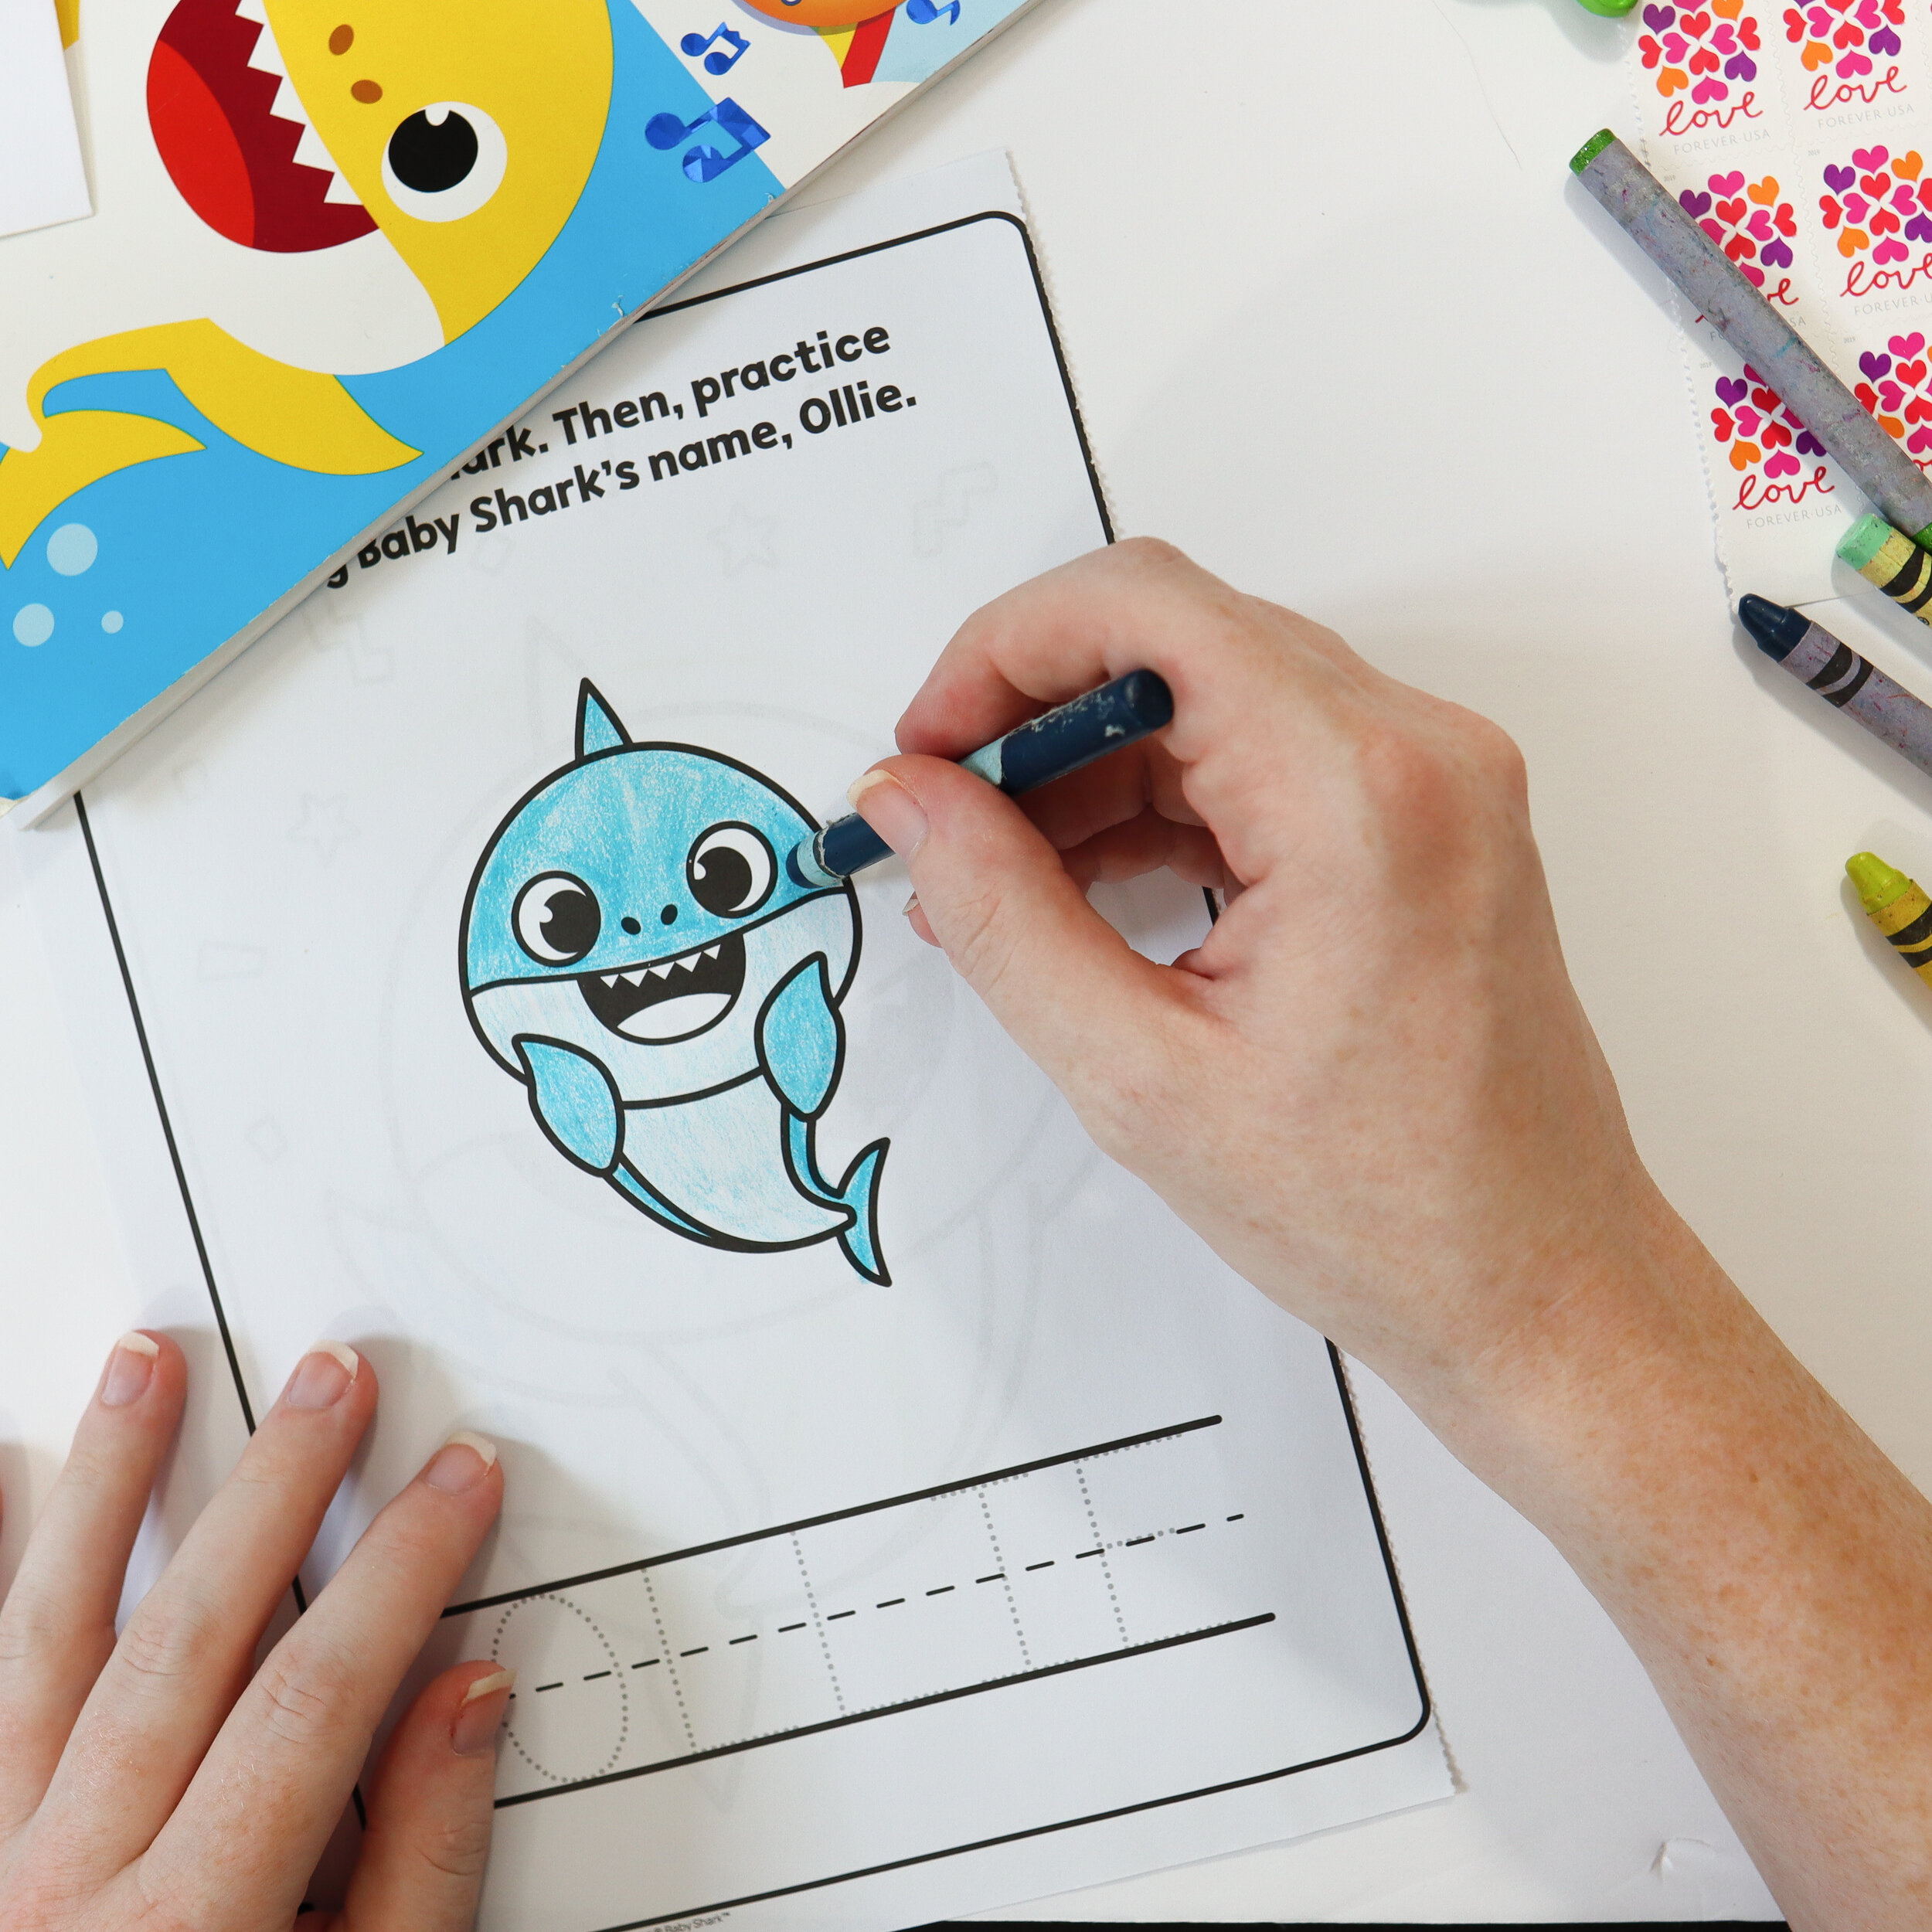
Step 2: Color!
Obviously, the best part of this tutorial is the coloring, because that’s the best part of any day, IMHO. Make it fun, make it bright, make it you!
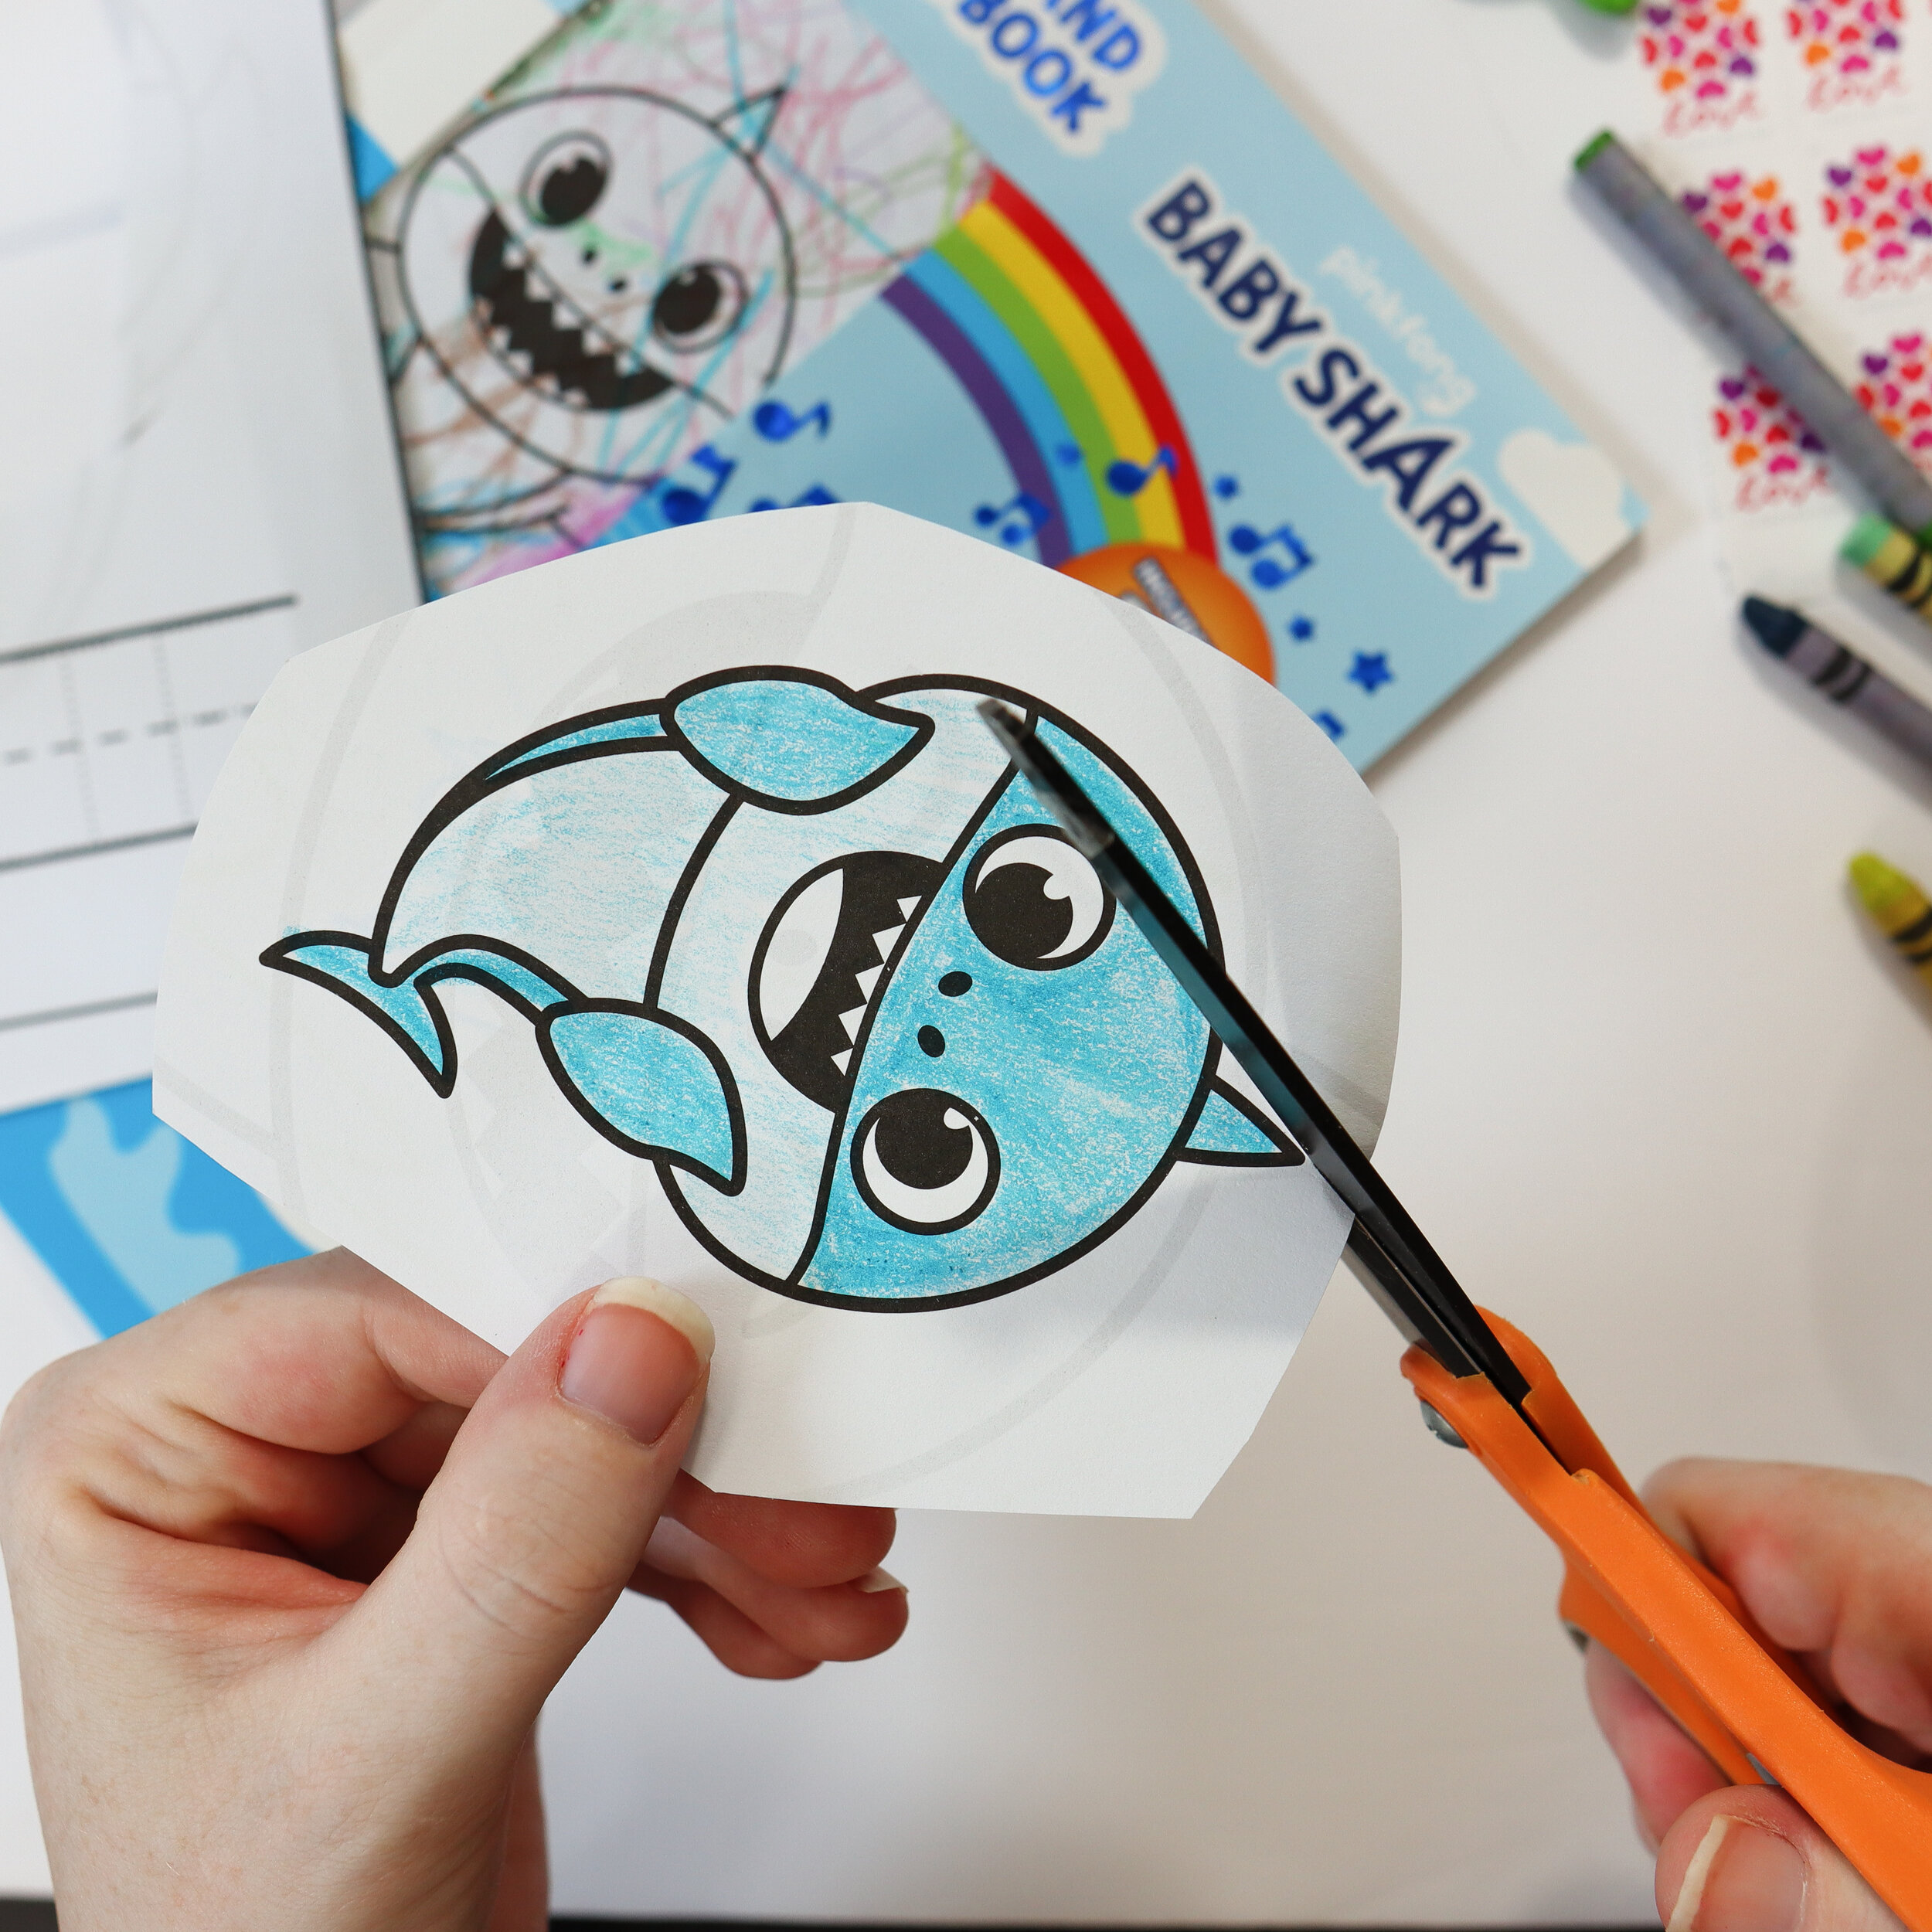
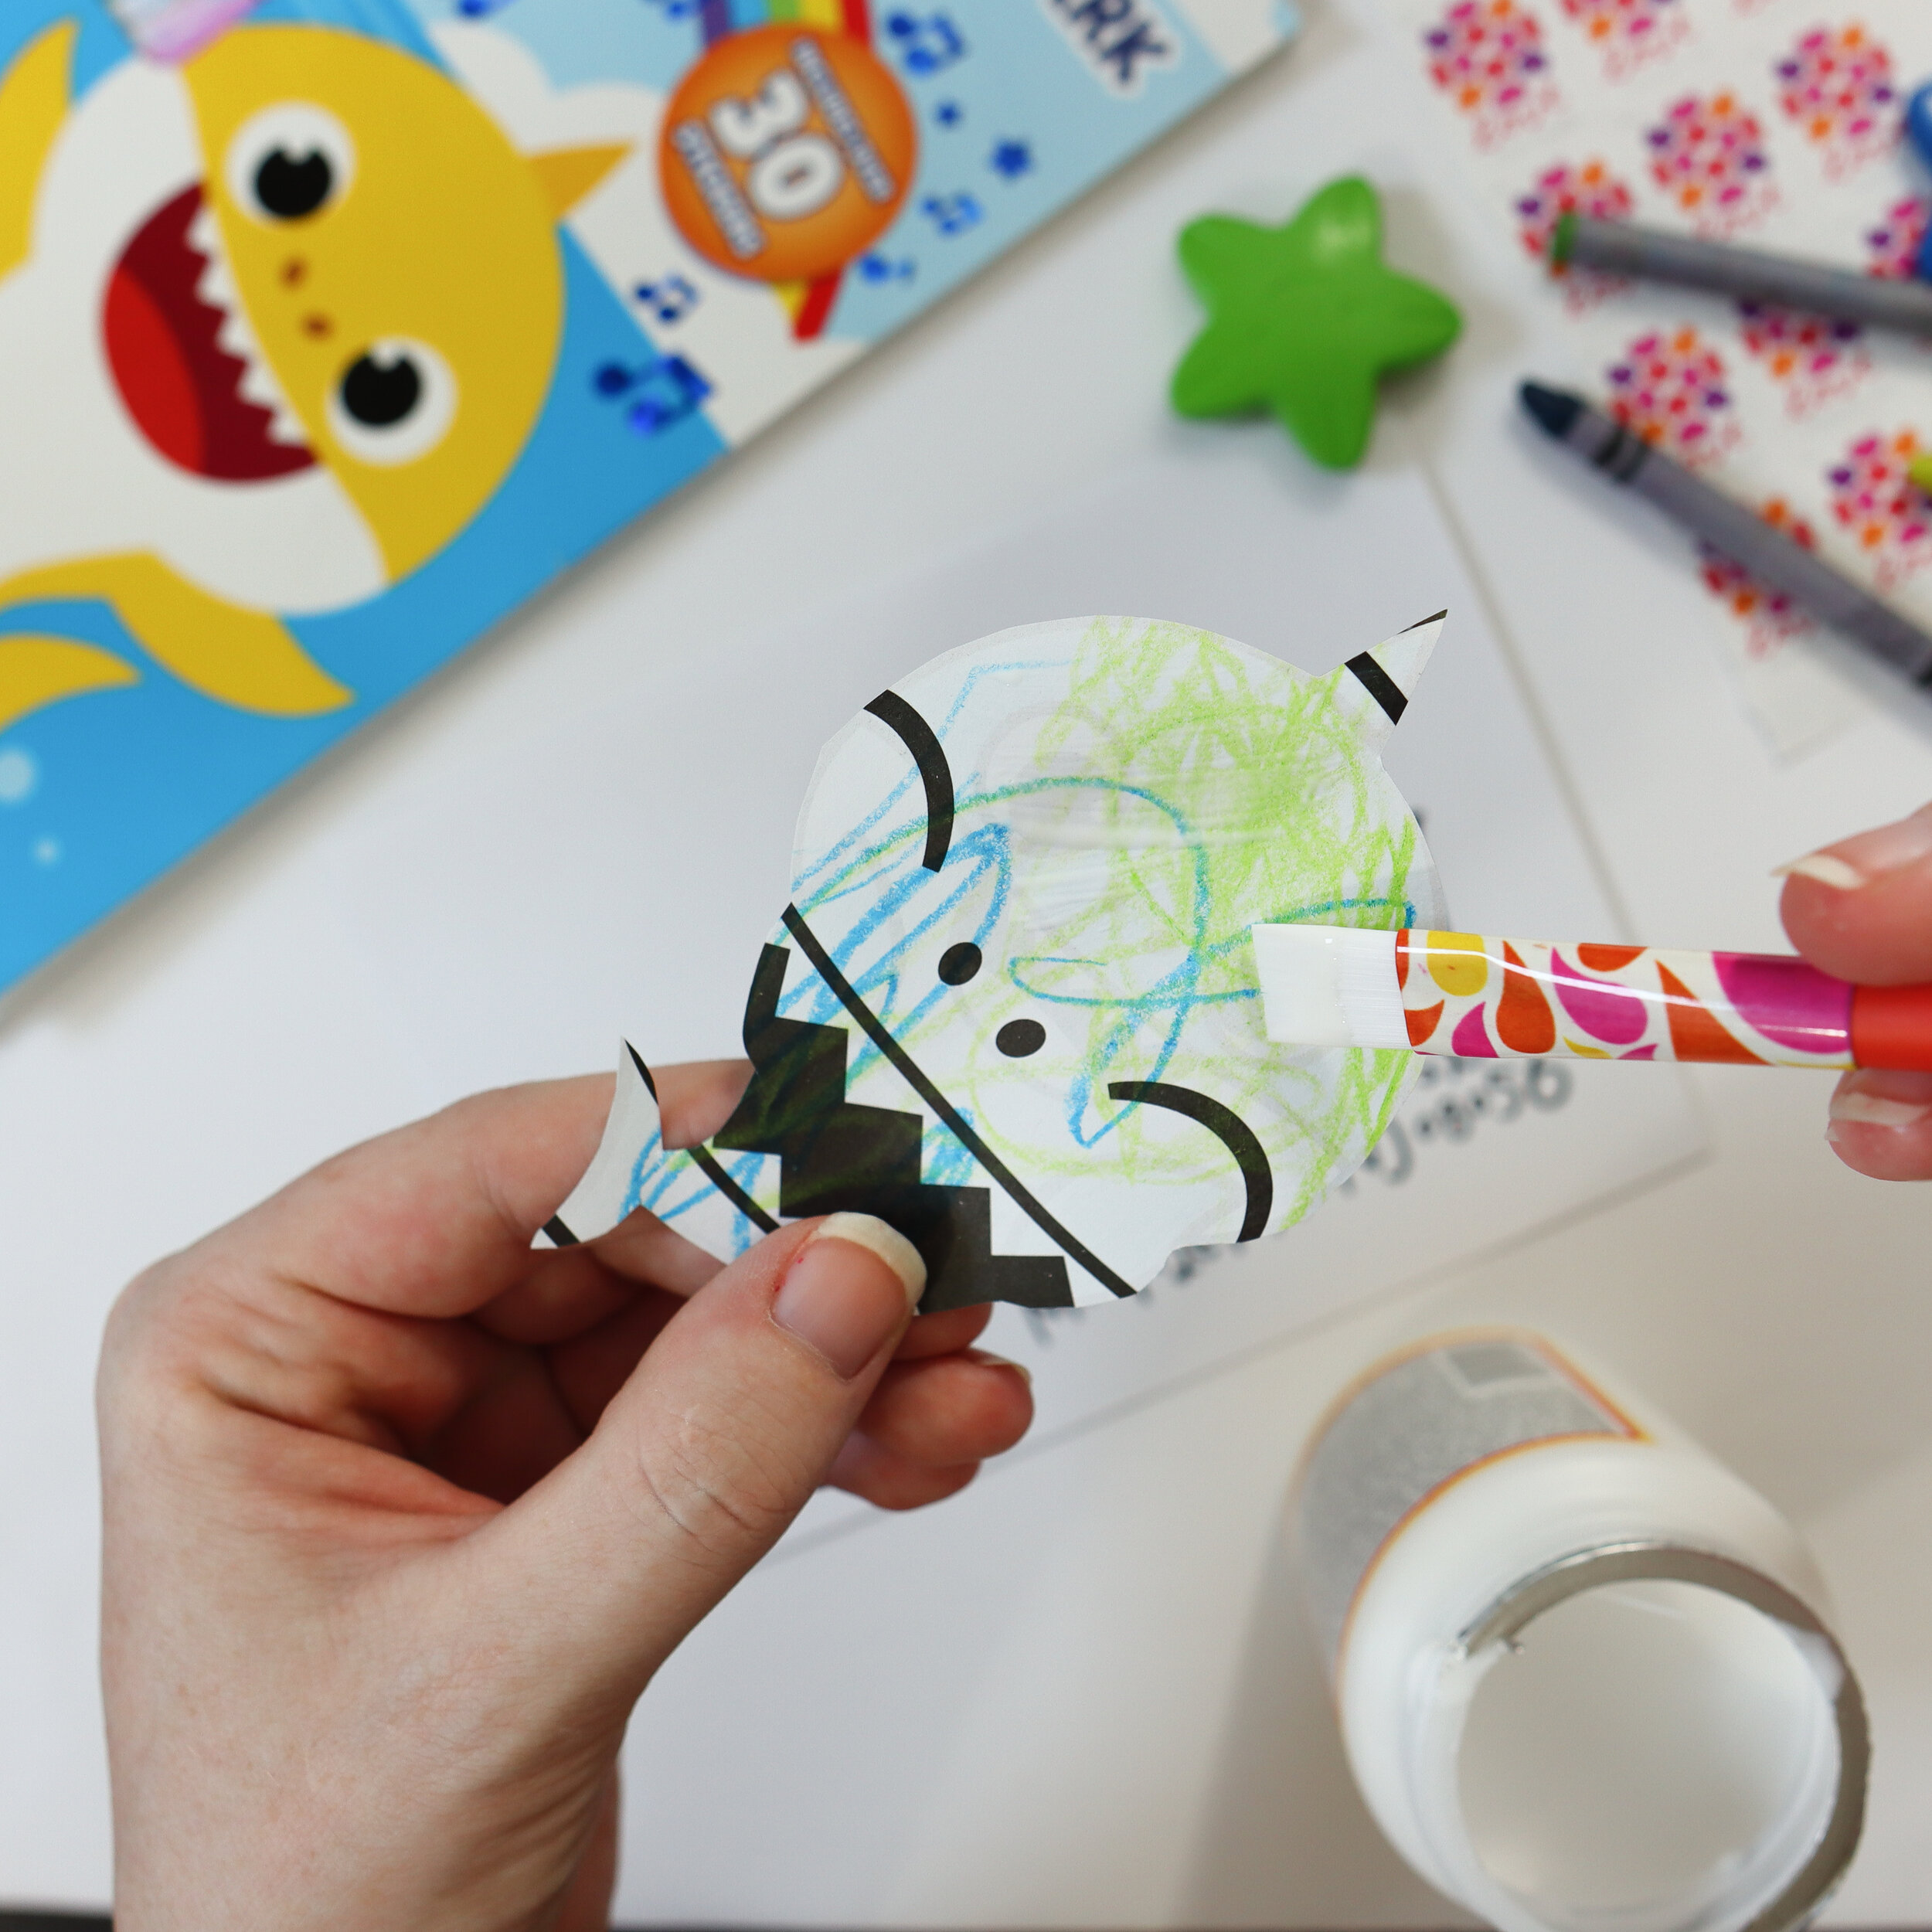
Step 3: Cut.
Once your kiddo has their masterpiece colored, it’s time to cut it out. You can always help with this step if you’re doing this with a toddler or the thought of putting scissors in your child’s hand fills you with terror.
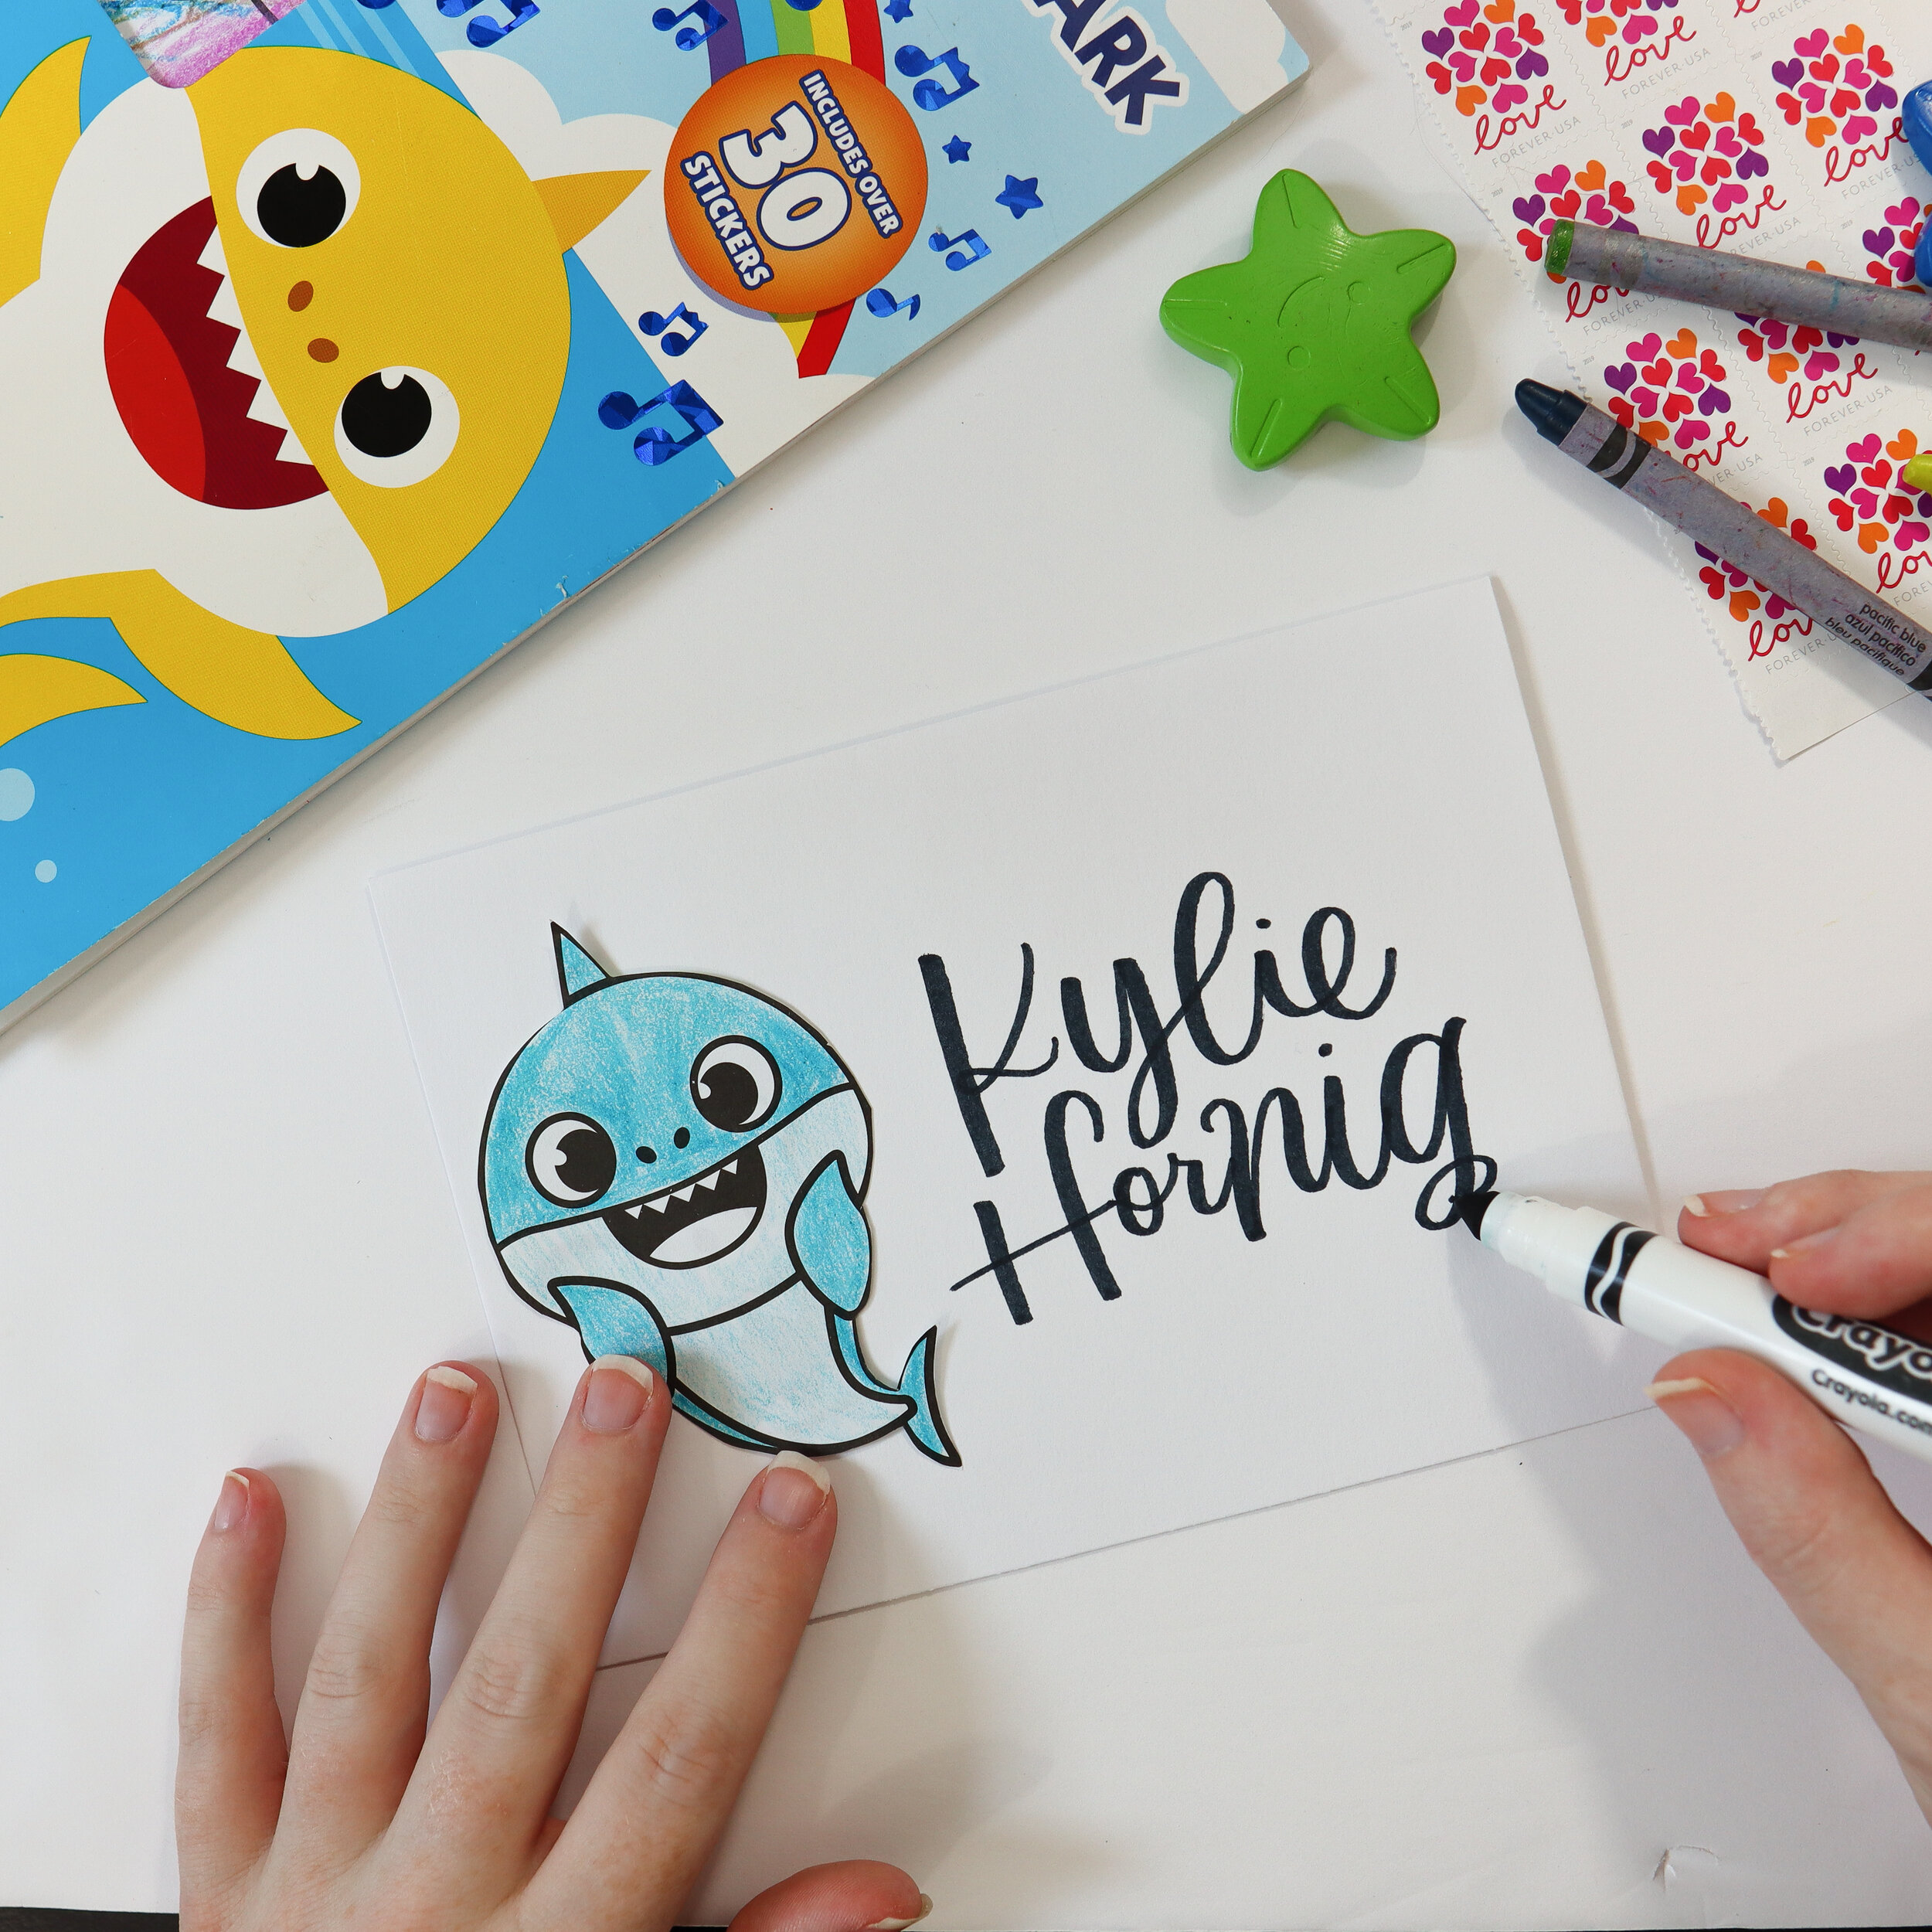
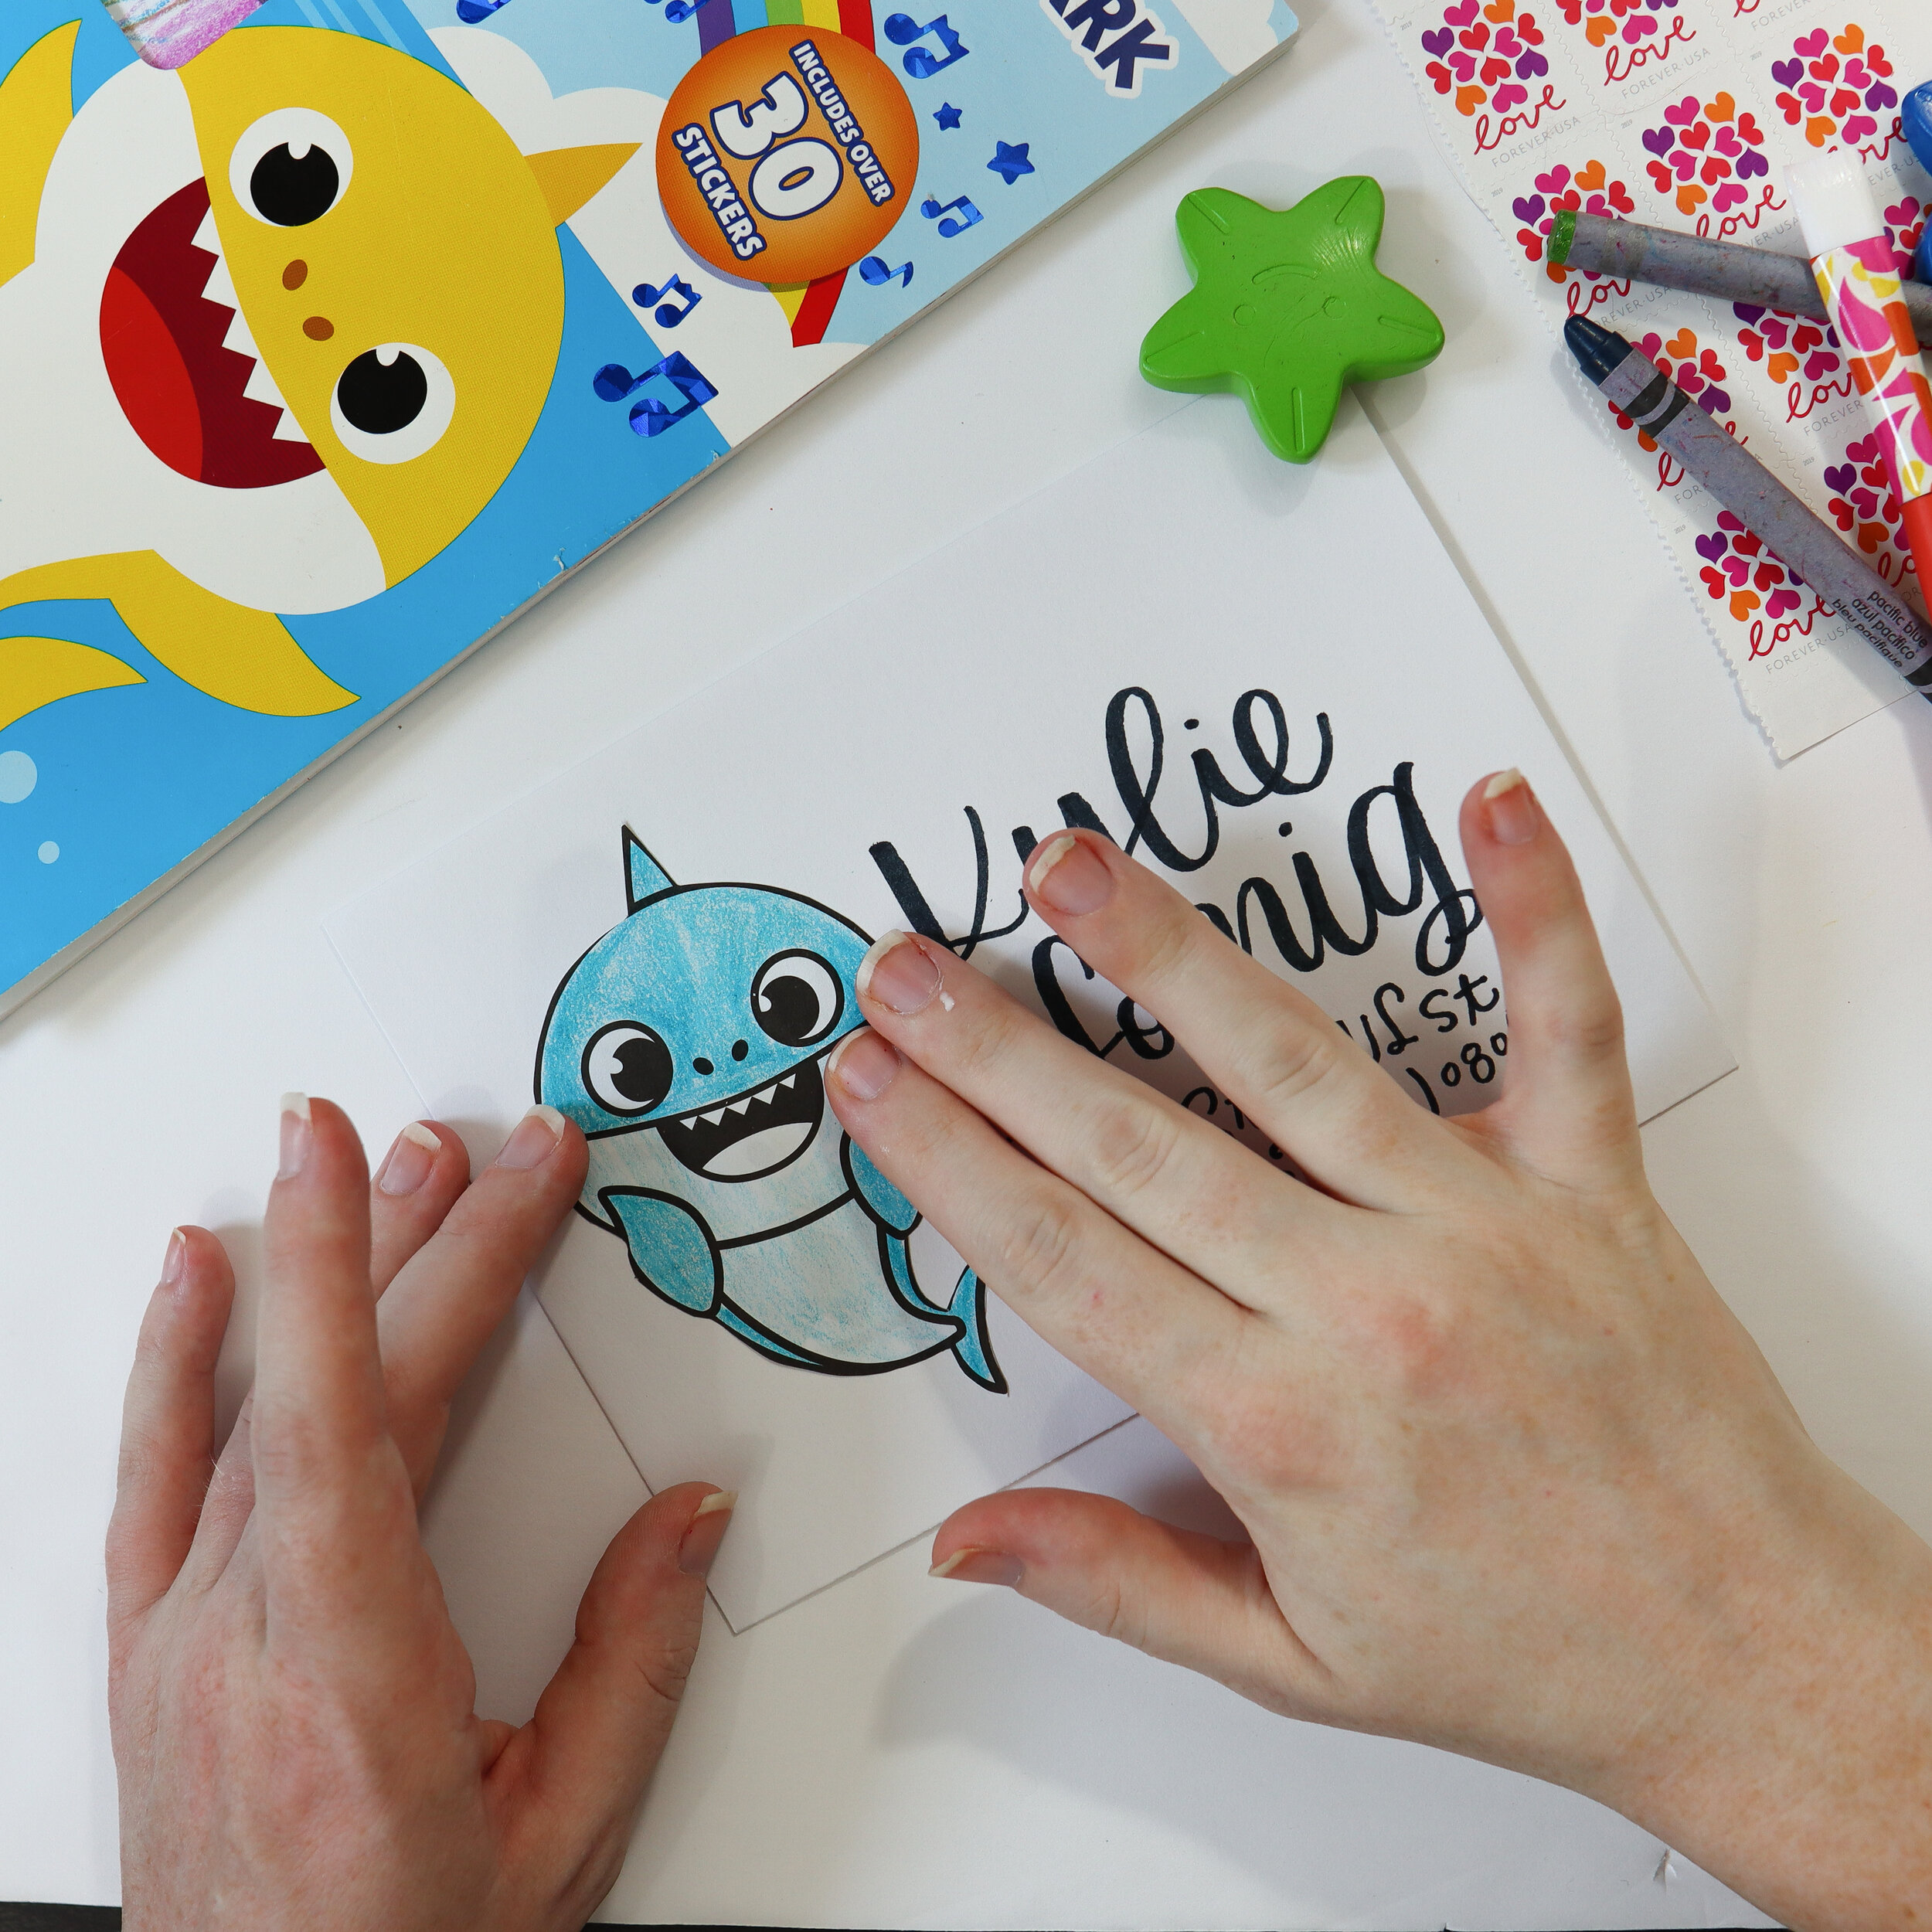
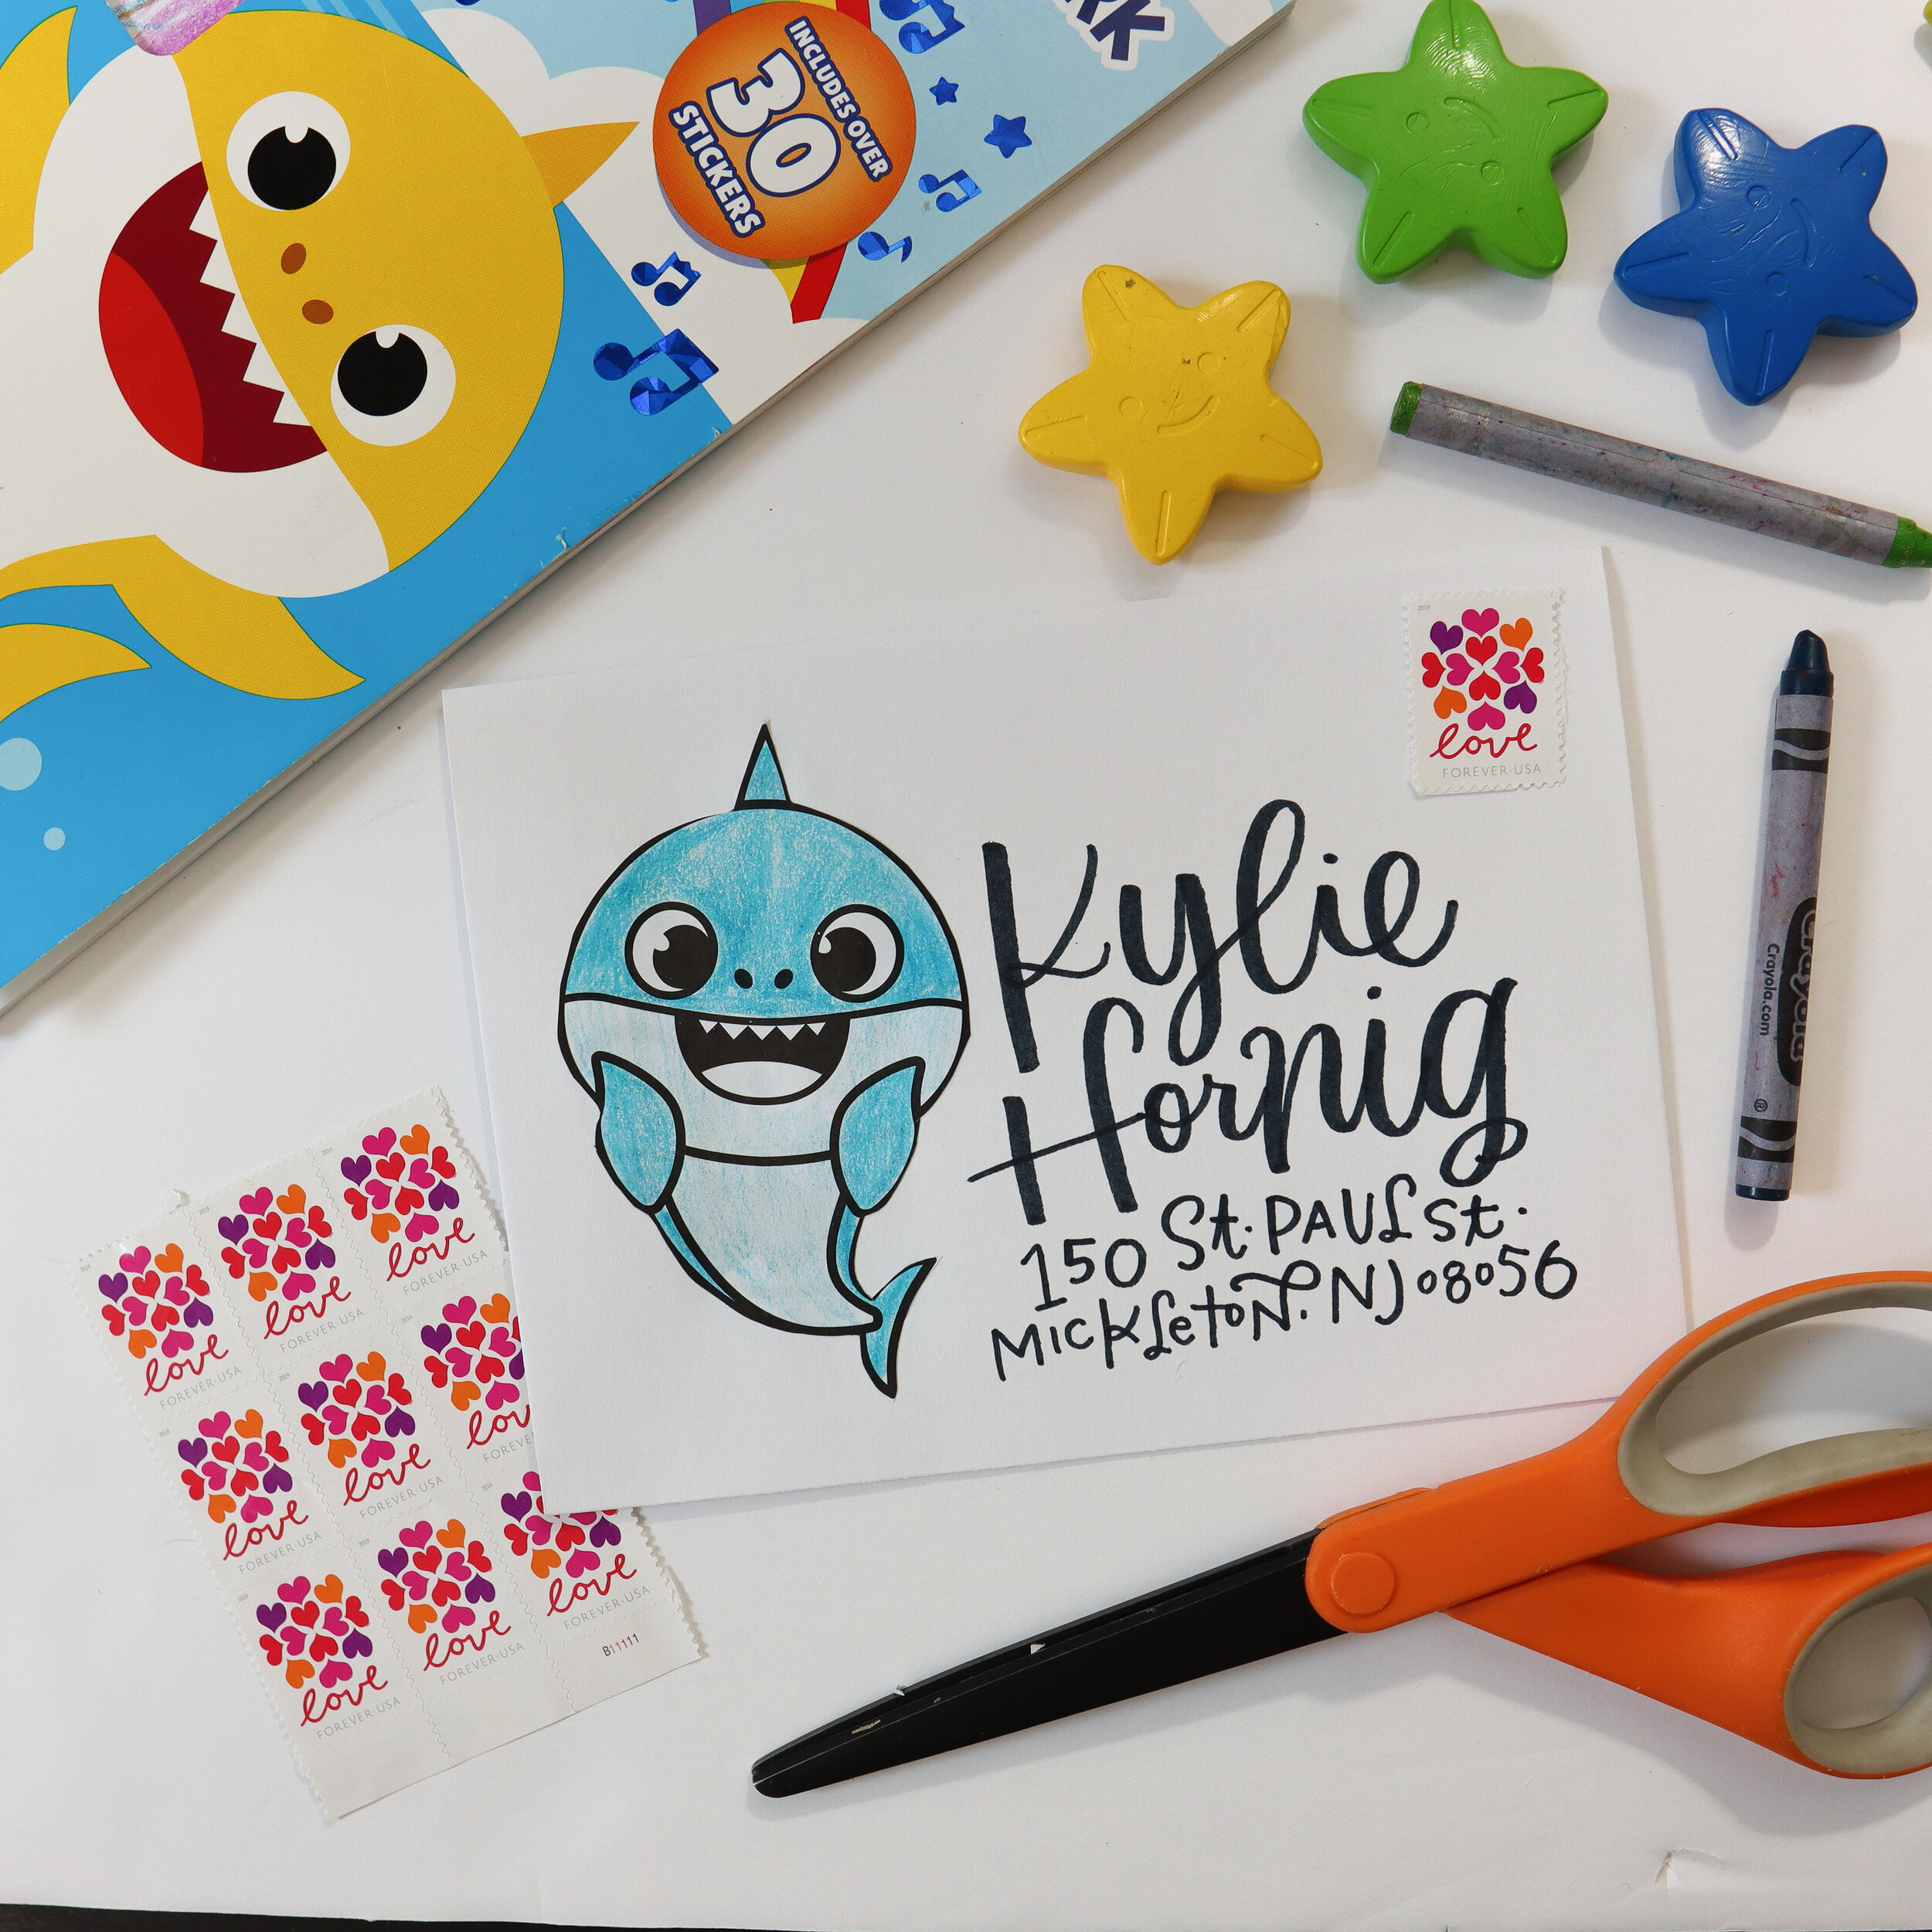
Step 4: Place & Write your address.
Place the cut out image on the envelope and adjust until you find a spot you like. I recommend keeping it on the left side so it doesn’t interfere with the stamp. If your image has to curl around the back of the envelope, that’s totally fine – in fact, it can even look pretty cool. Now that you know where your image will go, you can write down the address! I recommend writing it down in pencil first, and then in pen. That way, if your child makes an error in the address, you can catch it before it’s permanent.
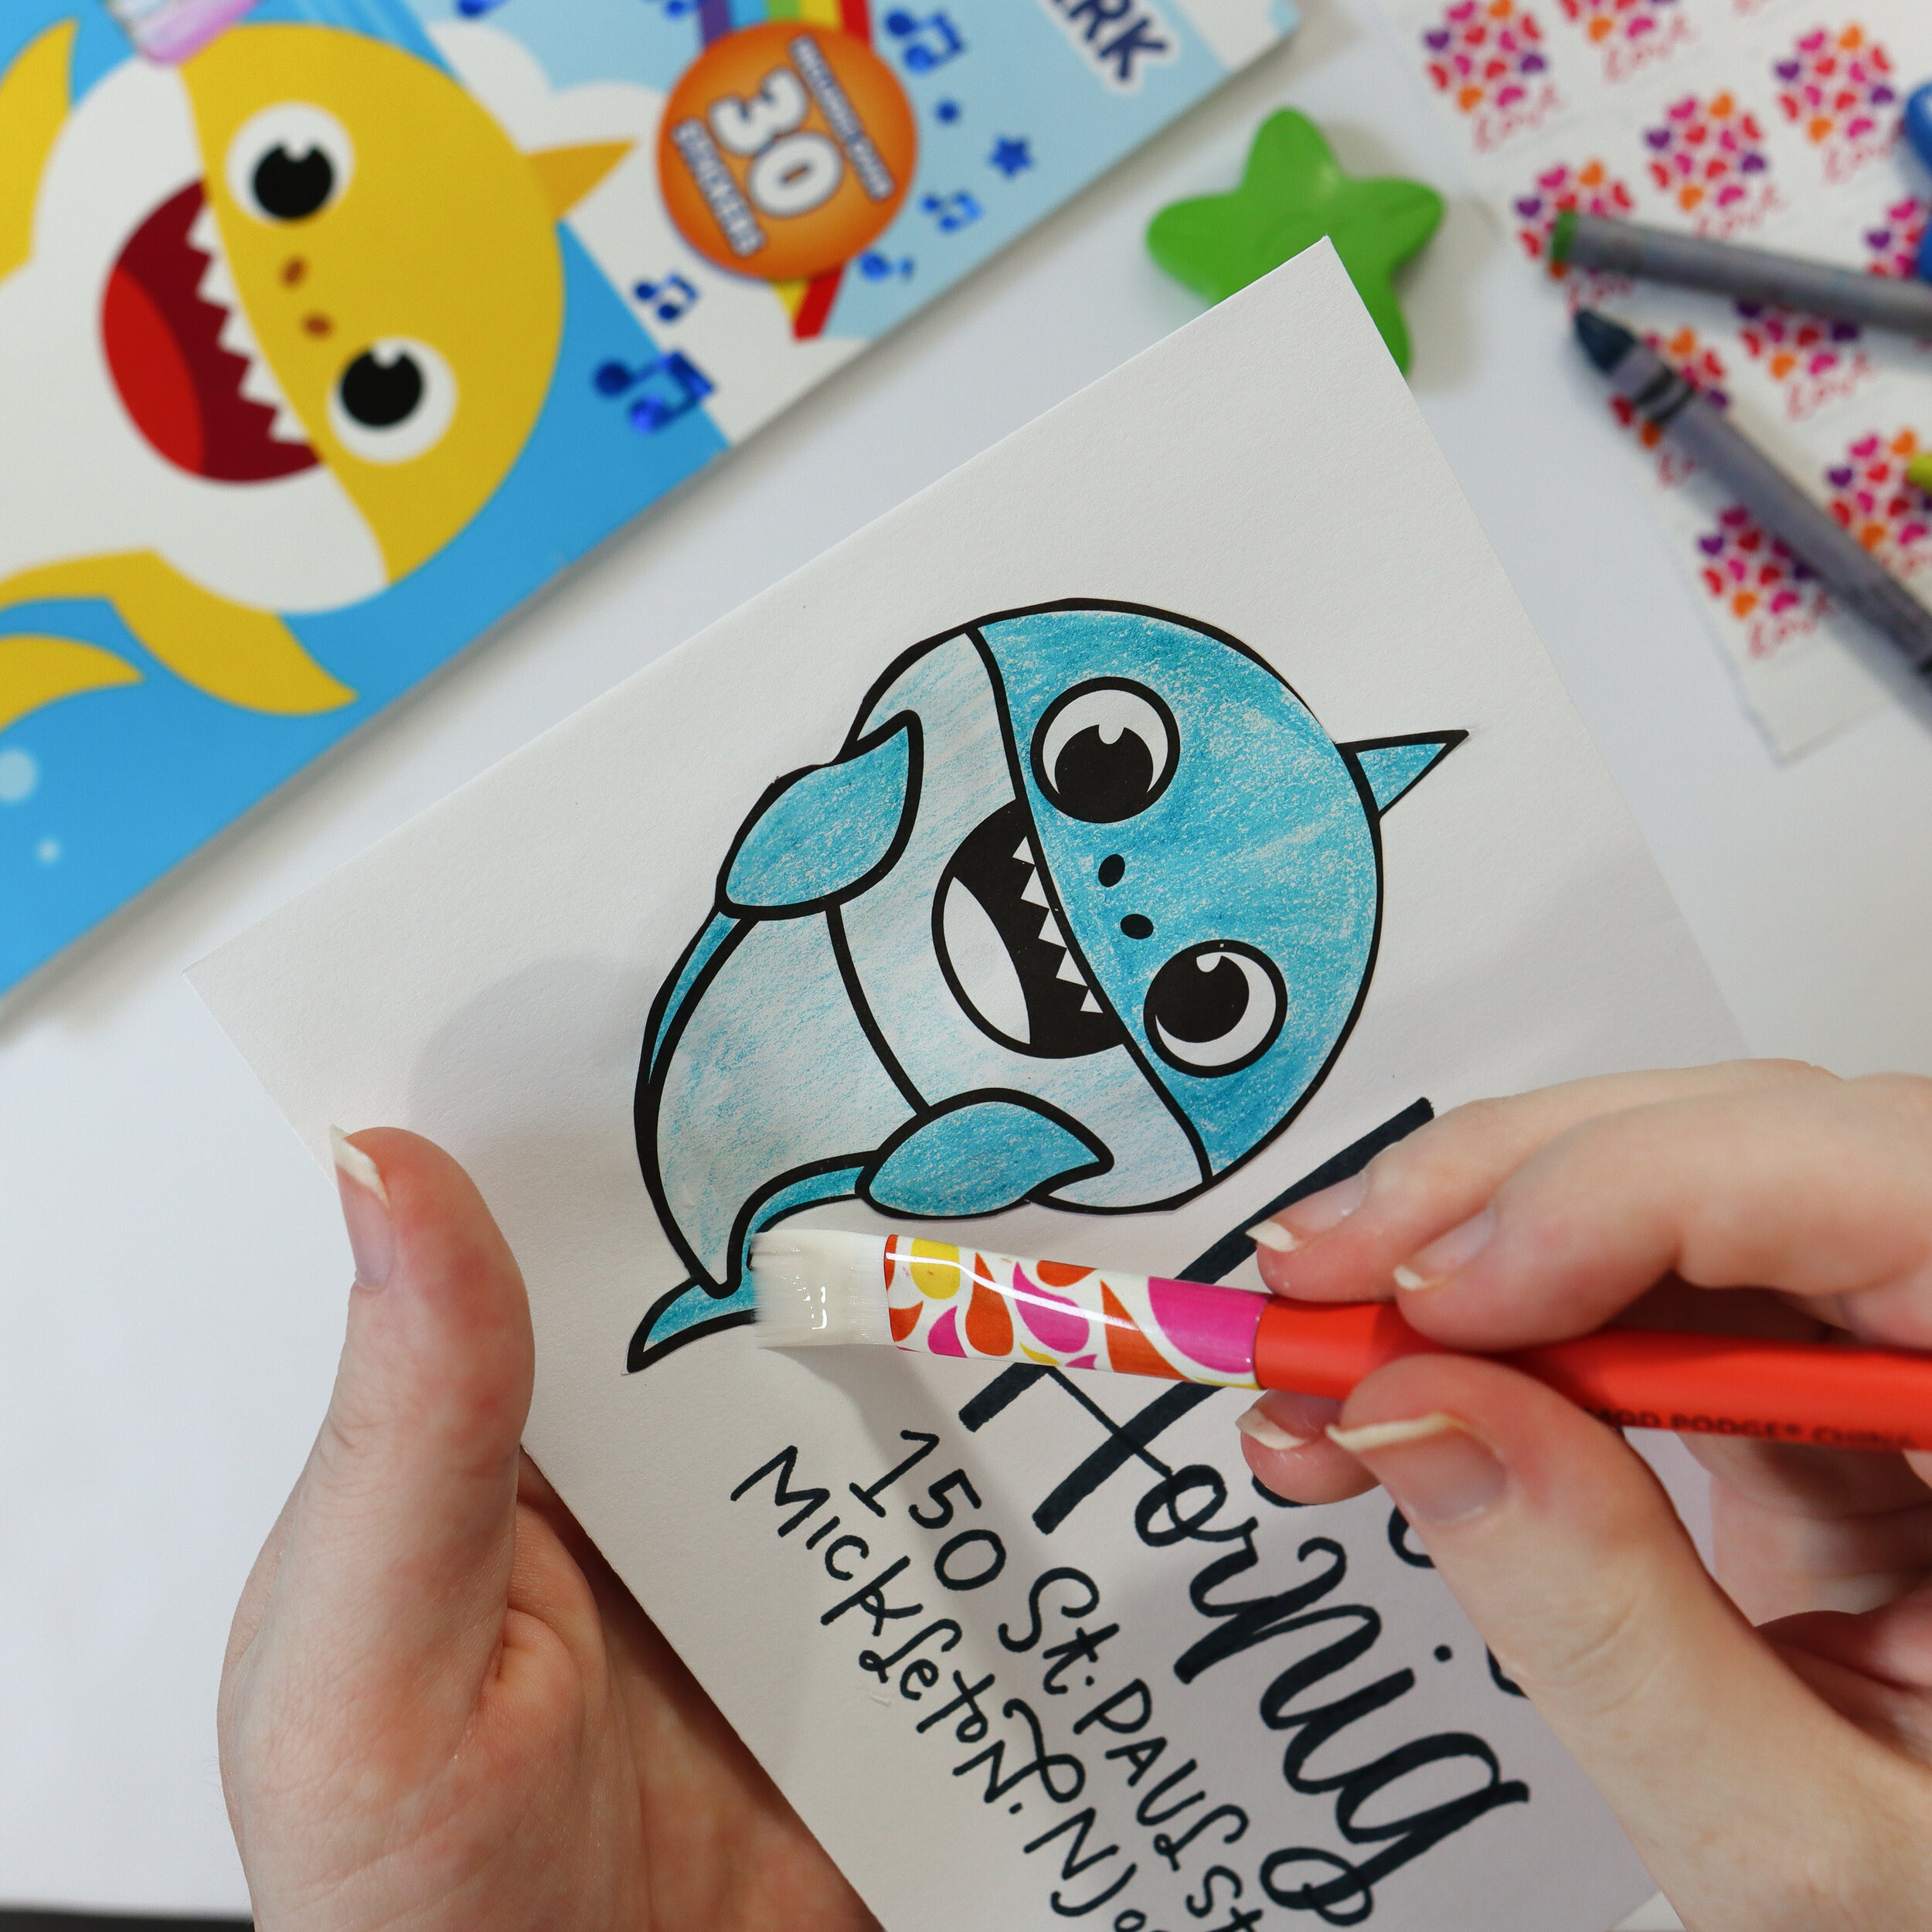
Step 5: Glue.
Once your address is written — and you know it’s correct! — you can glue down the image using either a glue stick or Mod Podge. One tip when it comes to gluing – take EXTRA care to make sure the edges are glued down tightly. If they aren’t secured, you run the risk of having the coloring page tear off before it reaches its destination. If you have ModPodge, be sure to seal the edges of the cutout — it will dry clear and will give you a little extra protection!

MIX IT UP: Instead of one large coloring image, your child can combine a bunch of different smaller images to create something truly unique. If going this route, I highly recommend Mod Podge instead of glue, especially if the images will overlap one another.

Paint Scrape Postcard Art Tutorial
Suitable for big kids & tweens
First thing’s first – let’s give credit where credit is due! When looking for some crafty activities to do with my daughter and niece, I stumbled upon an old tutorial for paint scraping from the Art Bar blog, and not only is this activity a BLAST, but it also makes super pretty art every time. After some testing and tweaking her original tutorial, I came up with a foolproof method to apply this technique to envelope art. You can find the Art Bar’s original tutorial for paint scrape art for kids here – and while you’re there, be sure to check out all her amazing tutorials! Seriously, there’s enough content here to keep you flush in art projects until college. :)
Here’s what you’ll need:
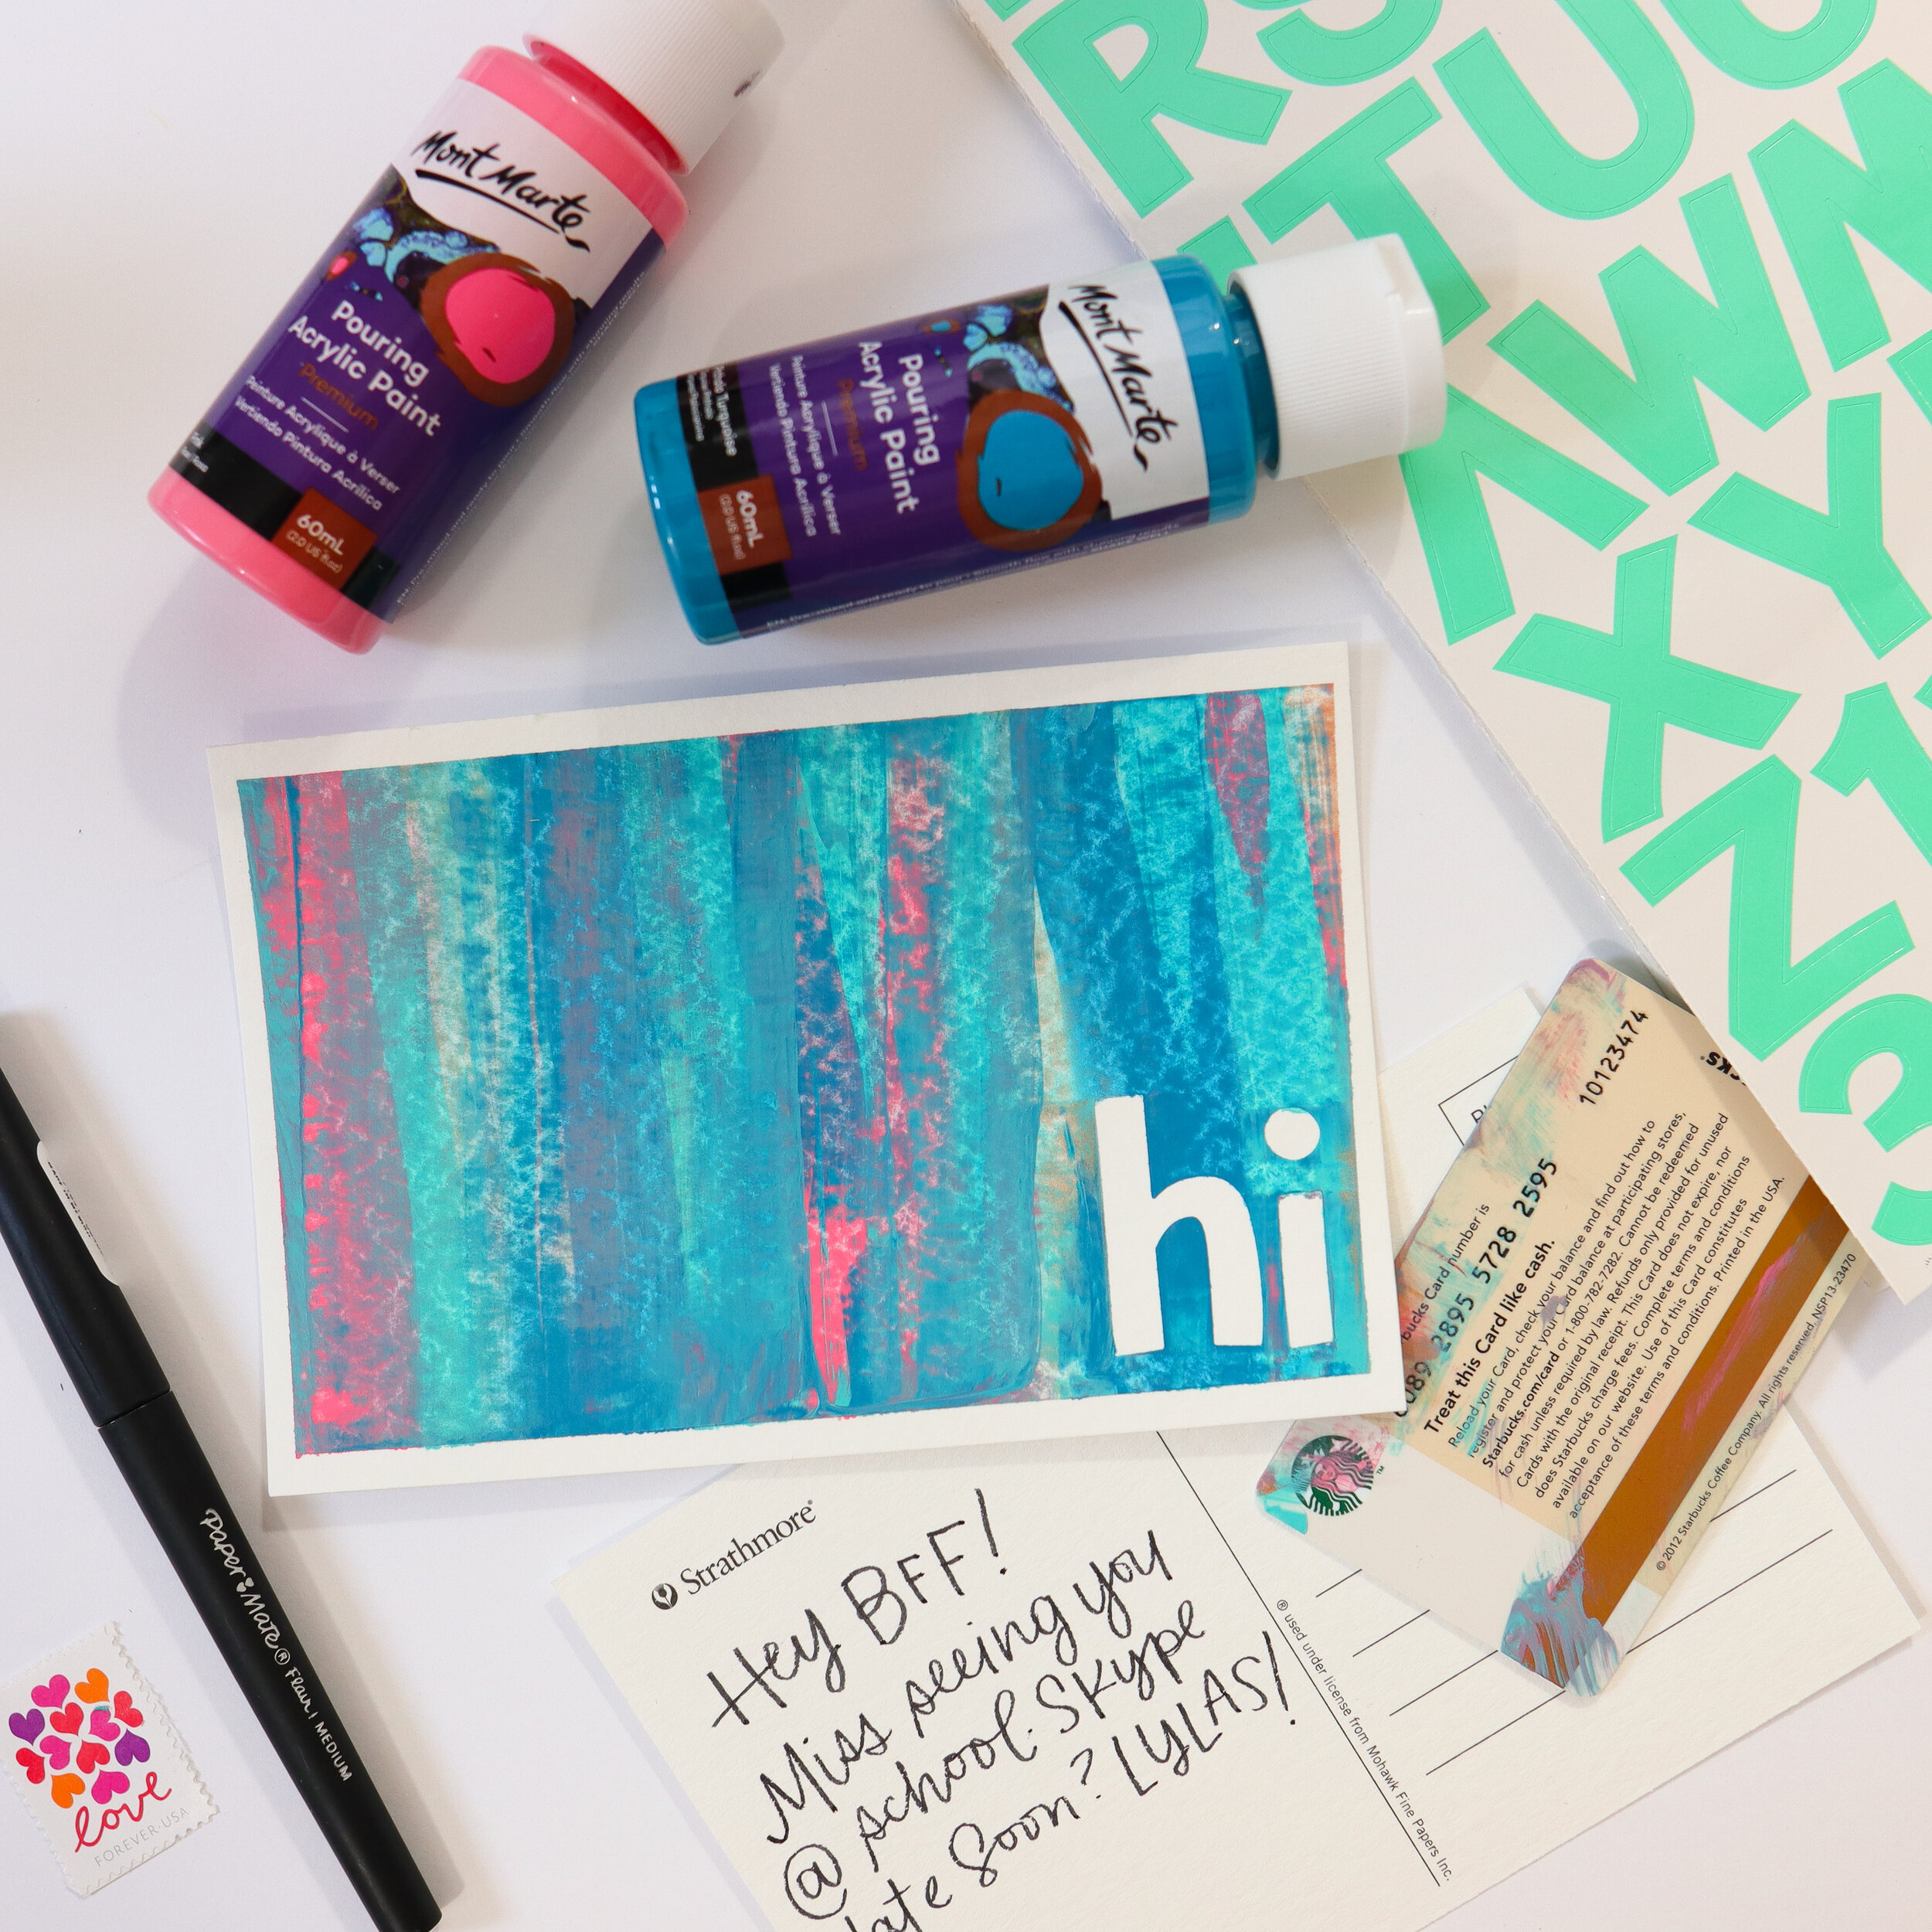
Watercolor postcards (I’m using these)
Washi tape (style/color doesn’t matter)
Removable letter stickers (color doesn’t matter - just make sure they aren’t permanent stickers as we will be removing them!)
Acrylic tray or cookie sheet with ridges
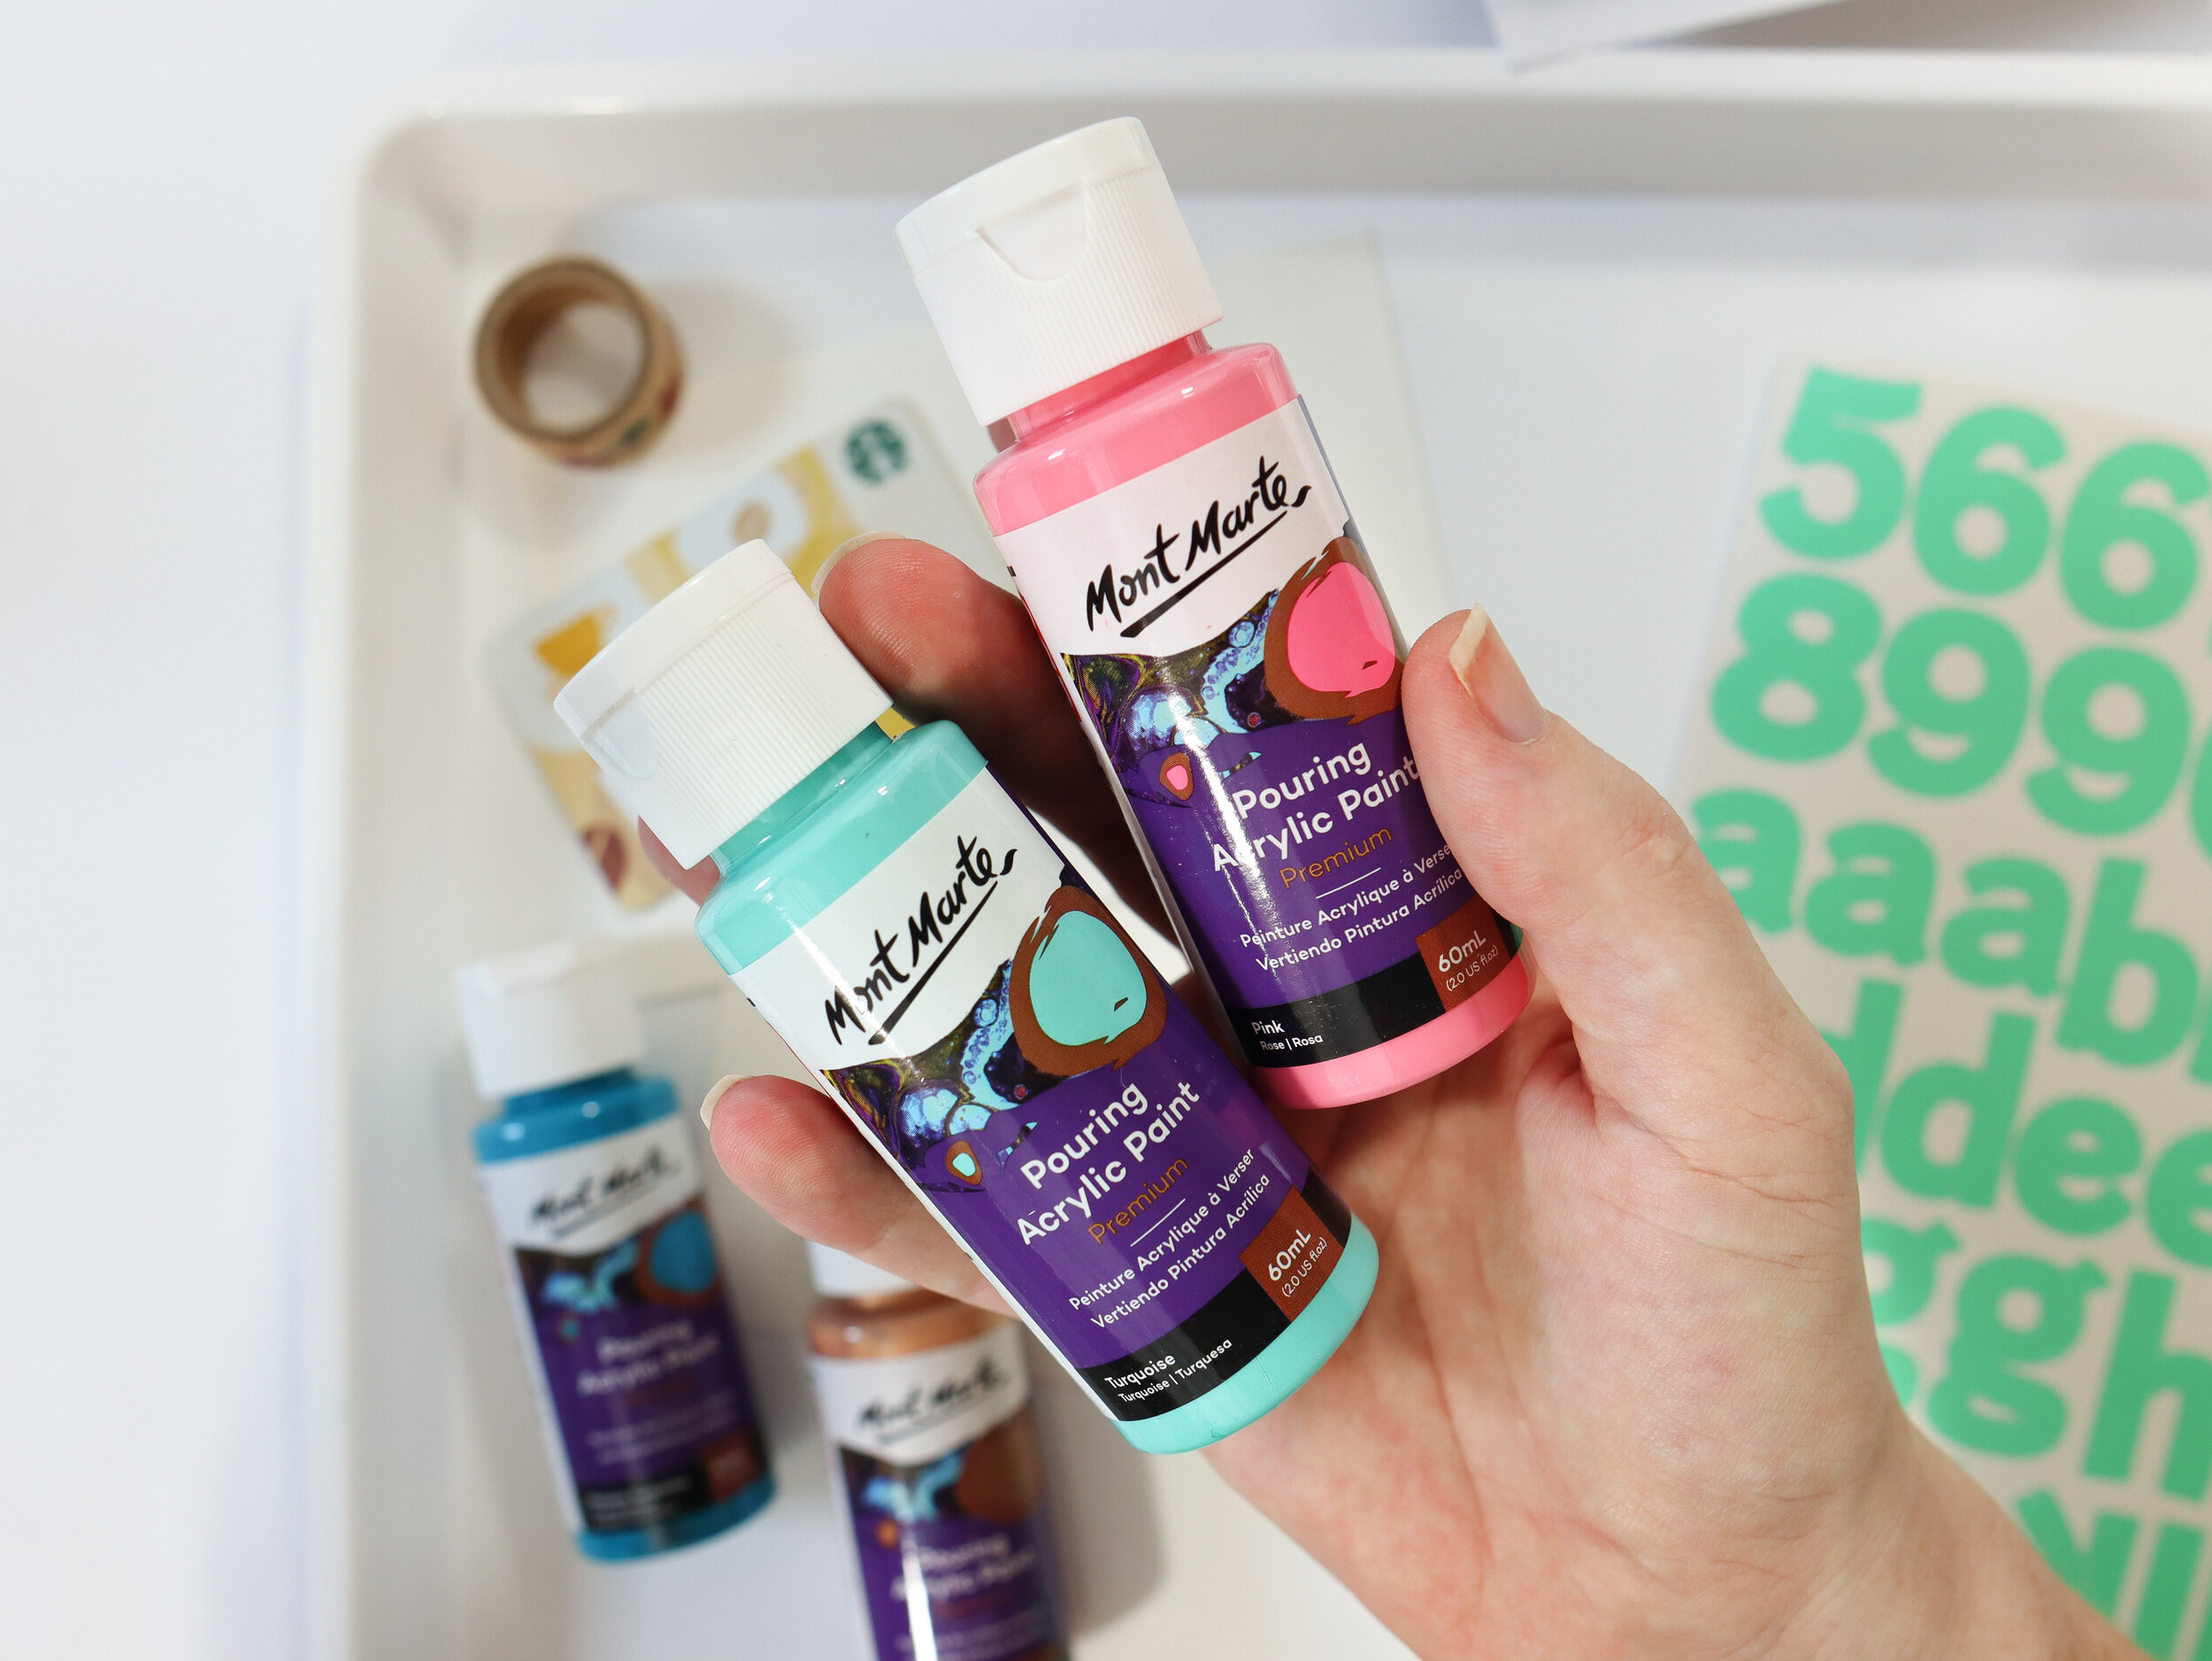
Pourable acrylic paint in at least 3 colors (I’m using this collection)
Old credit or rewards card
Towel
Pen for writing address
Step 1: Choose your colors wisely.
This is something we might not think about until our child has a postcard full of greenish brown paint, but it’s super important to choose analogous colors for this project. That’s just a fancy way of saying they are next to one another on the color wheel. Blue, purple and green is a great option, as is pink/red, orange and yellow. All those colors will blend together nicely.
On the other hand, if you choose colors that are opposite one another on the color wheel (that’s “complementary colors” in fancy speak), you’re going to end up with a big, brown mess. Combos you want to avoid include red and green, yellow and purple, and blue and orange.
Step 2: Set Up your workspace.
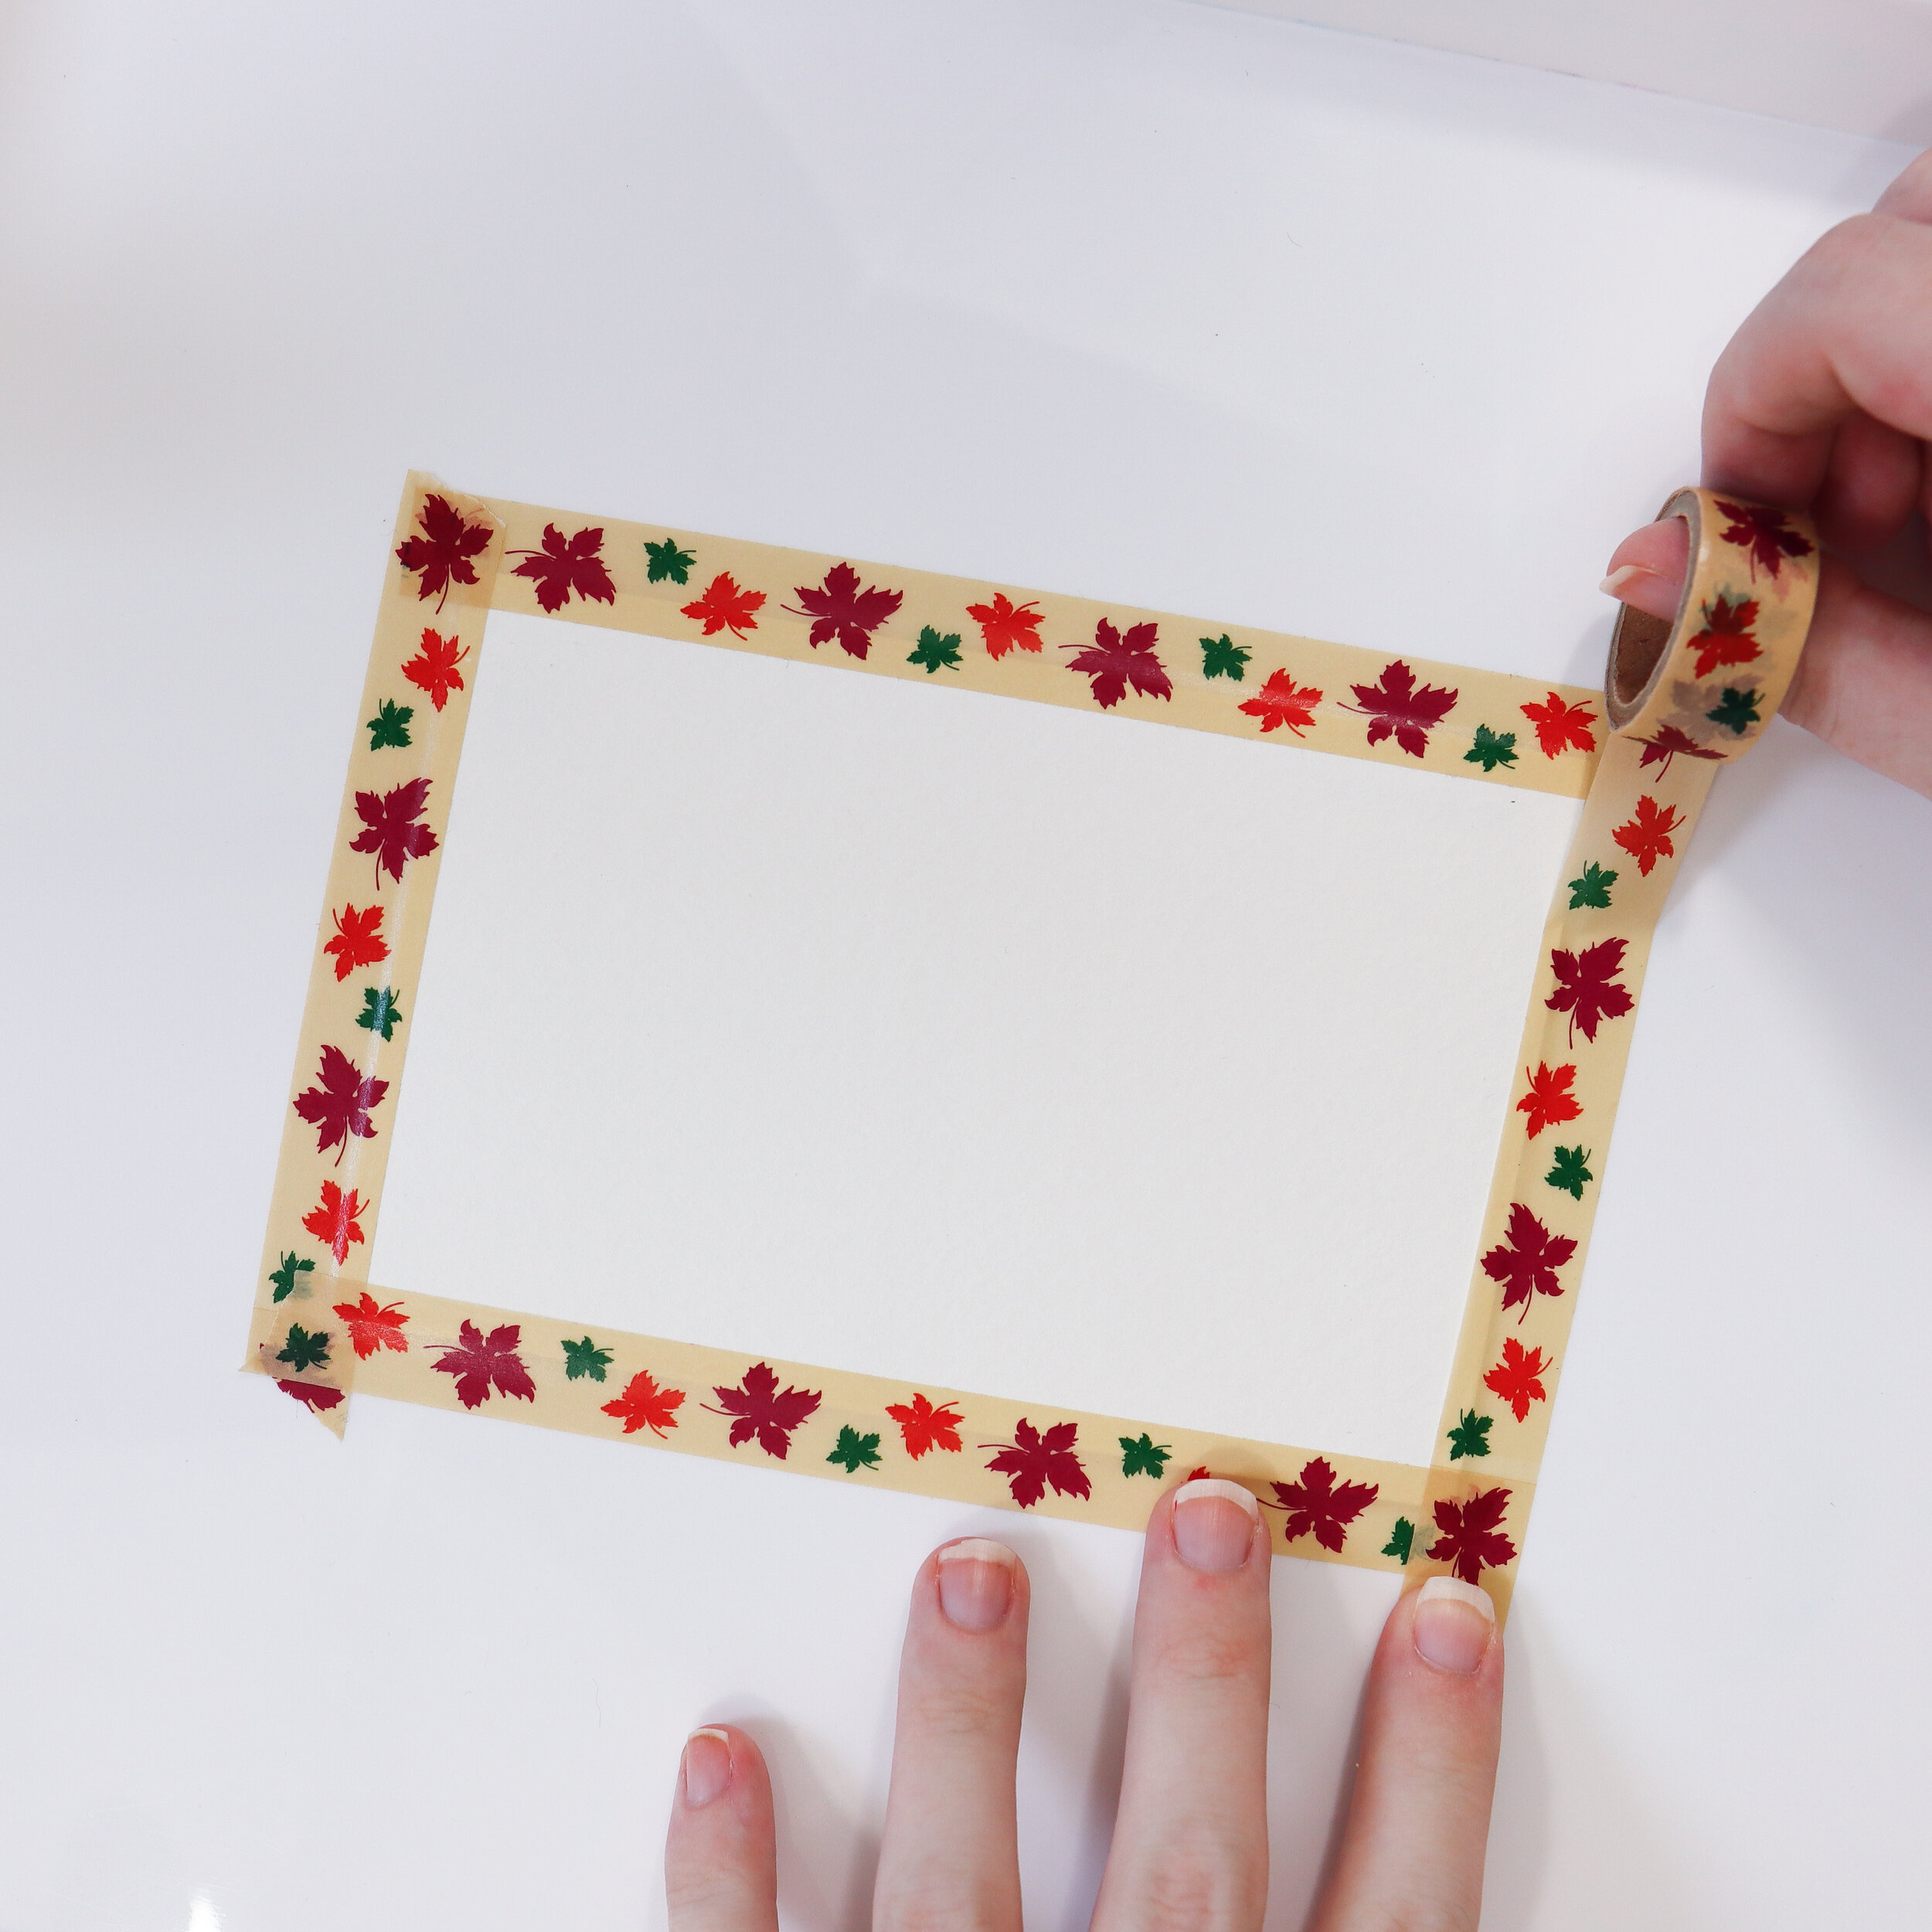
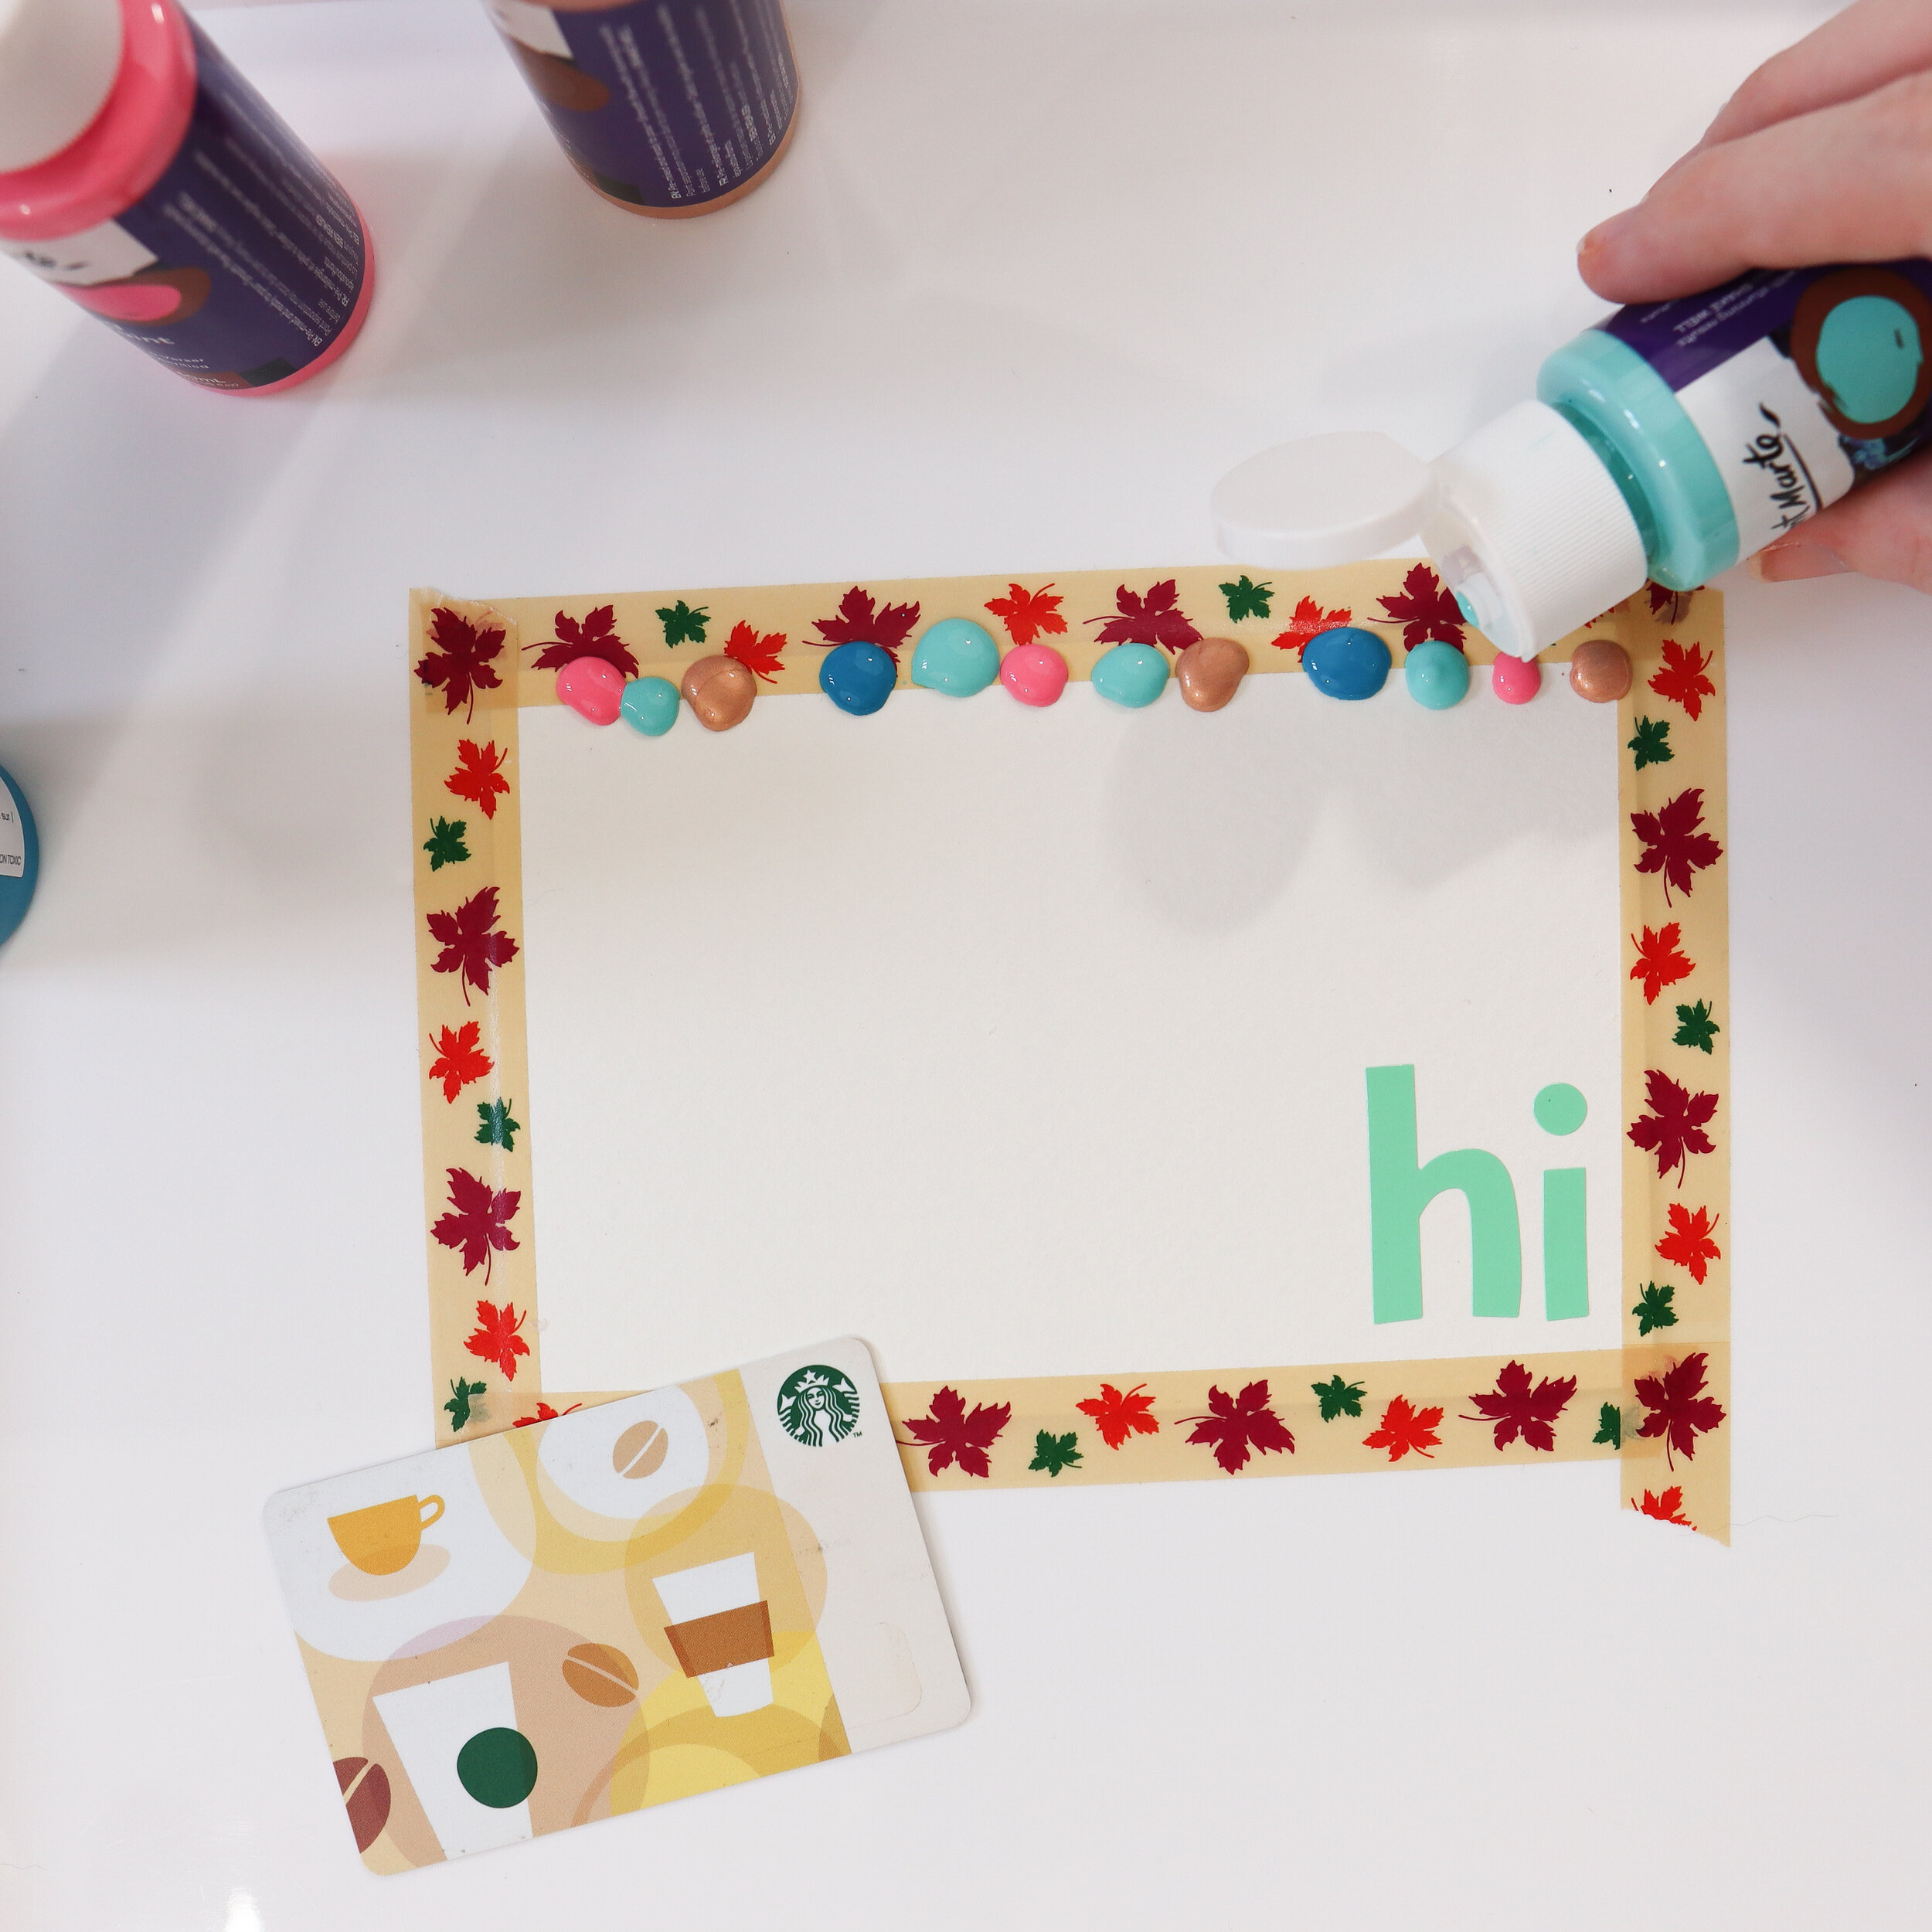
You may be wondering what the acrylic tray/clean cookie sheet is for. This is for containment… as in containment of the inevitable mess that comes along with kids and paint. If you are a braver soul than I, you can certainly get by without it and just use an old piece of cardboard. Using your washi tape, tape down the edges of your postcard to your tray. This will hold the postcard down while you scrape, but it will also create a nice border around your design.
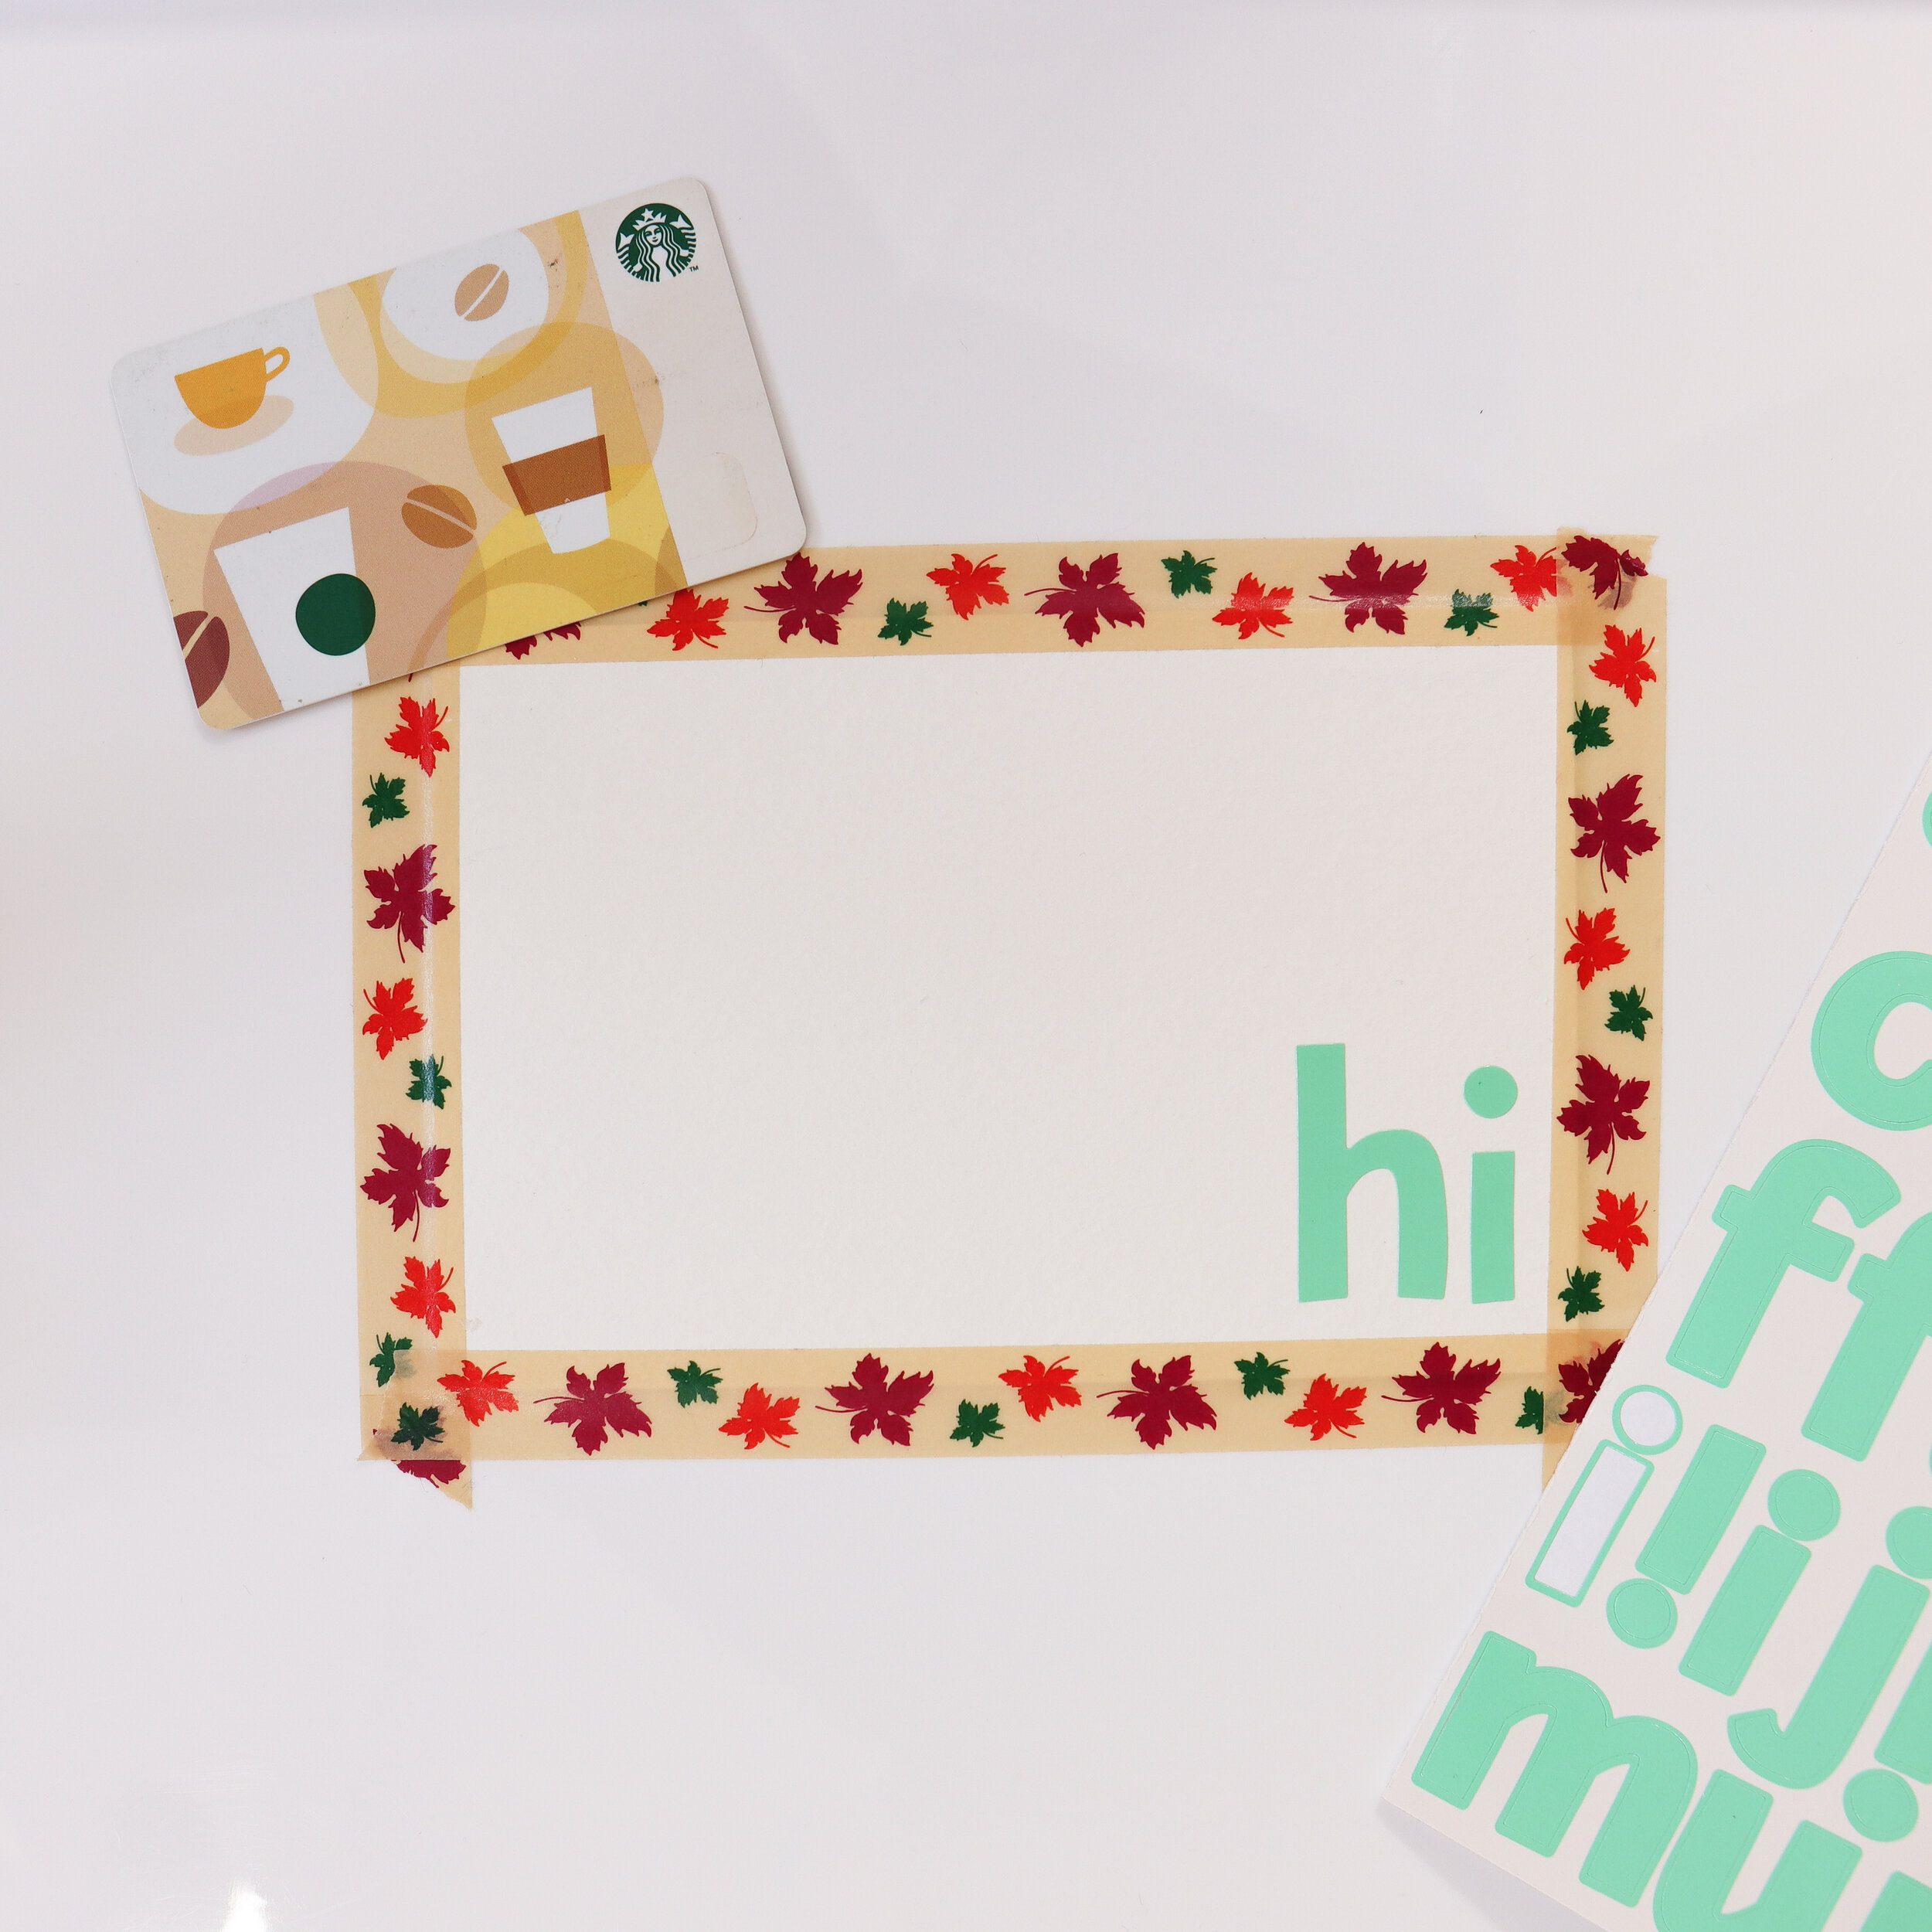
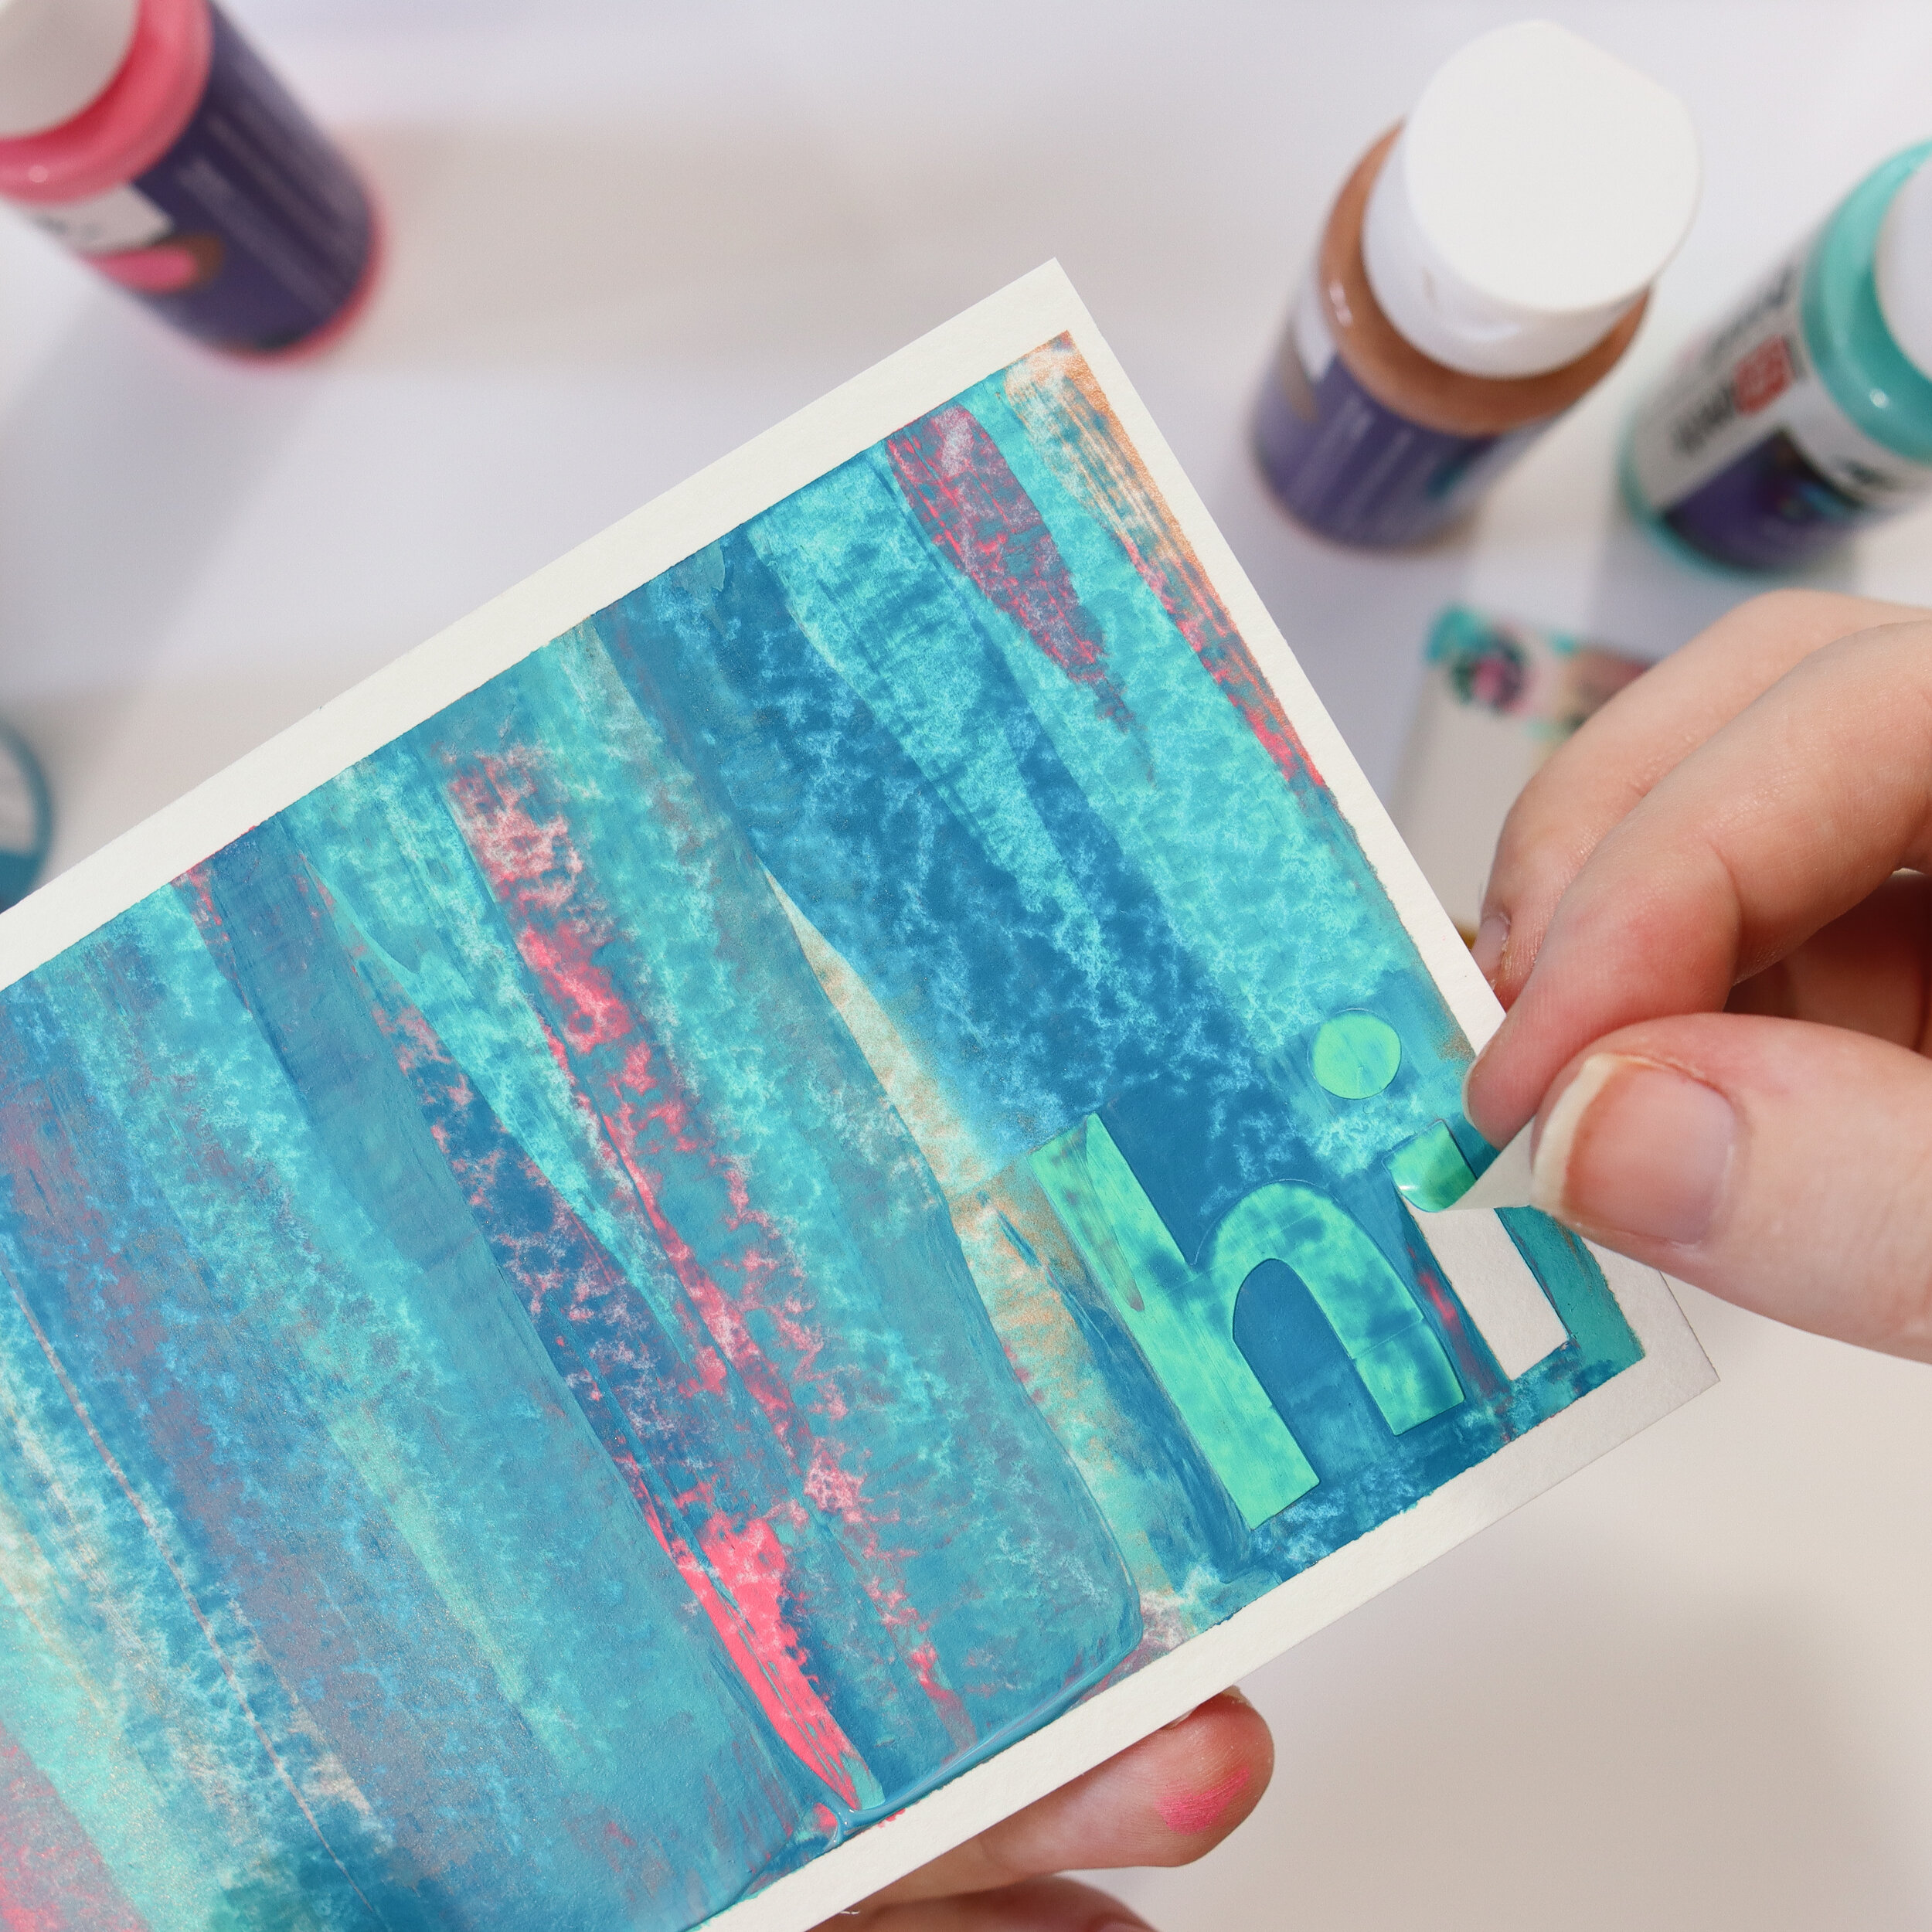
Step 3: Add your letter stickers.
Now it’s time to add your message using your removable letter stickers! Be sure to stick them down really well — these stickers are a resist tool, meaning we want the area under the stickers to be totally paint-free. If one of the edges isn’t pressed down enough, paint will definitely get under it. No bueno!
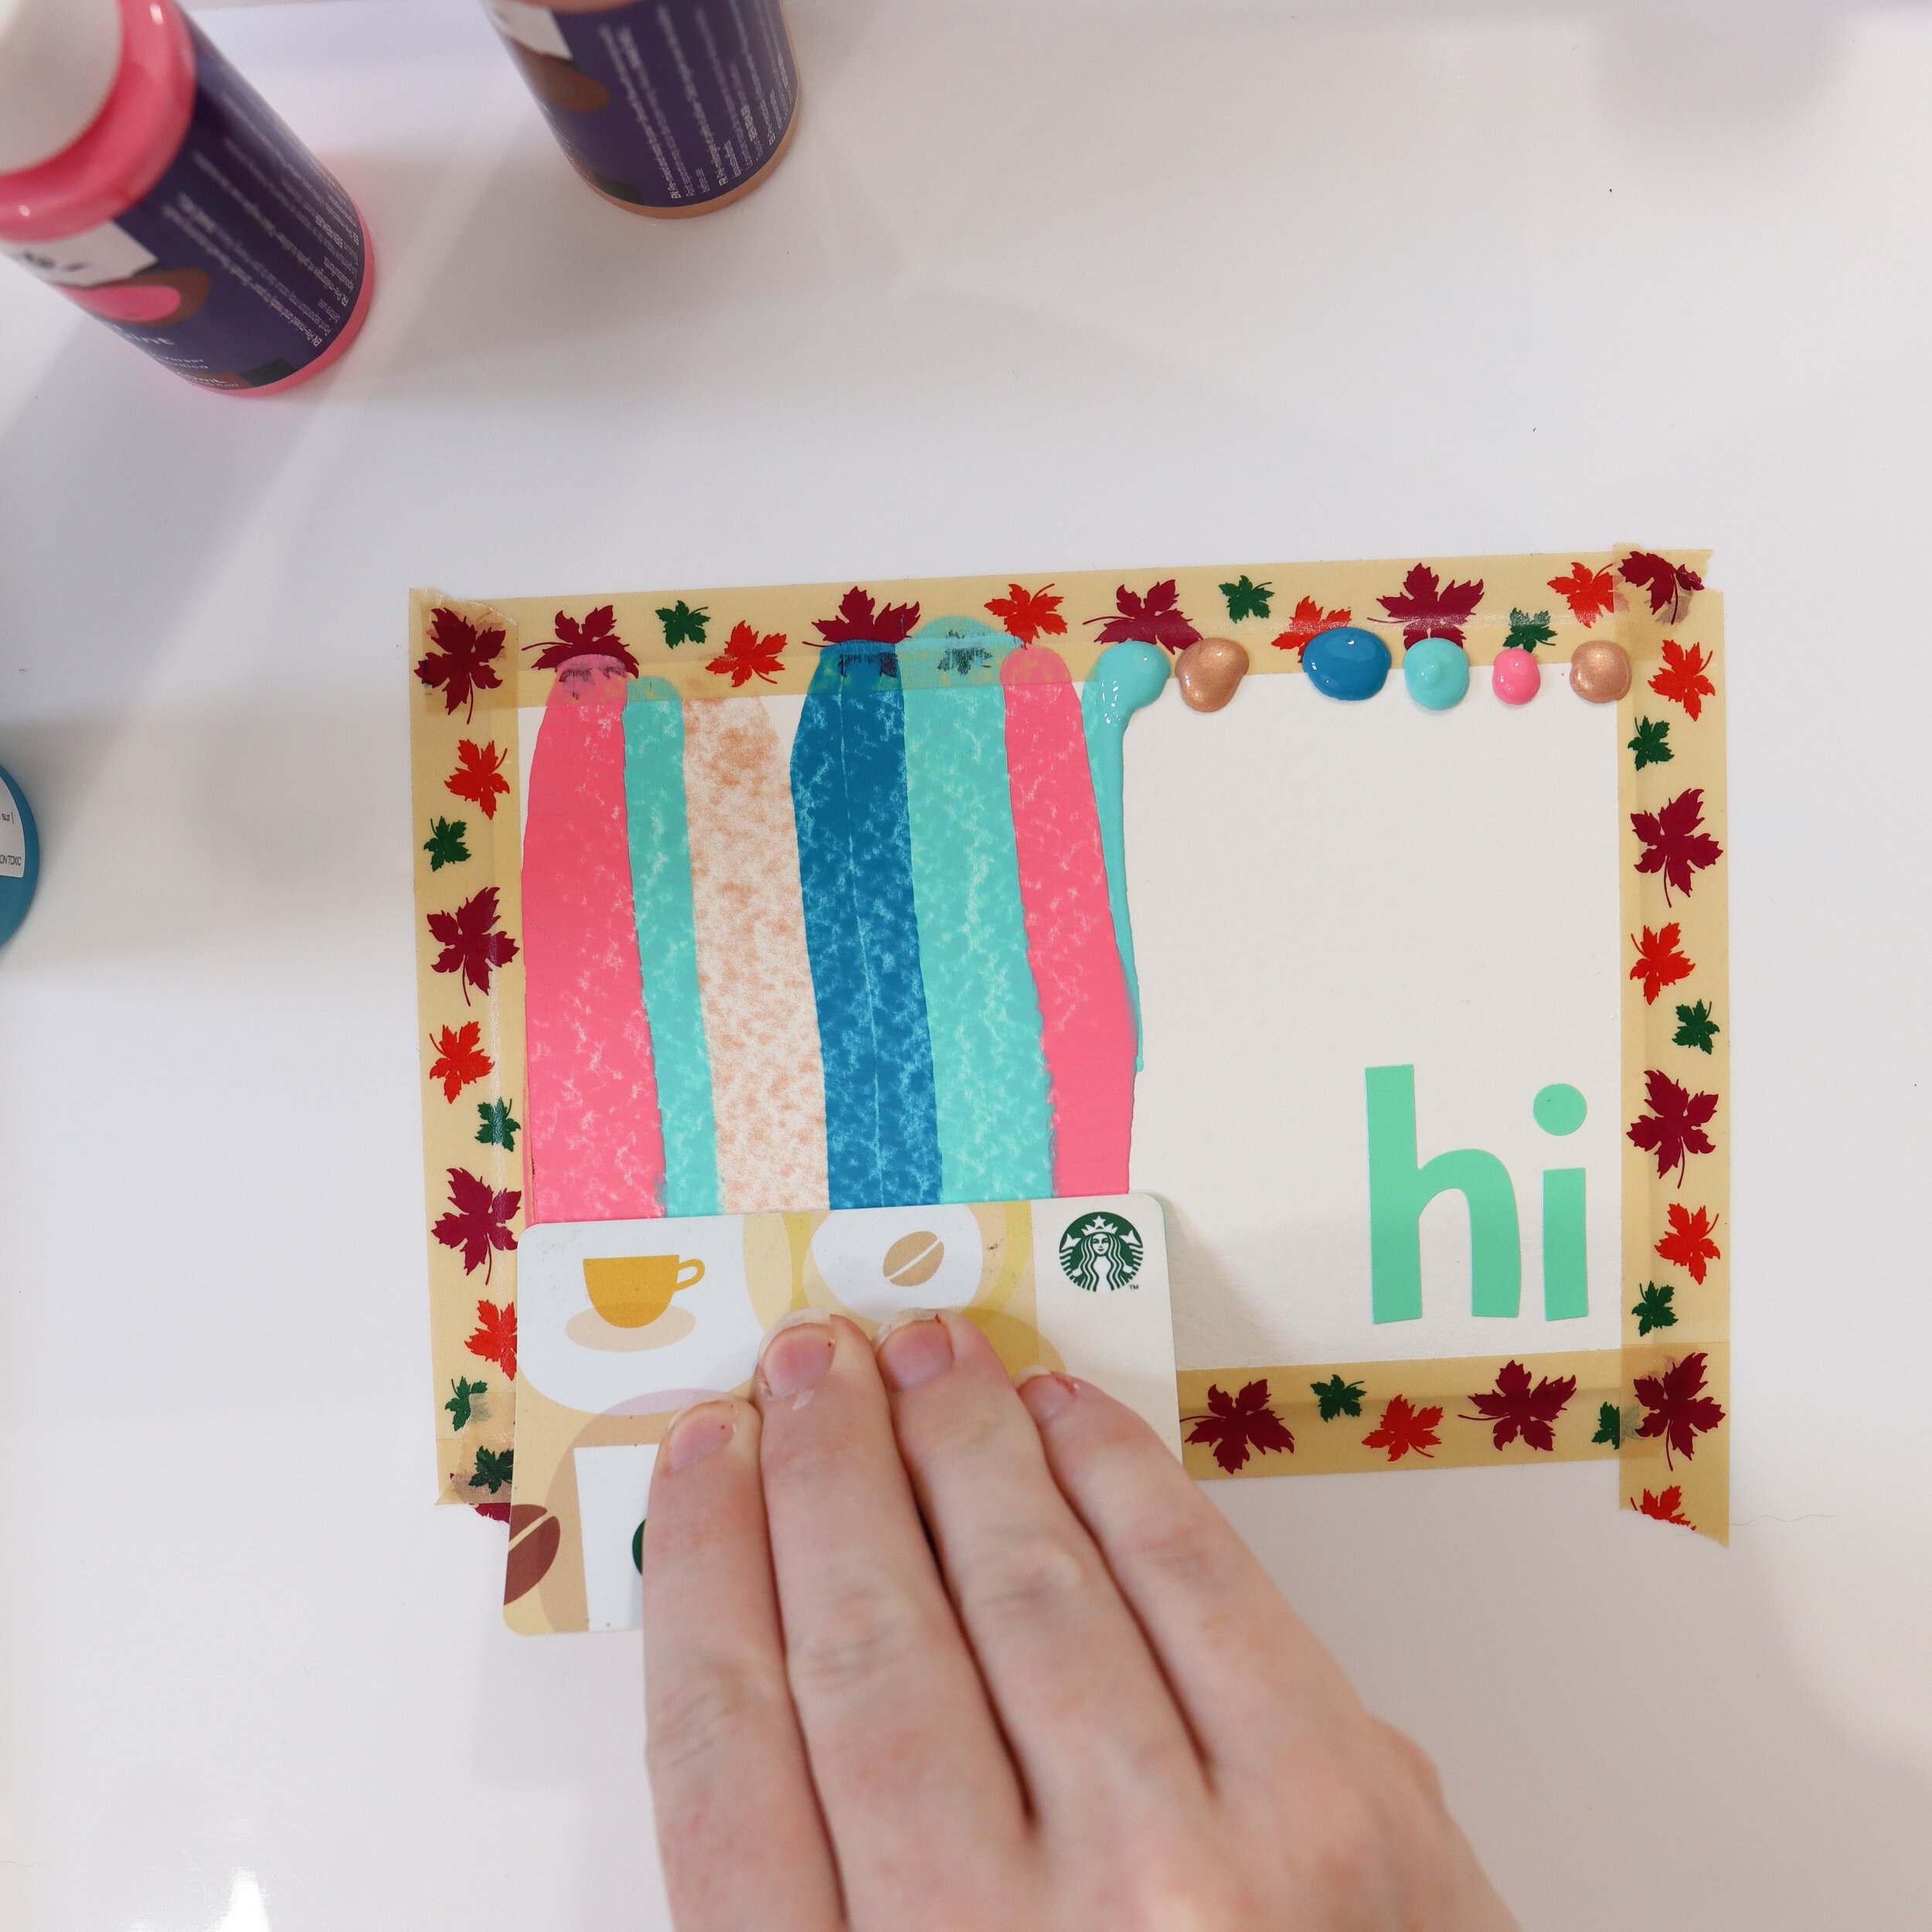
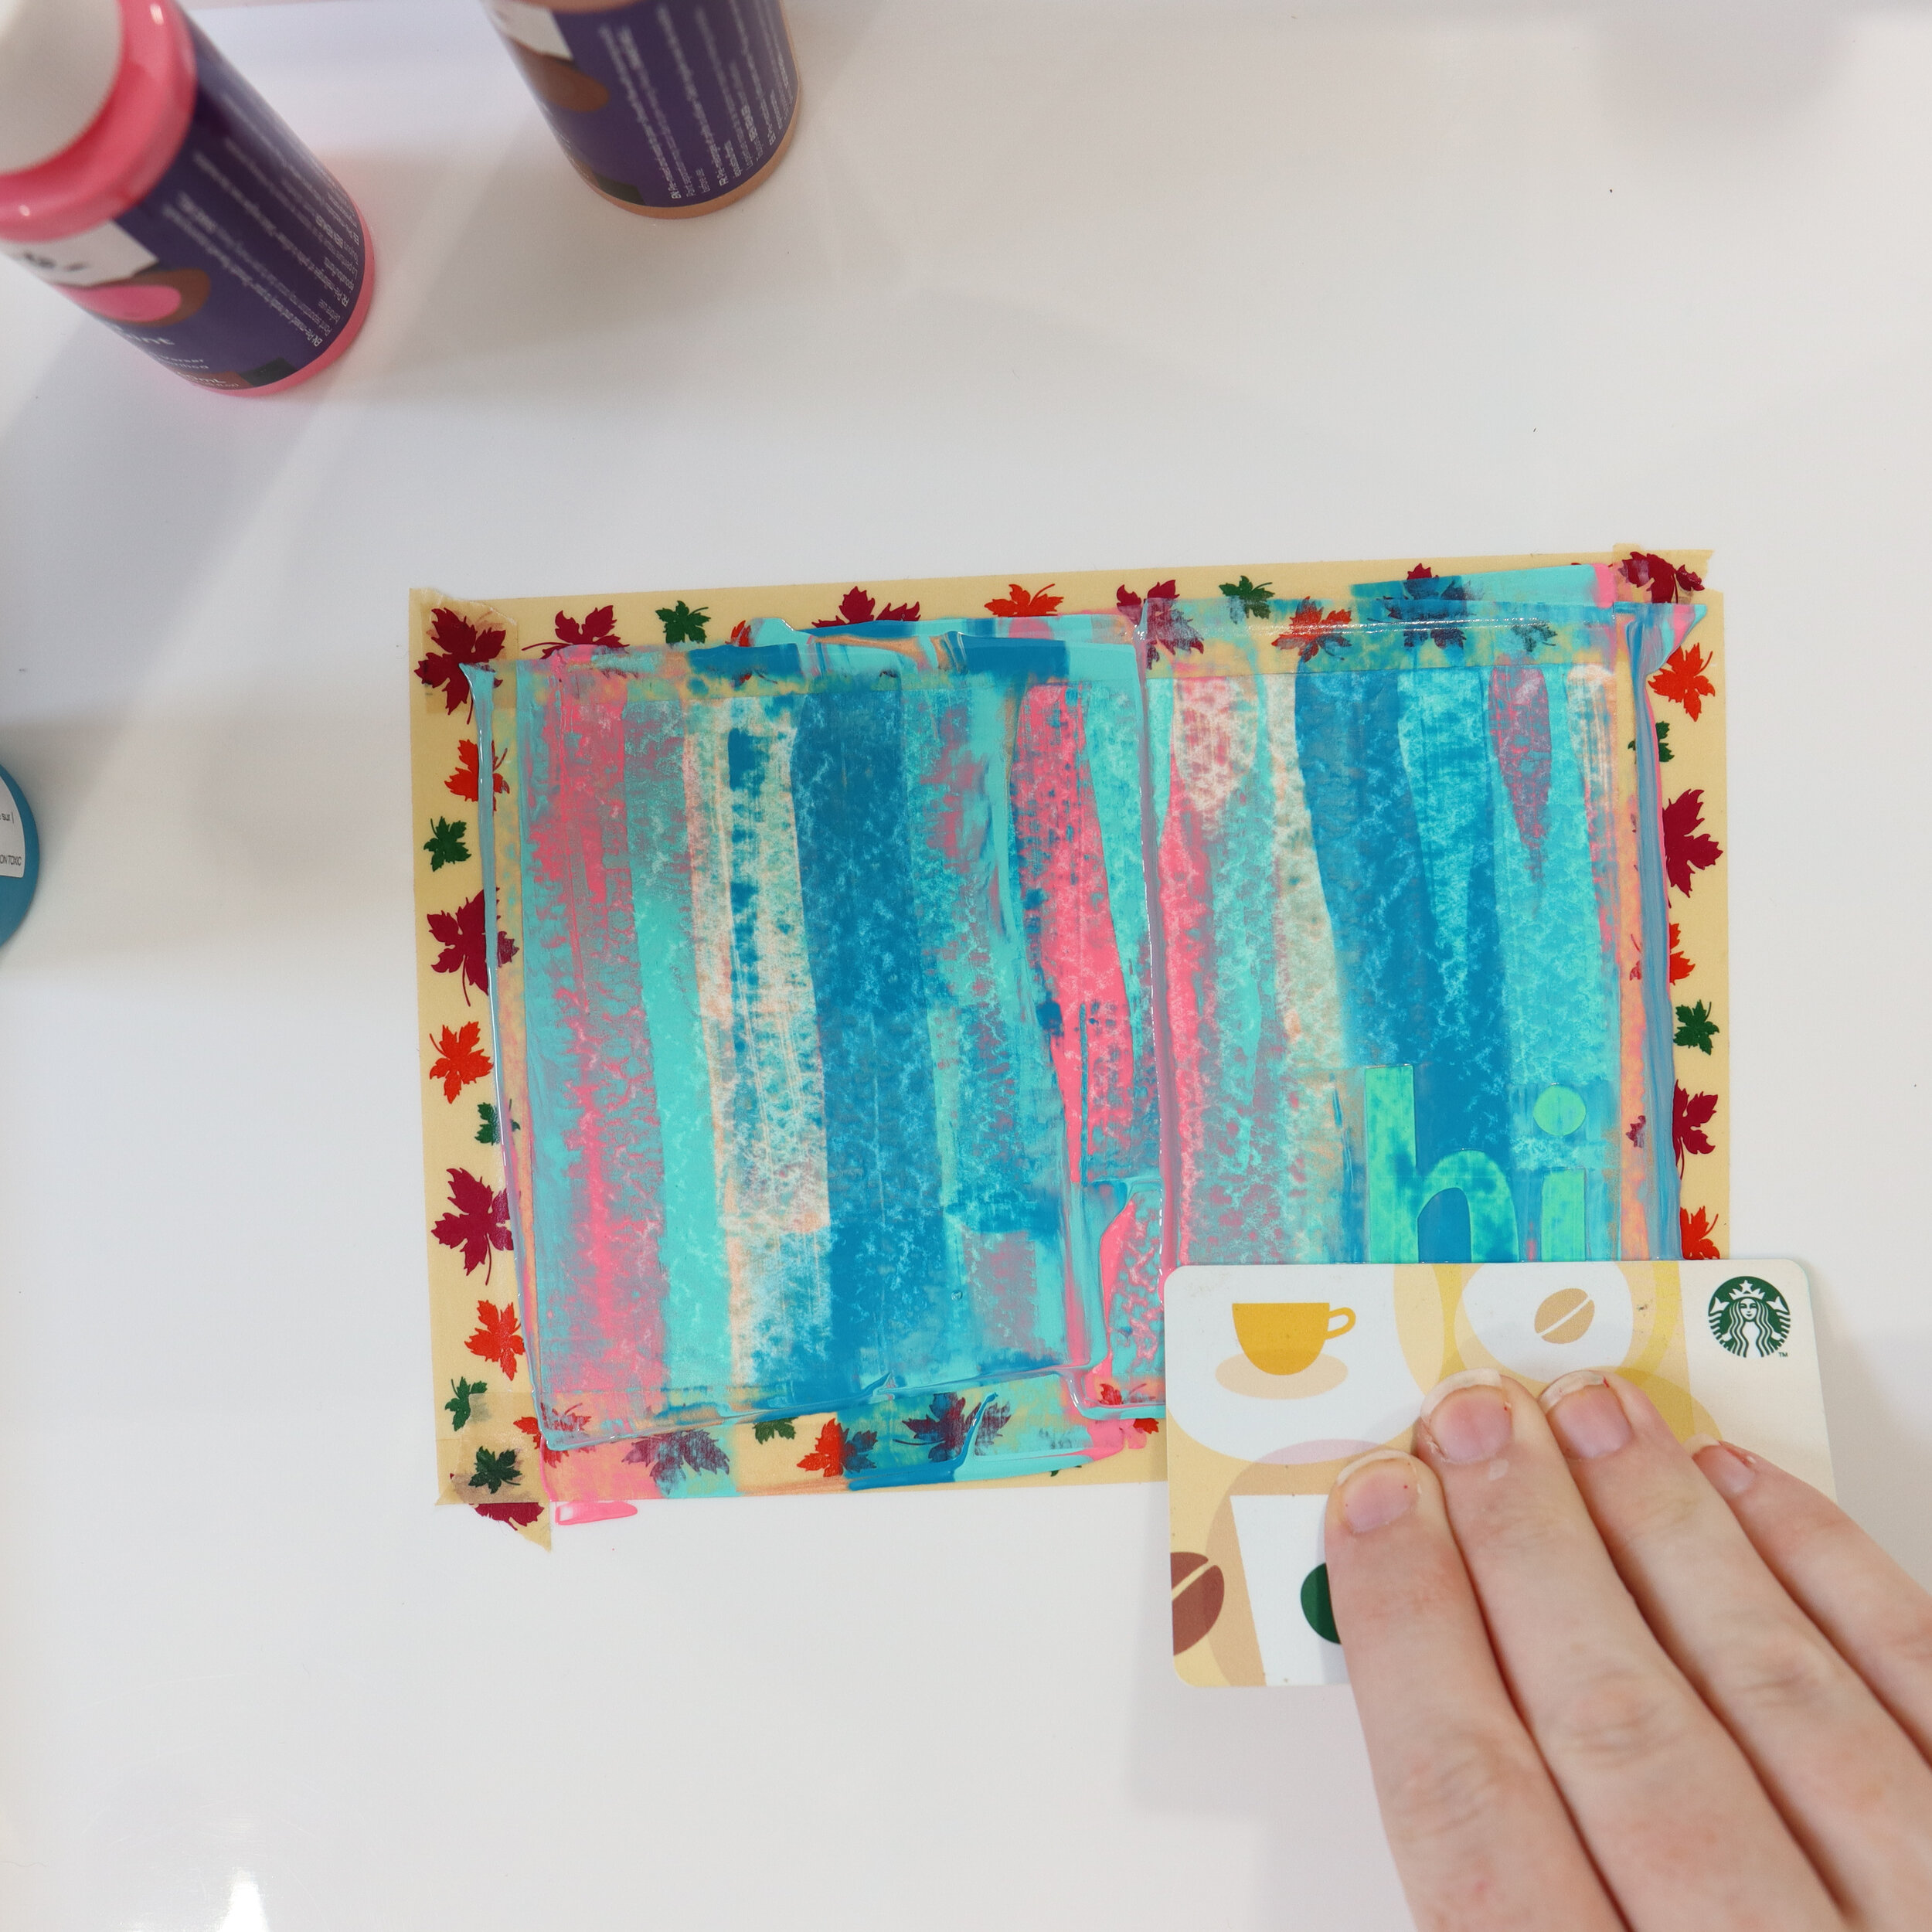
Step 4: Add dots of paint and scrape.
Add small dabs of paint along the top of your card. Once you’ve completed that step, your child can start scraping! Have them place the edge of the credit card just above a section of paint dots and pull down. They will immediately create a very cool piece of art! Continue this process until all the paint dabs have been pulled down, wiping the paint off the card with a paper towel in between pulls. This pulling process is the reason we want pourable acrylic paint — regular acrylic won’t drag quite so far. But if regular acrylic craft paint is all you have on hand, give your dots a little spray with water to thin it out — since we’re using watercolor postcards, a little water won’t warp it!
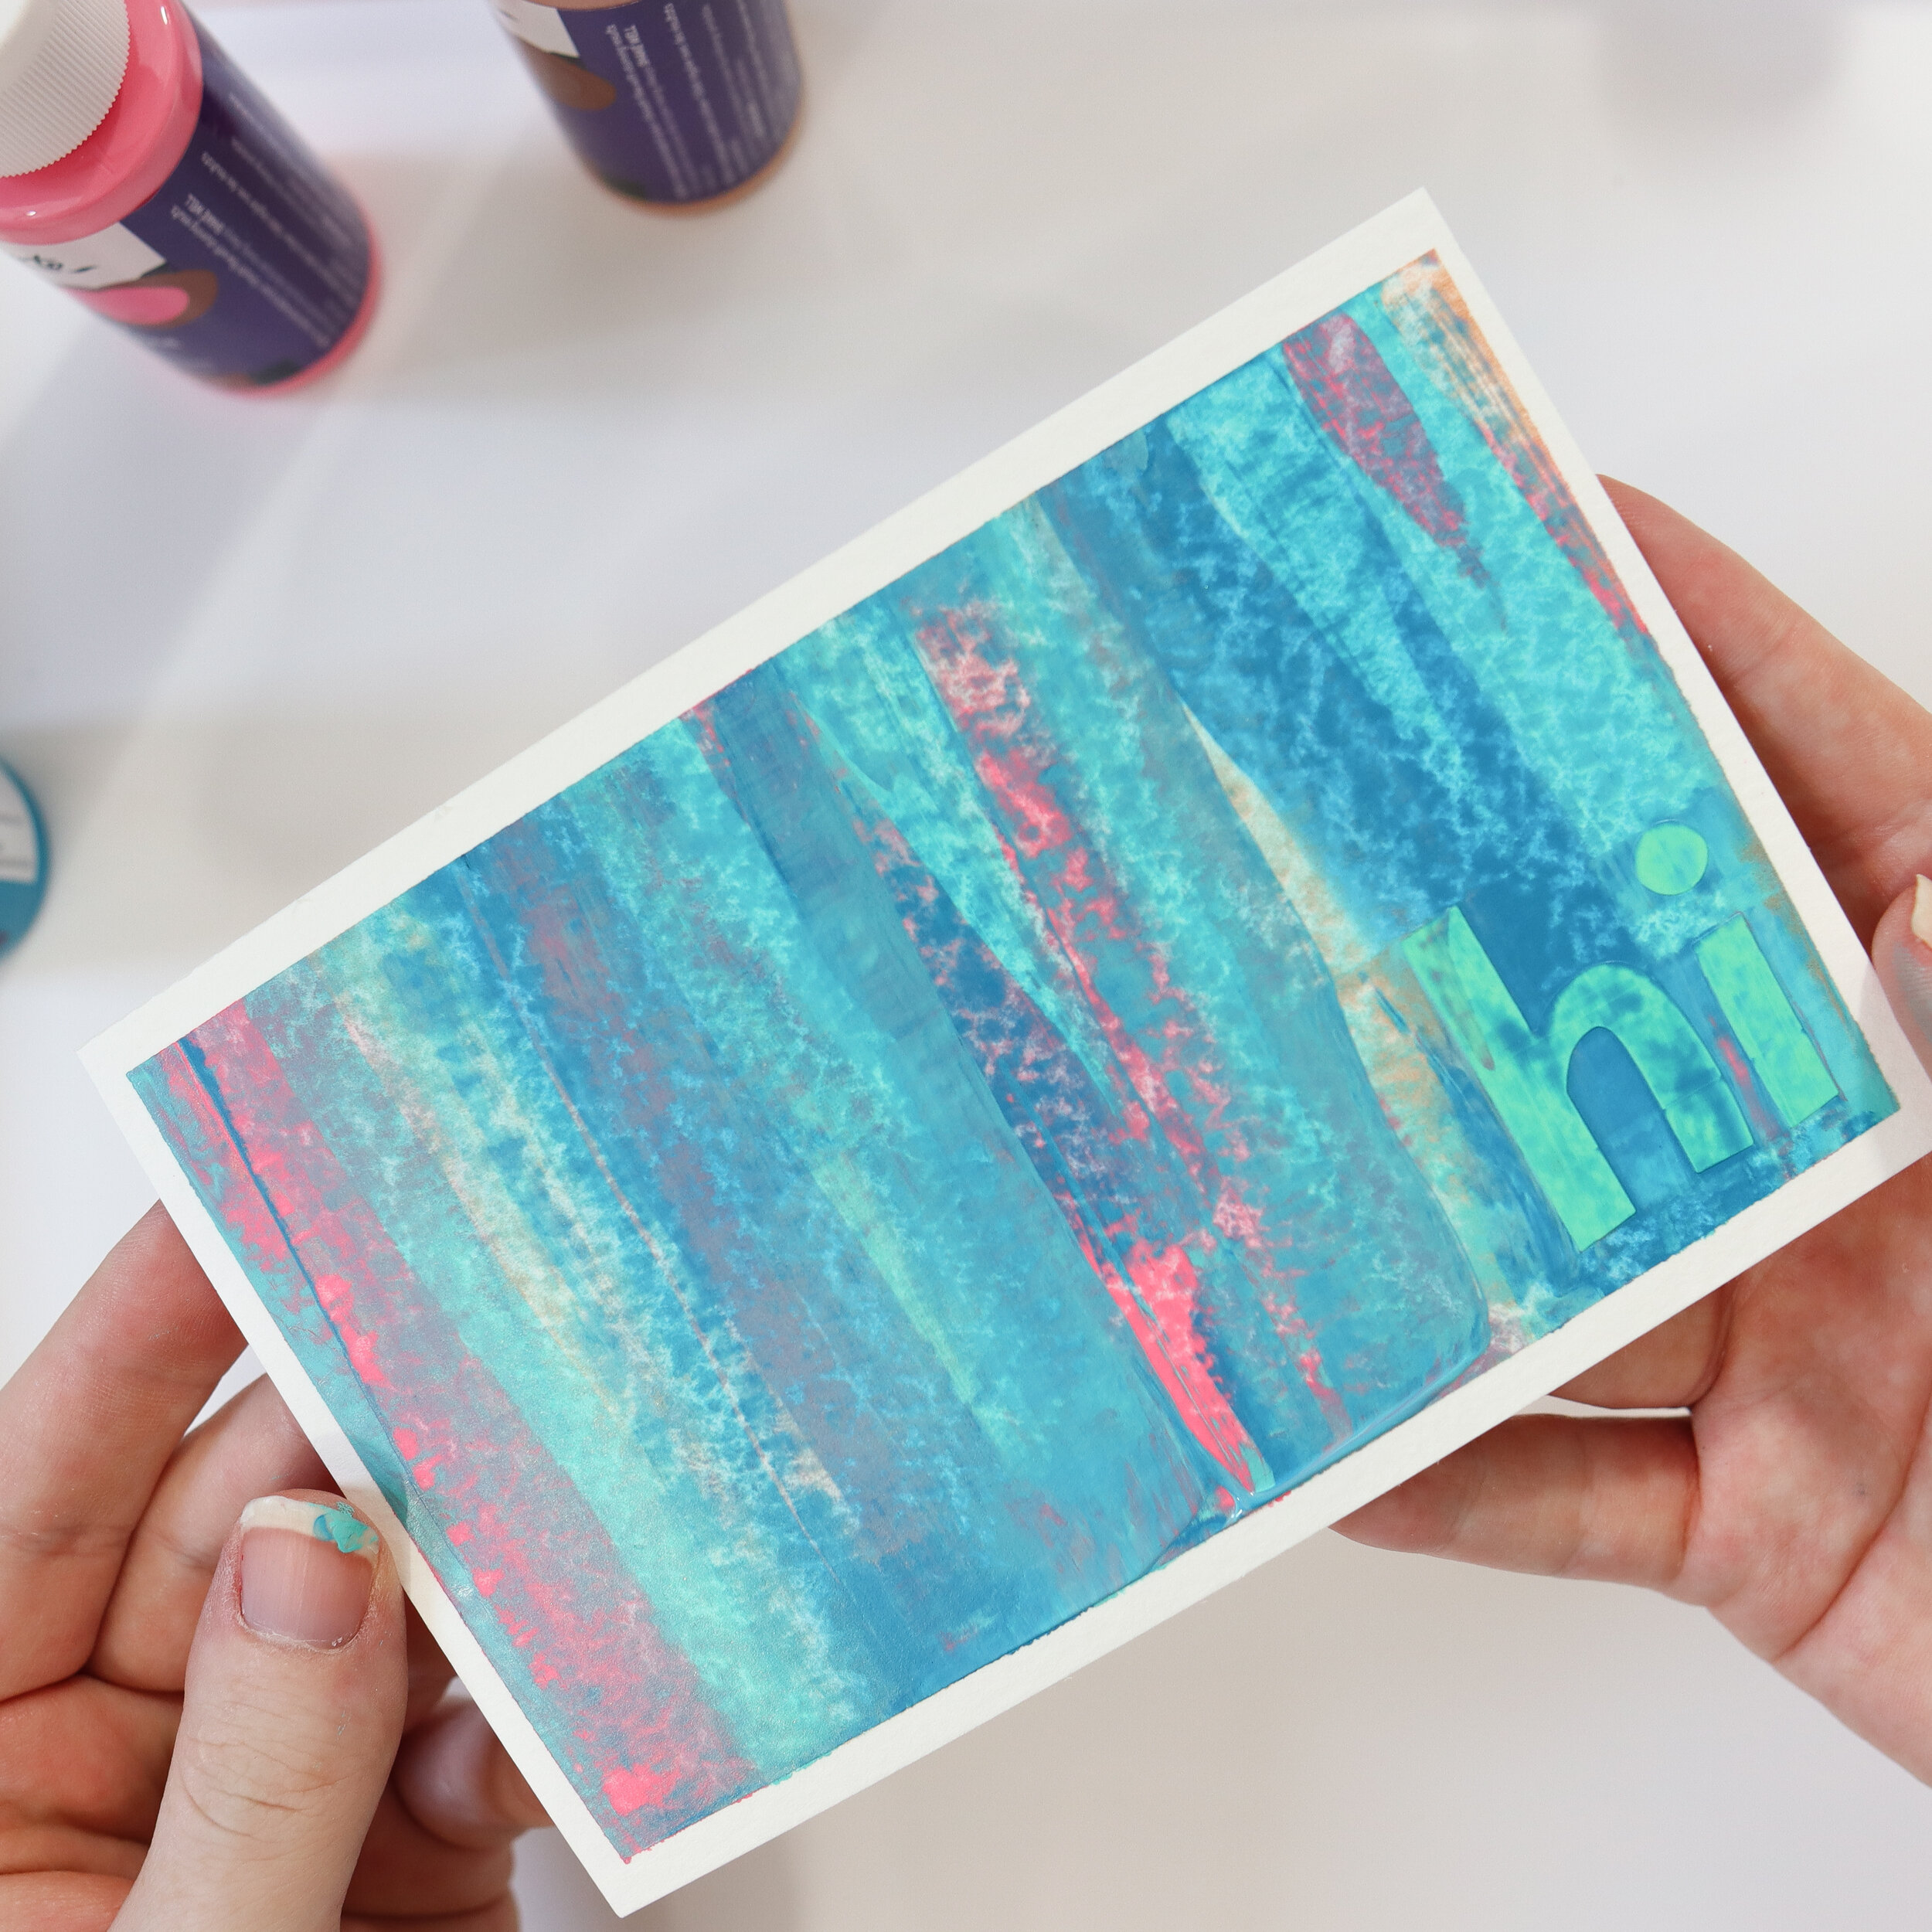
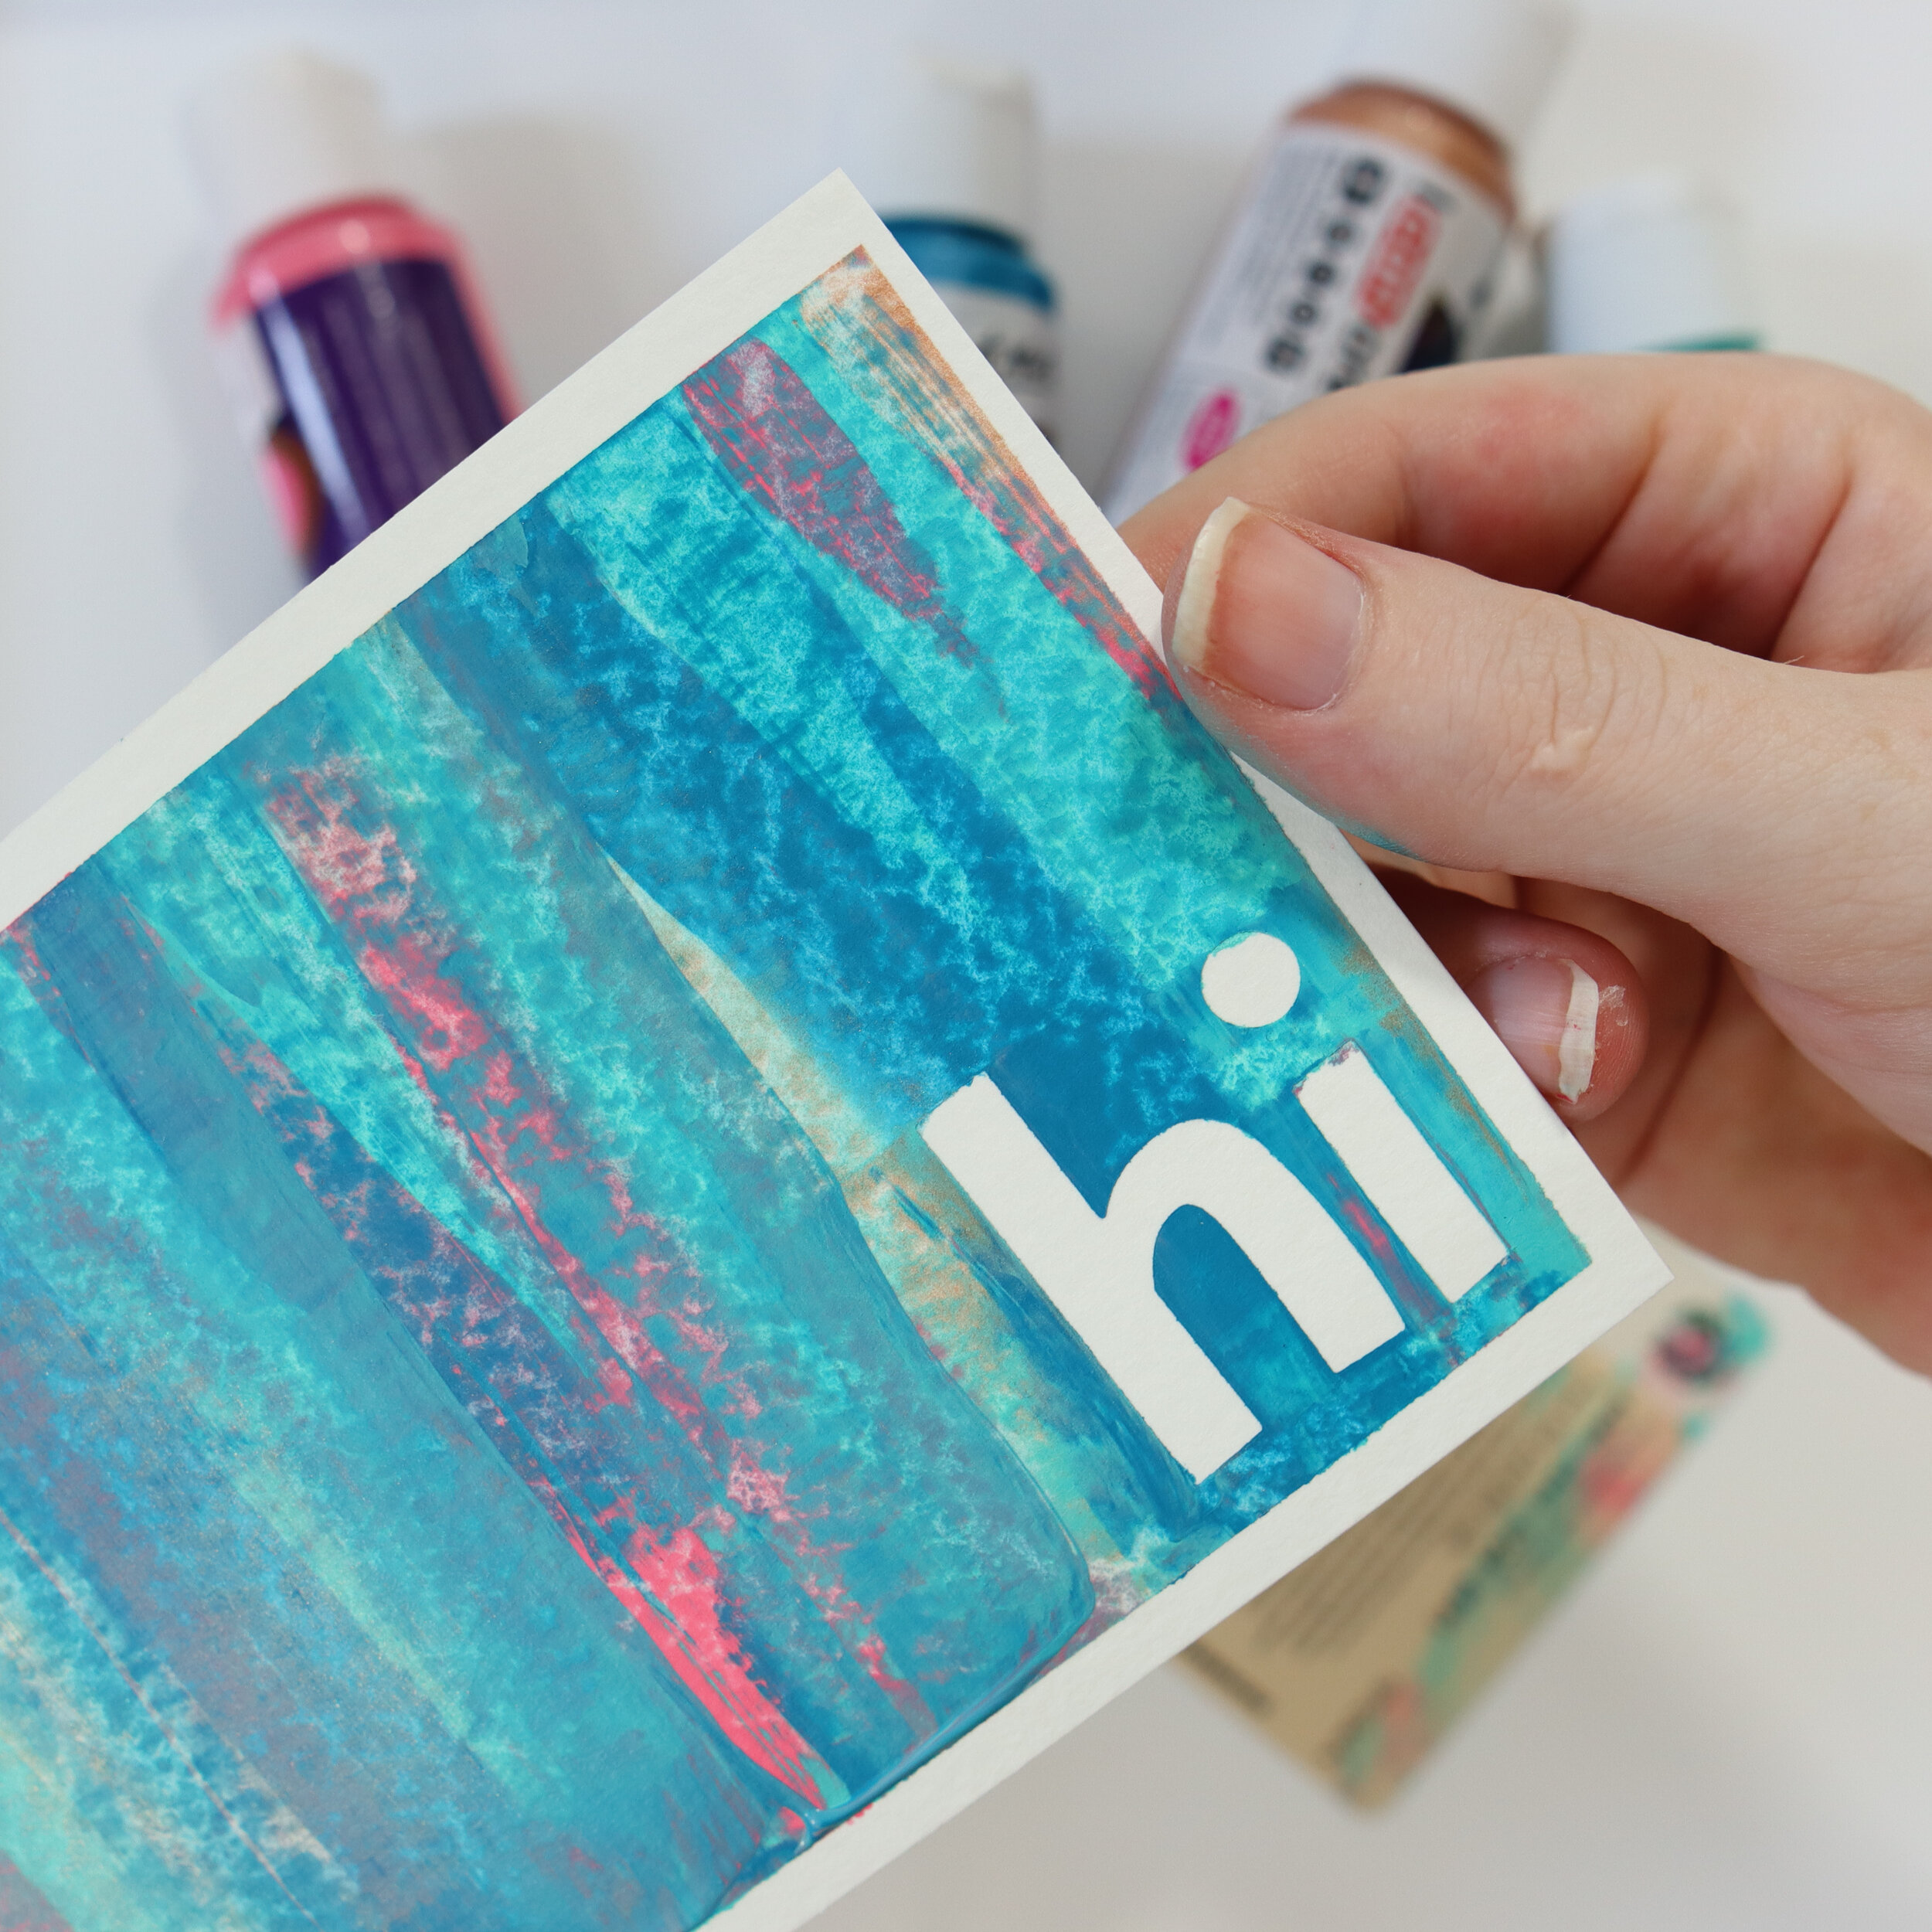
Step 5: Remove the washi tape and Stickers.
Once your postcard is dry, gently remove the washi tape to expose the border, and the letter stickers to reveal the greeting. You can now flip over the card, write your message and address, and send along! Because these cards take a little bit of set-up, I recommend making a whole bunch at once. You can always hang onto them for later if you don’t have need of them now!
MIX IT UP: This is also a great way to create custom cards and stationery! Here’s a great tutorial from Persia Lou about using this method along with puffy stickers to create some super cool greeting cards. This would be an especially fun project for tweens, since the final product is totally cool enough to send to their friends. I mean, I think it is. Oh god, am I old and unhip now?!
Hope you’ve enjoyed these mail art tutorials for toddlers, big kids & tweens! I would LOVE to see all the cool things your kiddos create, so be sure to share on the ‘gram and give @hooplaletters a tag. If you have any questions, you can pop them in the comments below.